If you only interested in camera lens with flawless optical design, skip this review as you won’t like the Helios 40-2.
But if photography to you is more like art than a photocopy machine, please keep on reading and see if the Helios is a lens you may fall in love with.
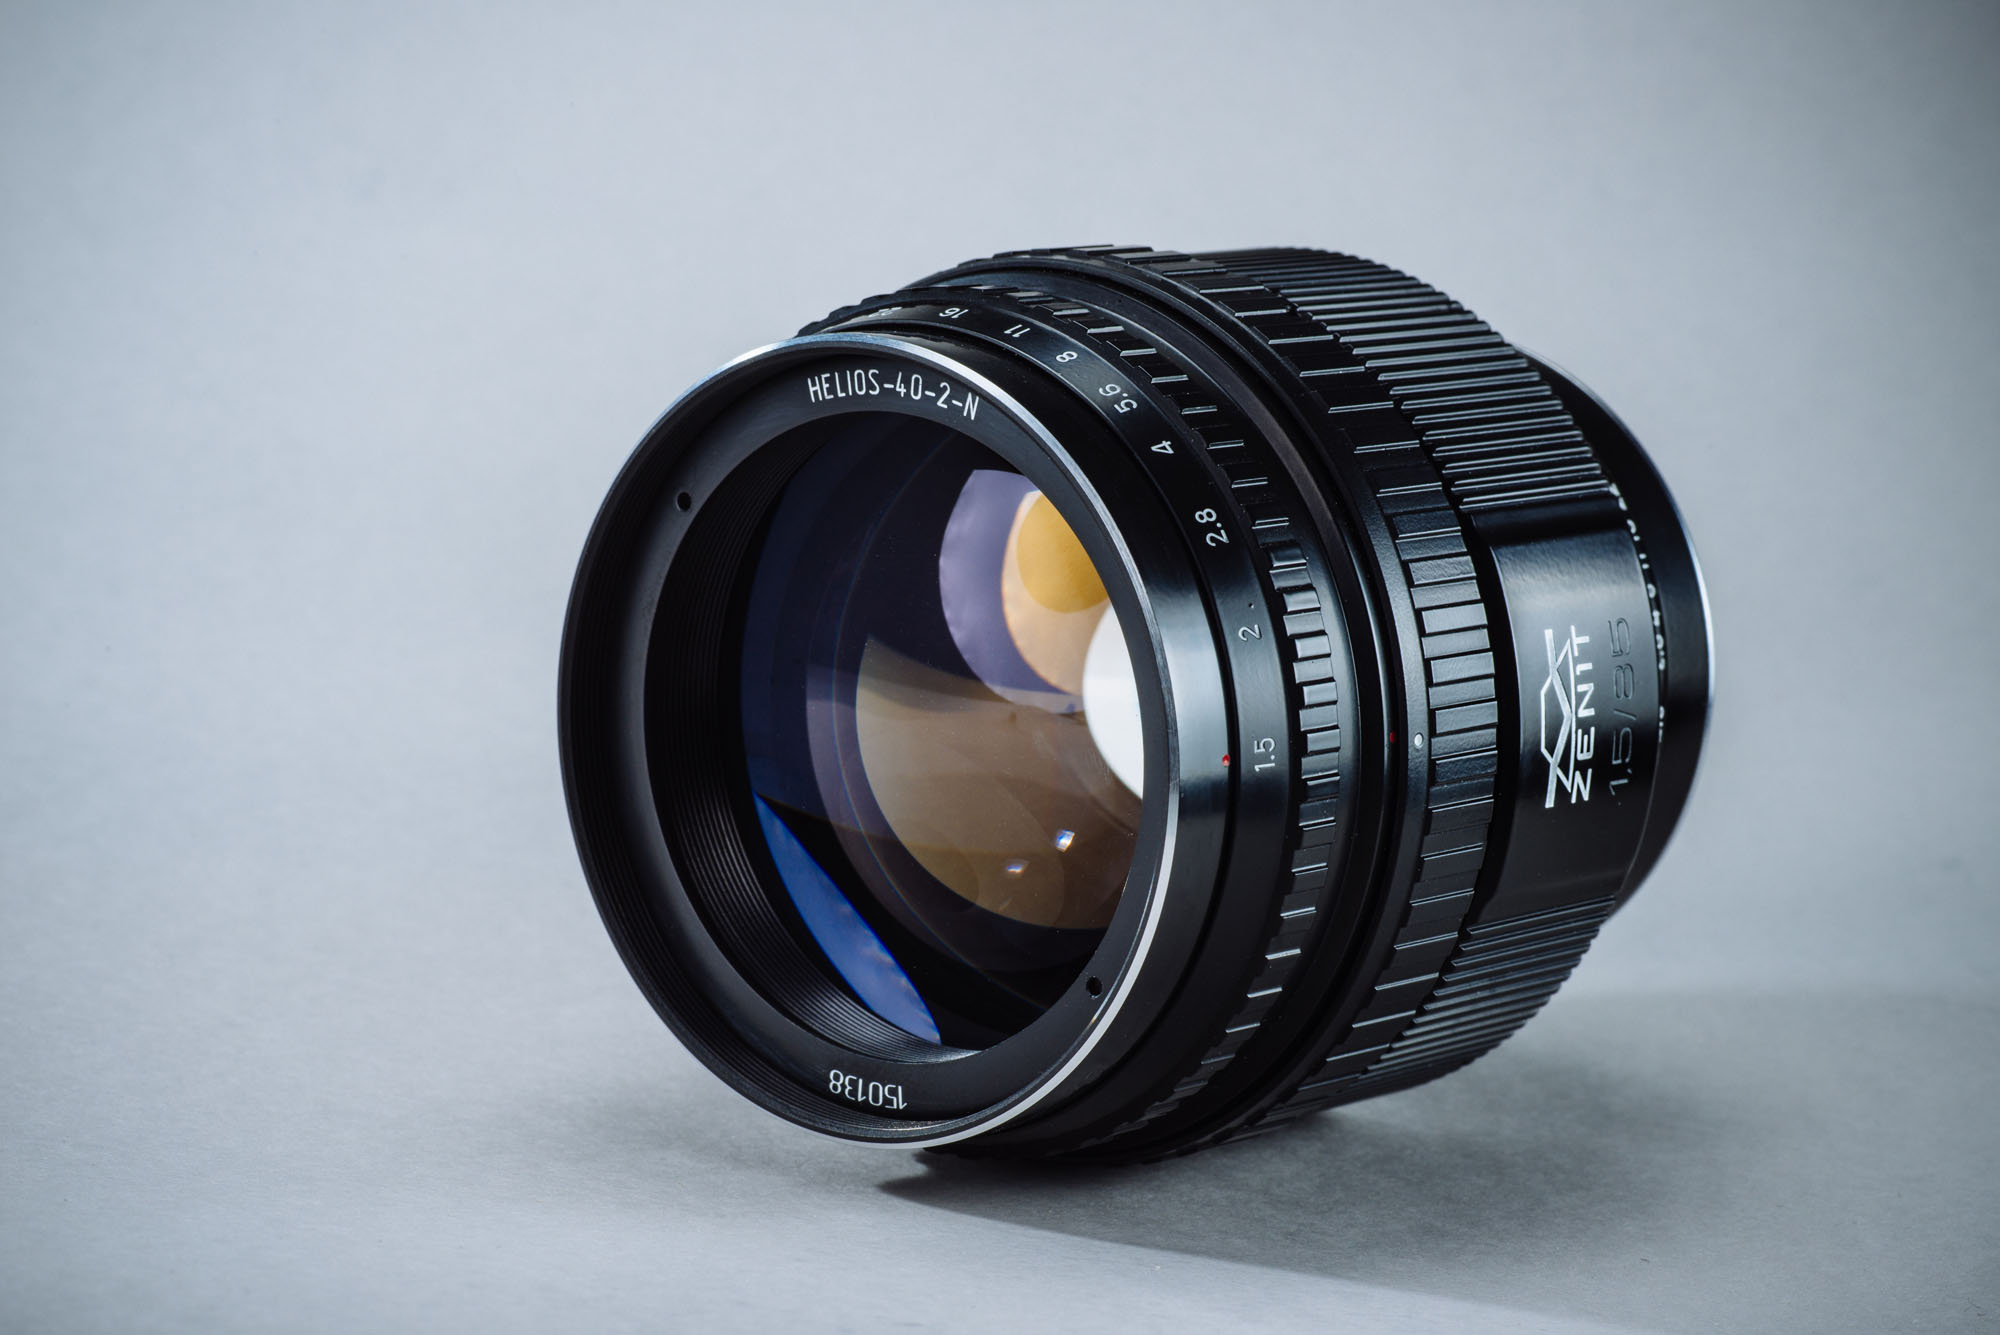
The Russian lens manufacturer Zenit has recently released an updated version of their MC Helios 40-2 85mm f/1.5 lens. It is a manual focus lens and the original version was released back in around 1950s. While many different versions of this lens have been released in the last sixty years or so, the optical formula remain fundamentally unchanged, and that includes the latest version. Some said the optics design is a copy of the Carl Zeiss Jena Biotar 75mm f/1.5 but basically it is a simple Double-Gauss lens.
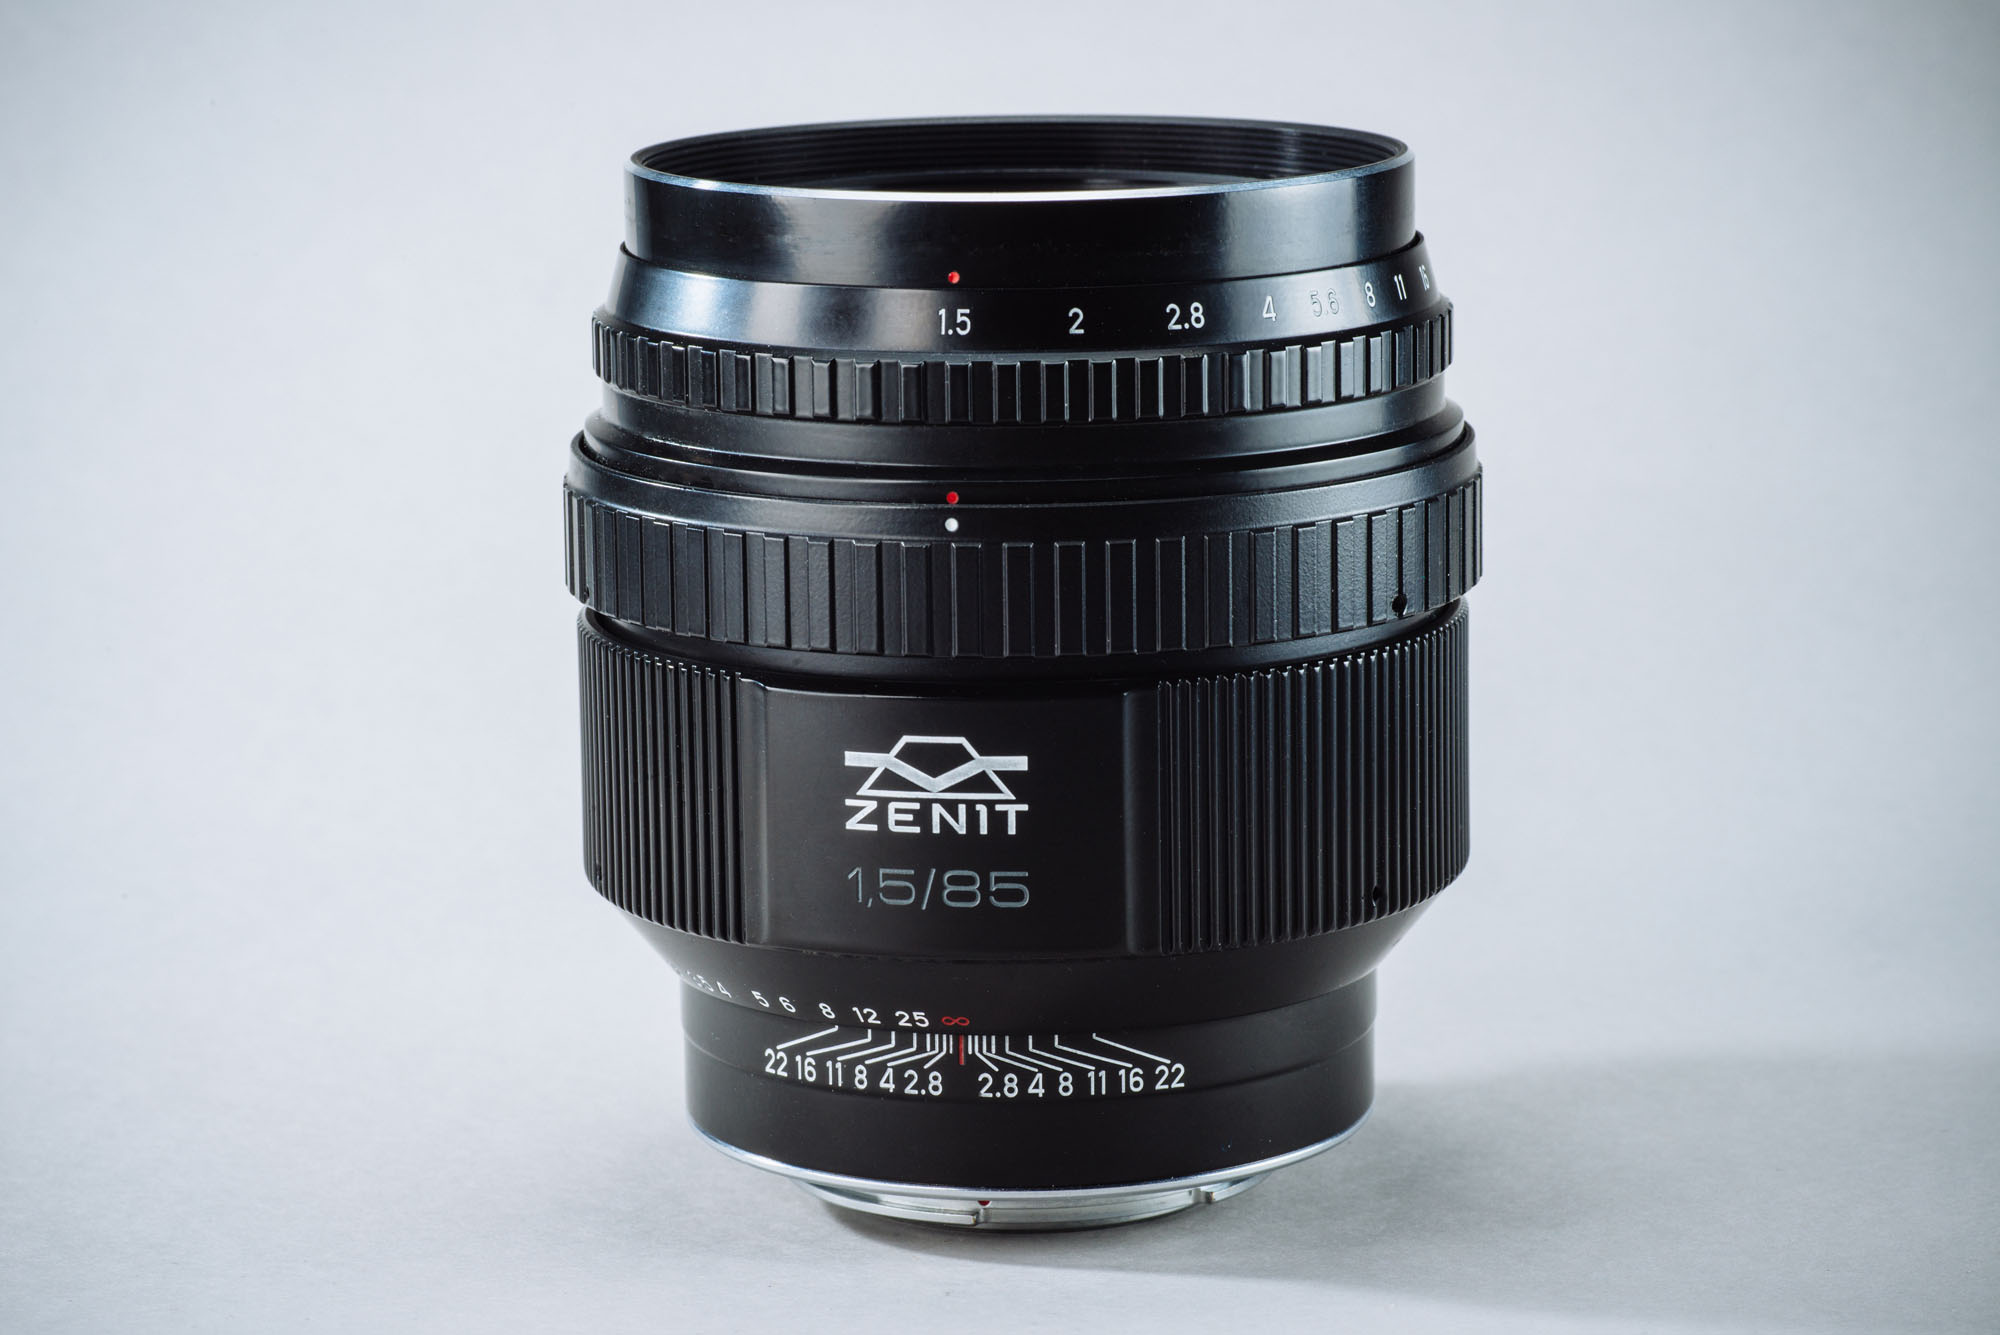
While the optical design seem to be the pretty much identical to the older version, the external appearance of this new version is quite different. The new version looks more modern and has a big “Zenit 1.5/85 1.5” engraved onto the focusing ring. But frankly I prefer old the version’s more classic design.
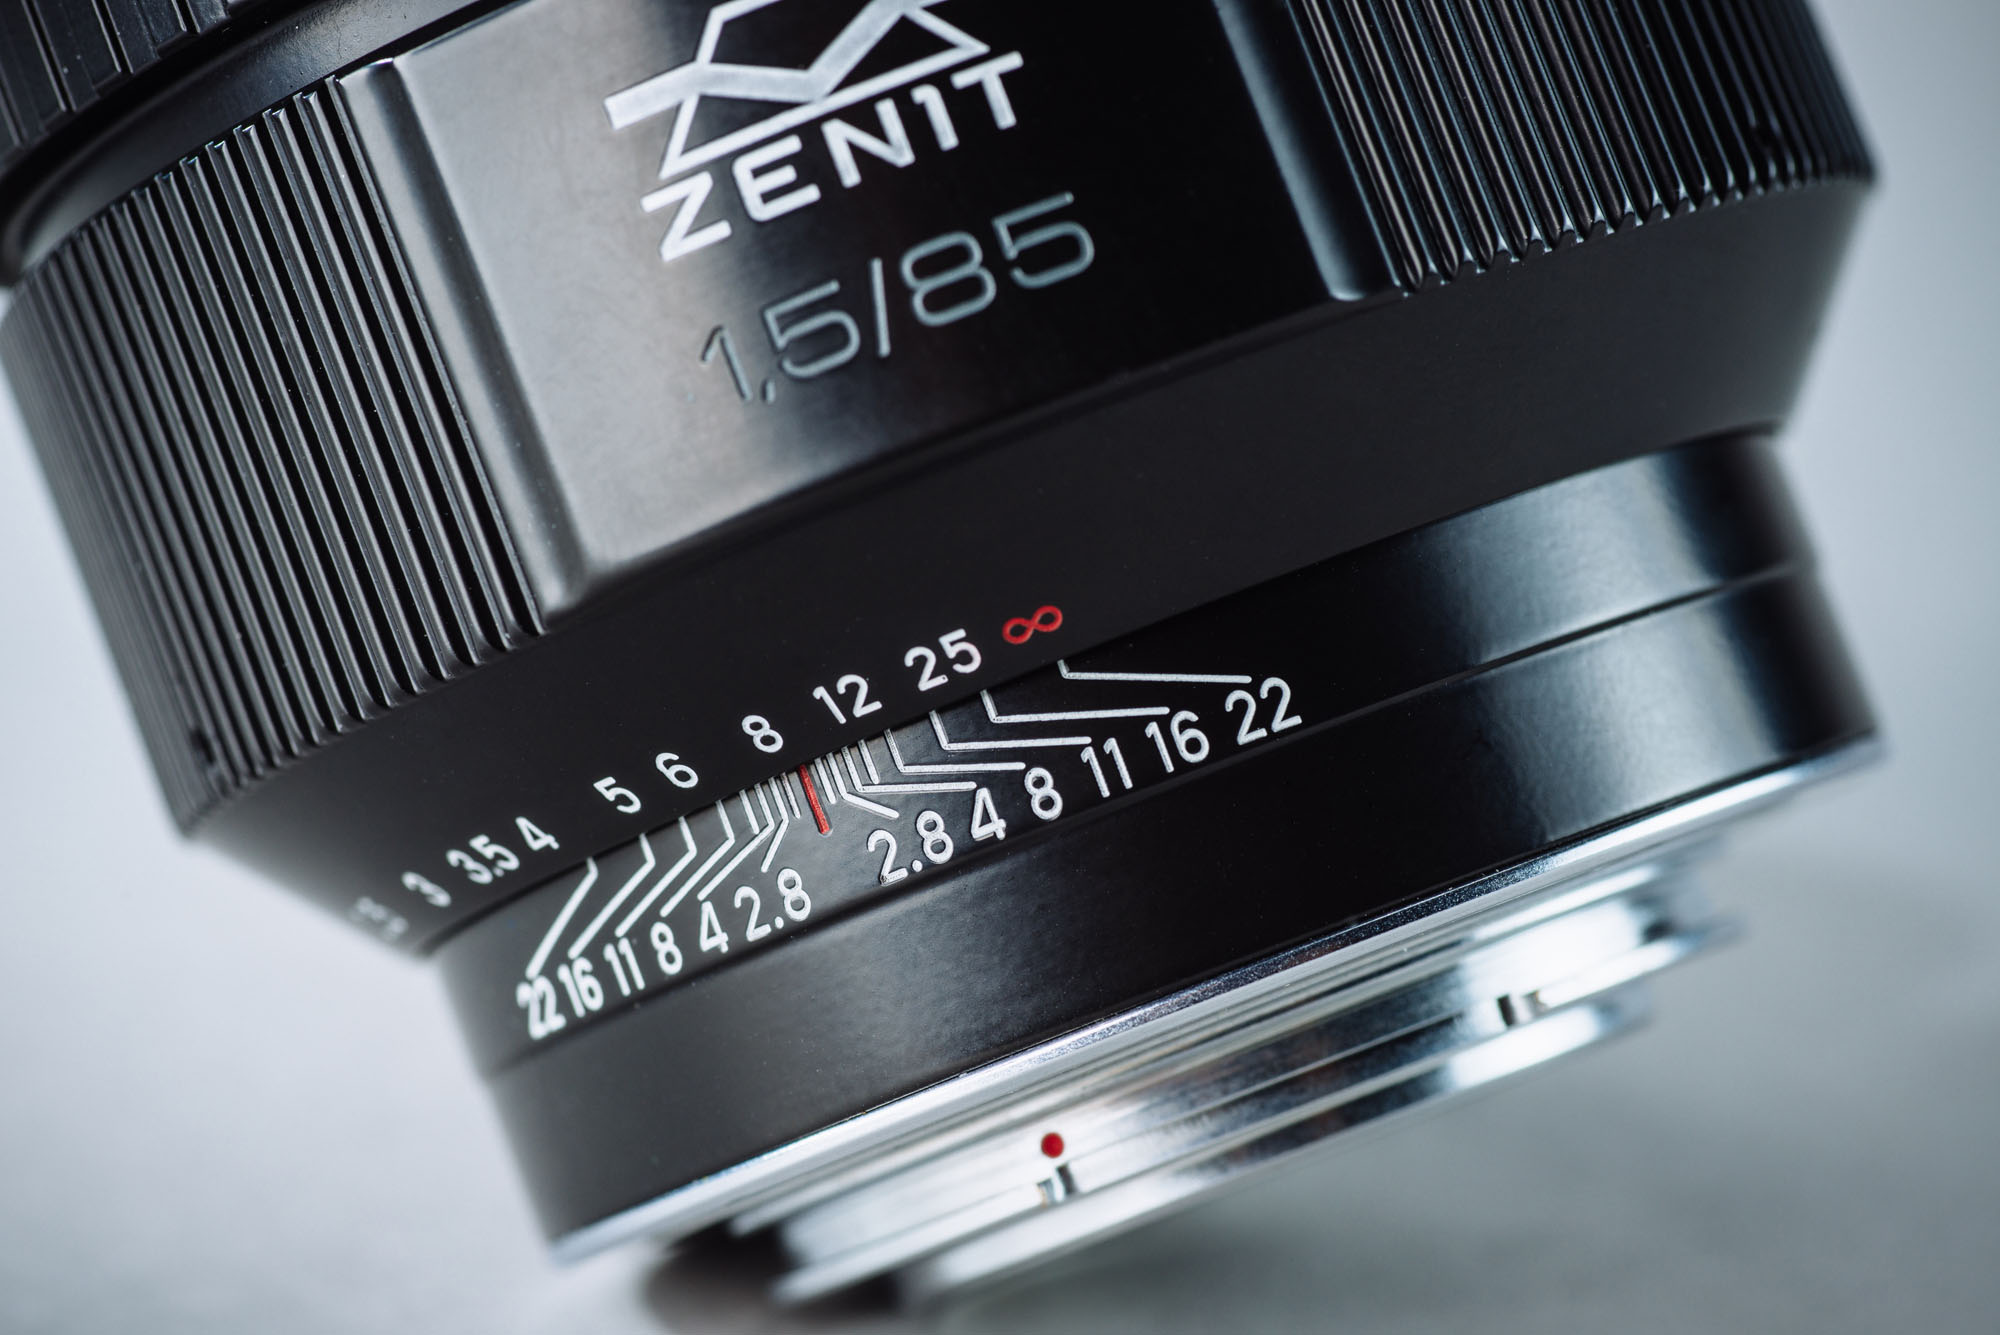
It looks more modern now, but I prefer the old classic design
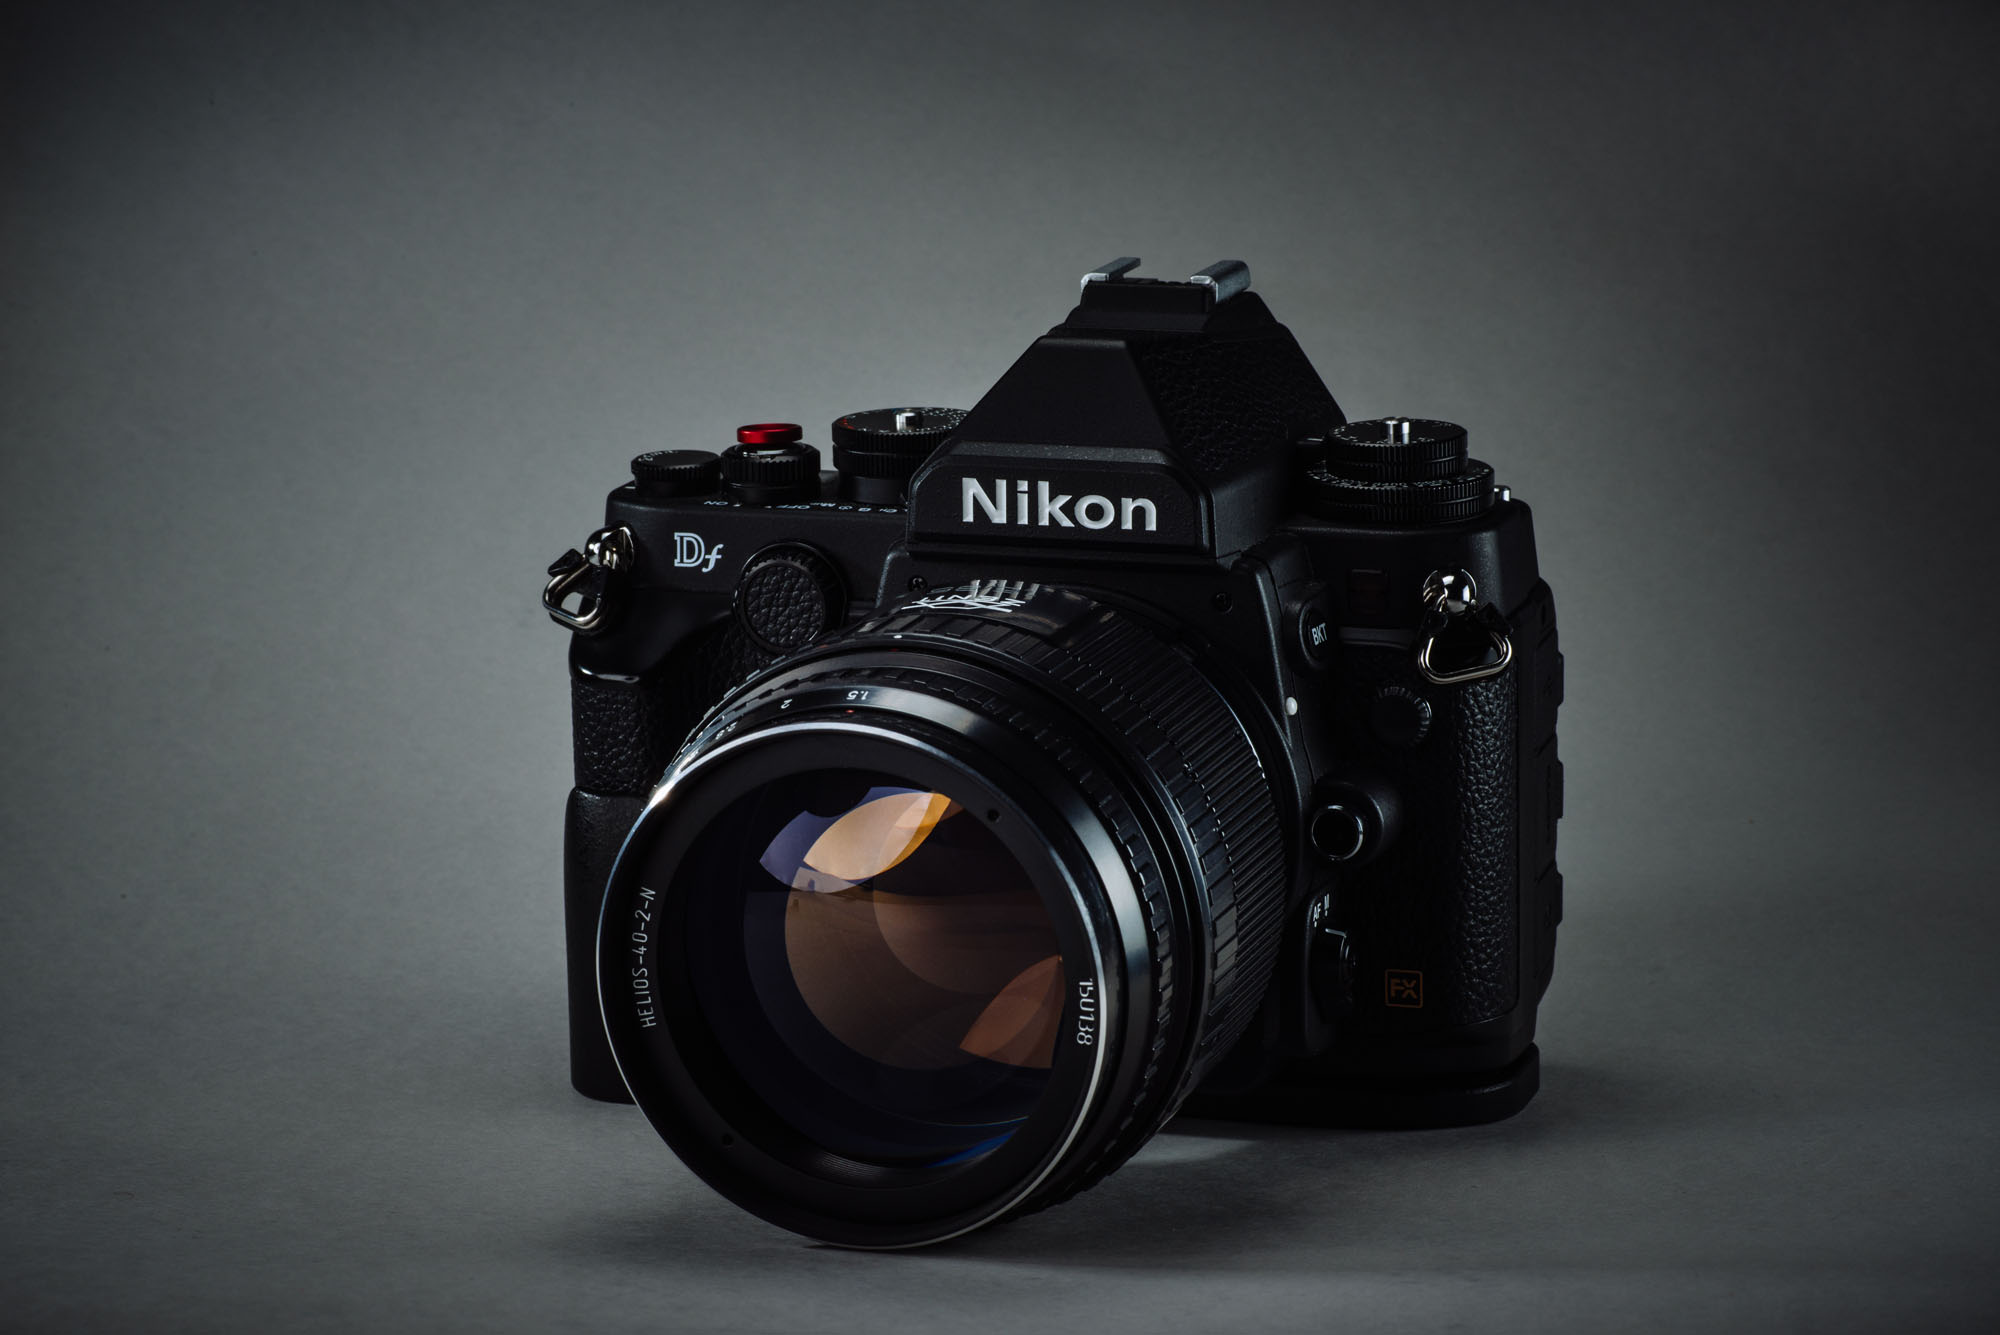
The new Helios 40-2 is slightly lighter than the old version, but at 800g it’s still pretty heavy. The heavy weight is because the Helios 40-2 is mostly made of metal, even the lens cap is made of metal. As a comparison, the Nikon AFS 85mm f/1.4G is just under 600g. The metal construction makes the Helios feel very solid.
The lens has a long throw focus ring, approximately 270 degree from closest focus distance (0.8m) to infinity. This allows easy and accurate manual focus adjustment which is very important for a fast prime with really shallow depth of field.
But while the focus ring is dampened, it’s not buttery smooth like some of the more expensive manual focus lenses.
Overall, it’s a solidly built lens, but it lacks refinement compare to the modern Japanese or other European lenses. For example the paint is quite rough and there are already quite a few dust inside the brand new lens.
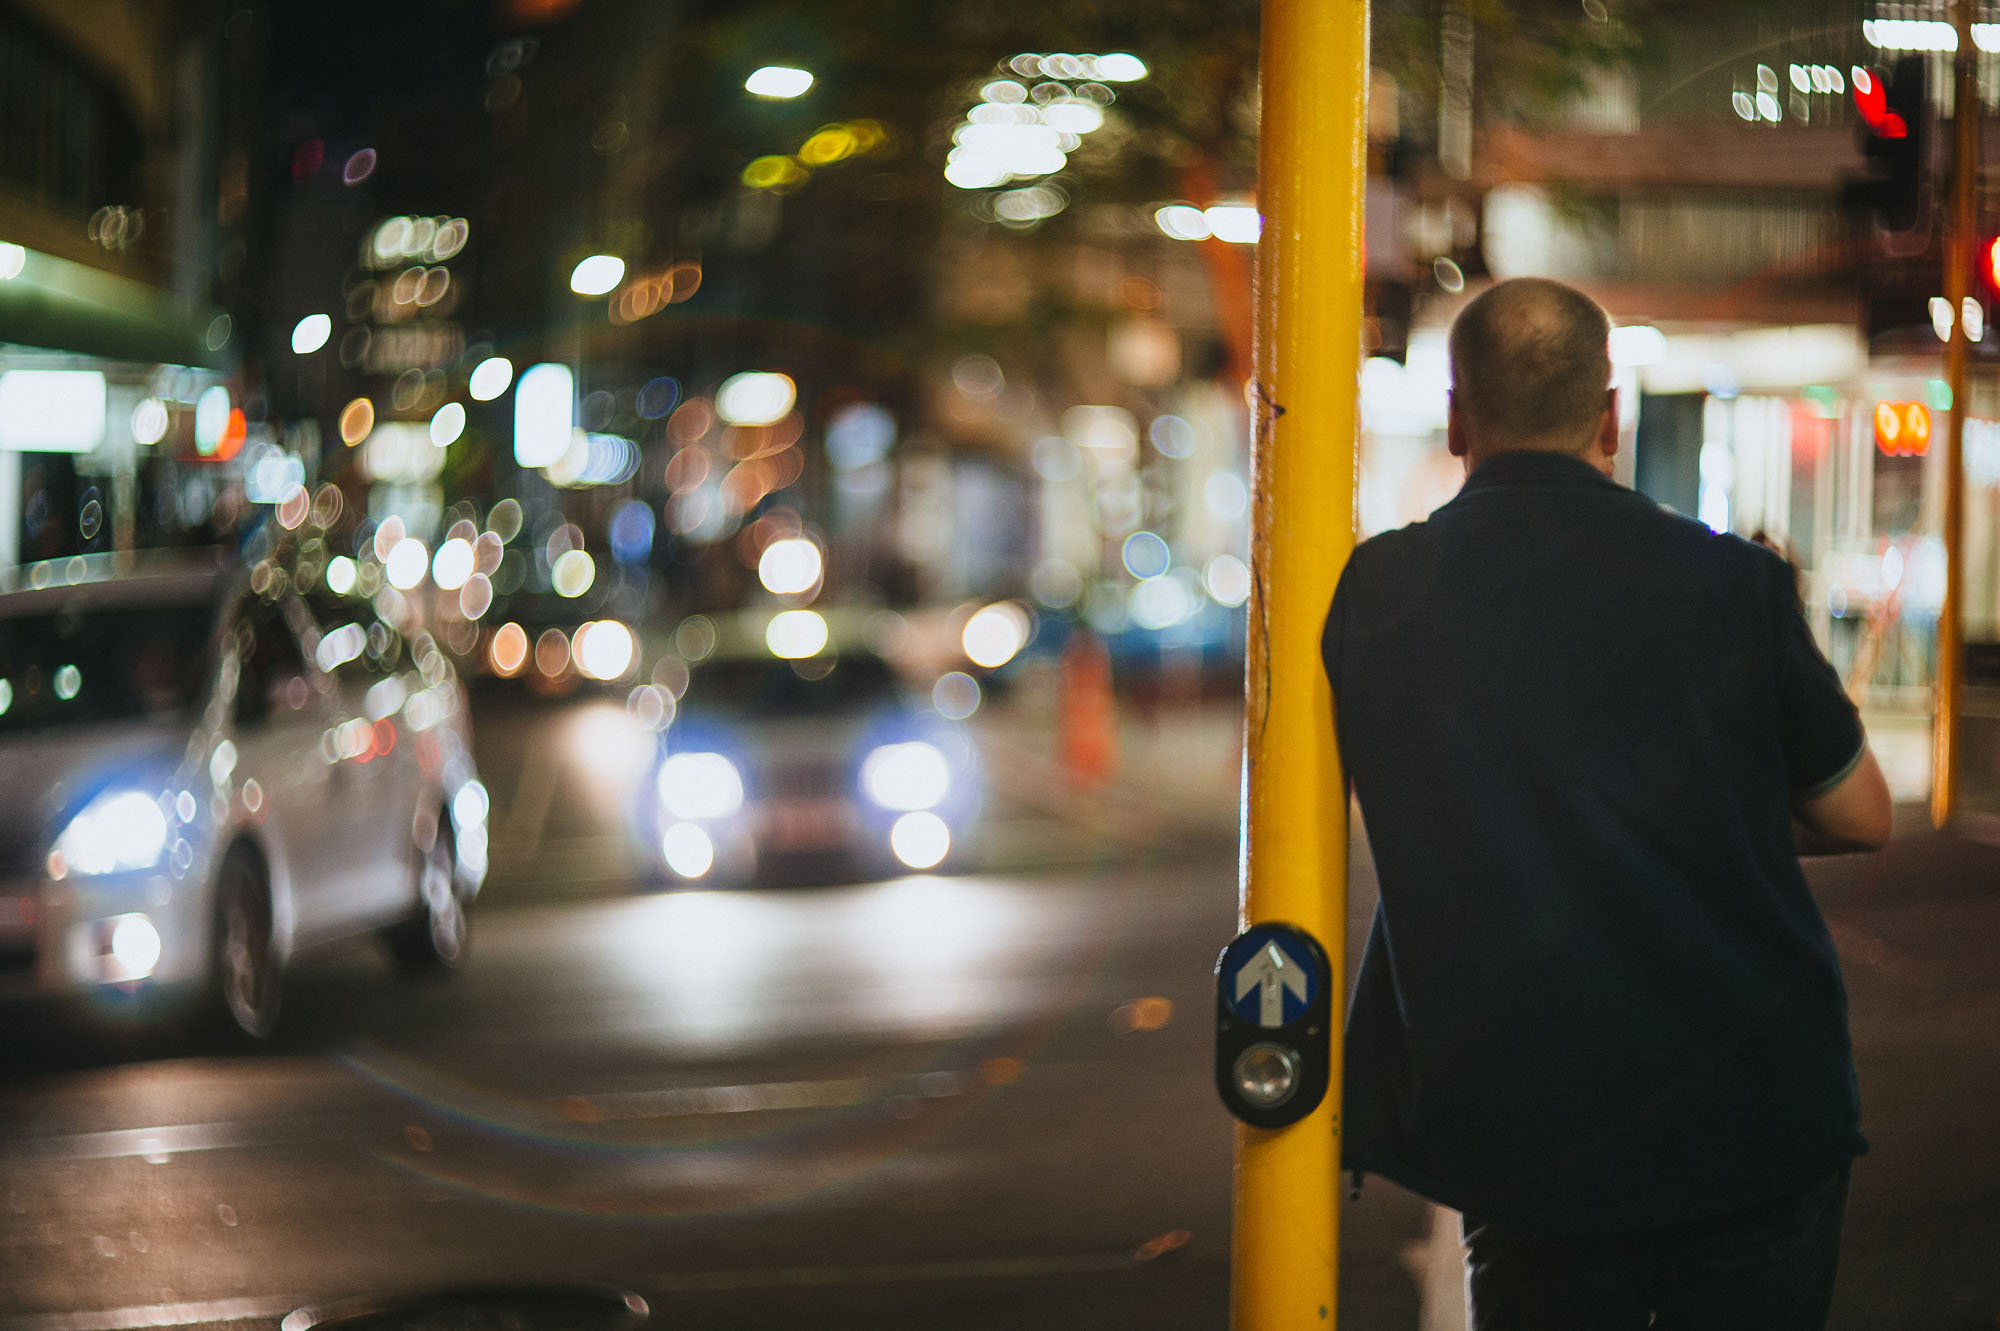
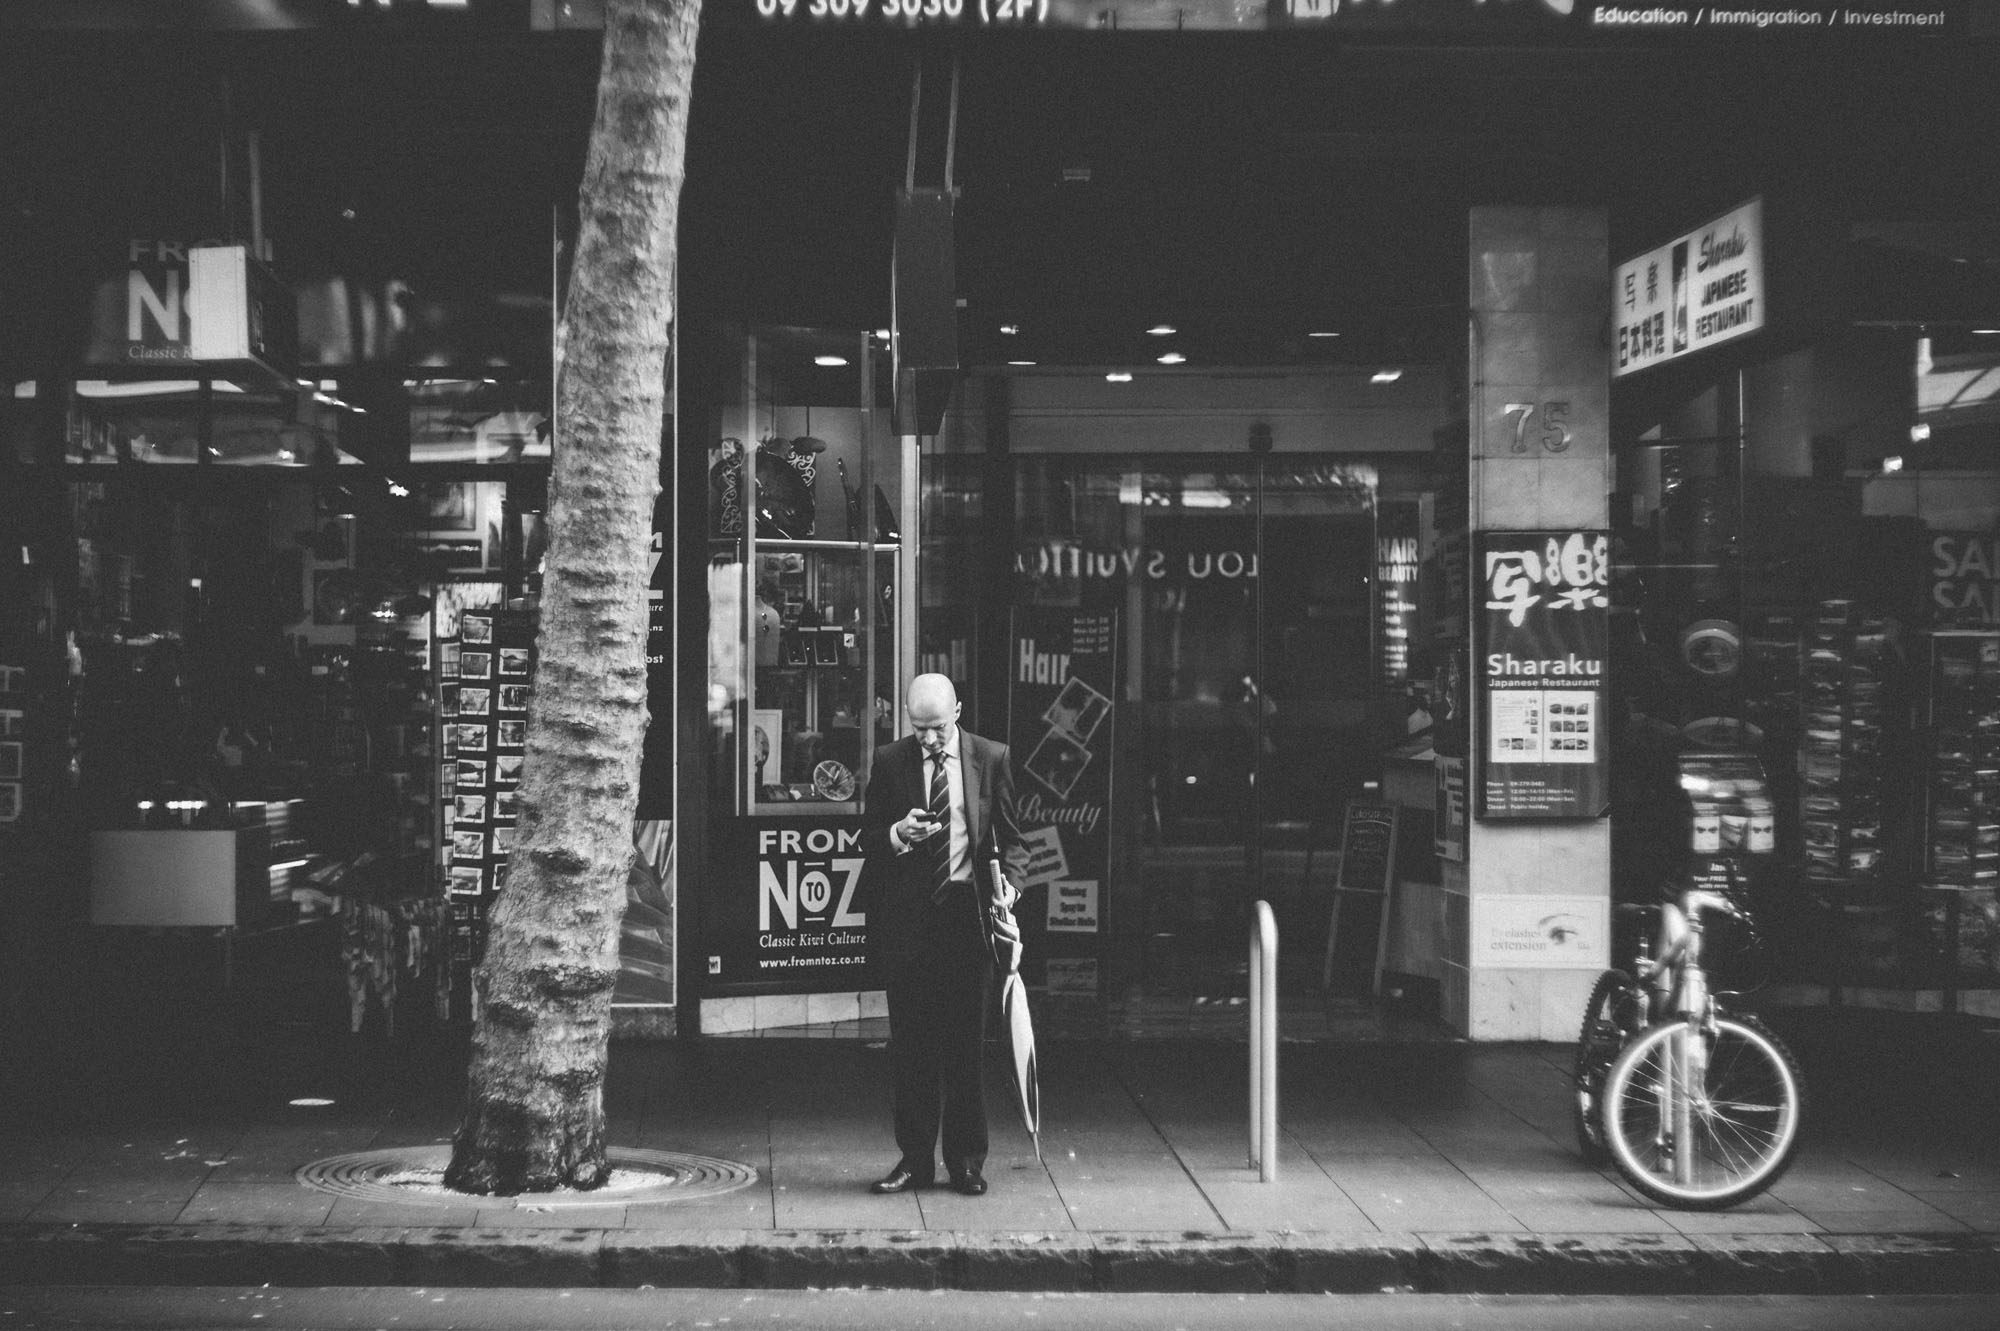
 ISO 100 f/1.5 1/1600s
From one of my recent photo session. It’s not easy to nail the focus at f/1.5, at least the long throw focus ring make it easier to focus accurately.
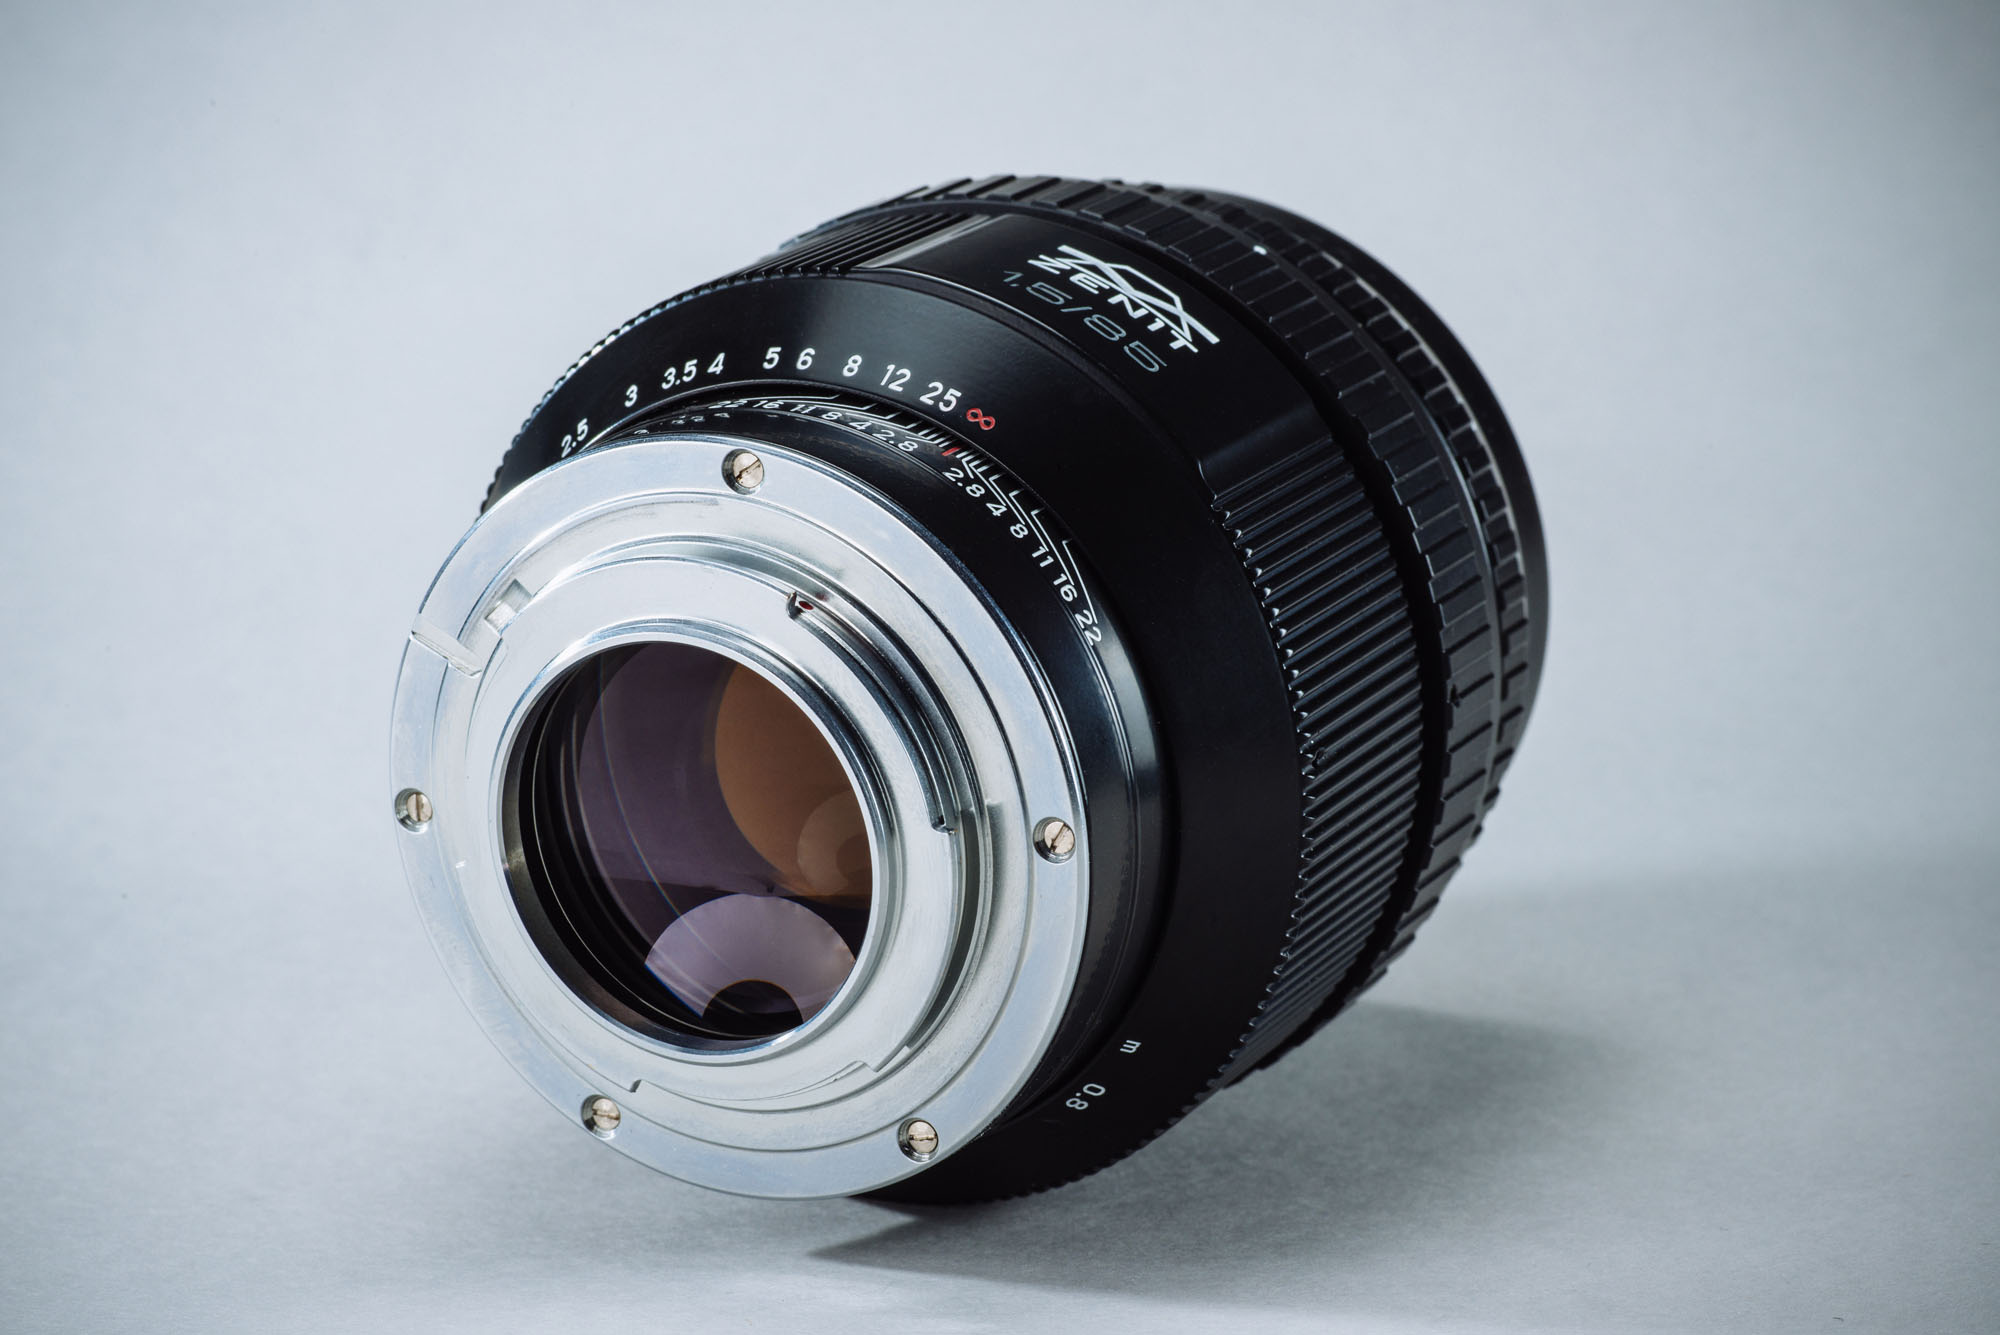
The Helios 40-2 has a pretty special aperture control system. There are two control rings on the lens to control the aperture. The ring closer to the camera body is to select the actual aperture you want to use. While the other ring that is closer to the front of the lens is like an aperture limiter, which limits the usable aperture range. For example, if you set the limiter to f/2.8. It means you can use the other ring to adjust the aperture between wide open (f/1.5) to f/2.8.
It may take a bit of time to get used to it but it is not too hard to understand.
 Do you know what aperture is the lens set to? (Answer below)
But to make it more confusing, neither the white dot nor the red dots on the limiter ring can directly tell you what aperture you are shooting at.
To figure out what aperture you are using, you need to first look at the position of the two red dots on the lens, then reverse the numbers on the aperture scale between the two red dots, then the white dot will tell you your aperture setting. So in the example photo above, the lens is set to f/2.
And since the lens doesn’t have electronic contacts, you can’t rely on the camera to tell you what aperture you are using either.
But maybe it doesn’t really matter as you’ll be shooting at wide open 99.999% of time anyway. (continue reading to find out why)
As mentioned in the beginning, the optical design is pretty much the same as what it was in the 1950s. It may work quite well back in the days with the film cameras but it’s showing its age when used with a modern DSLR.
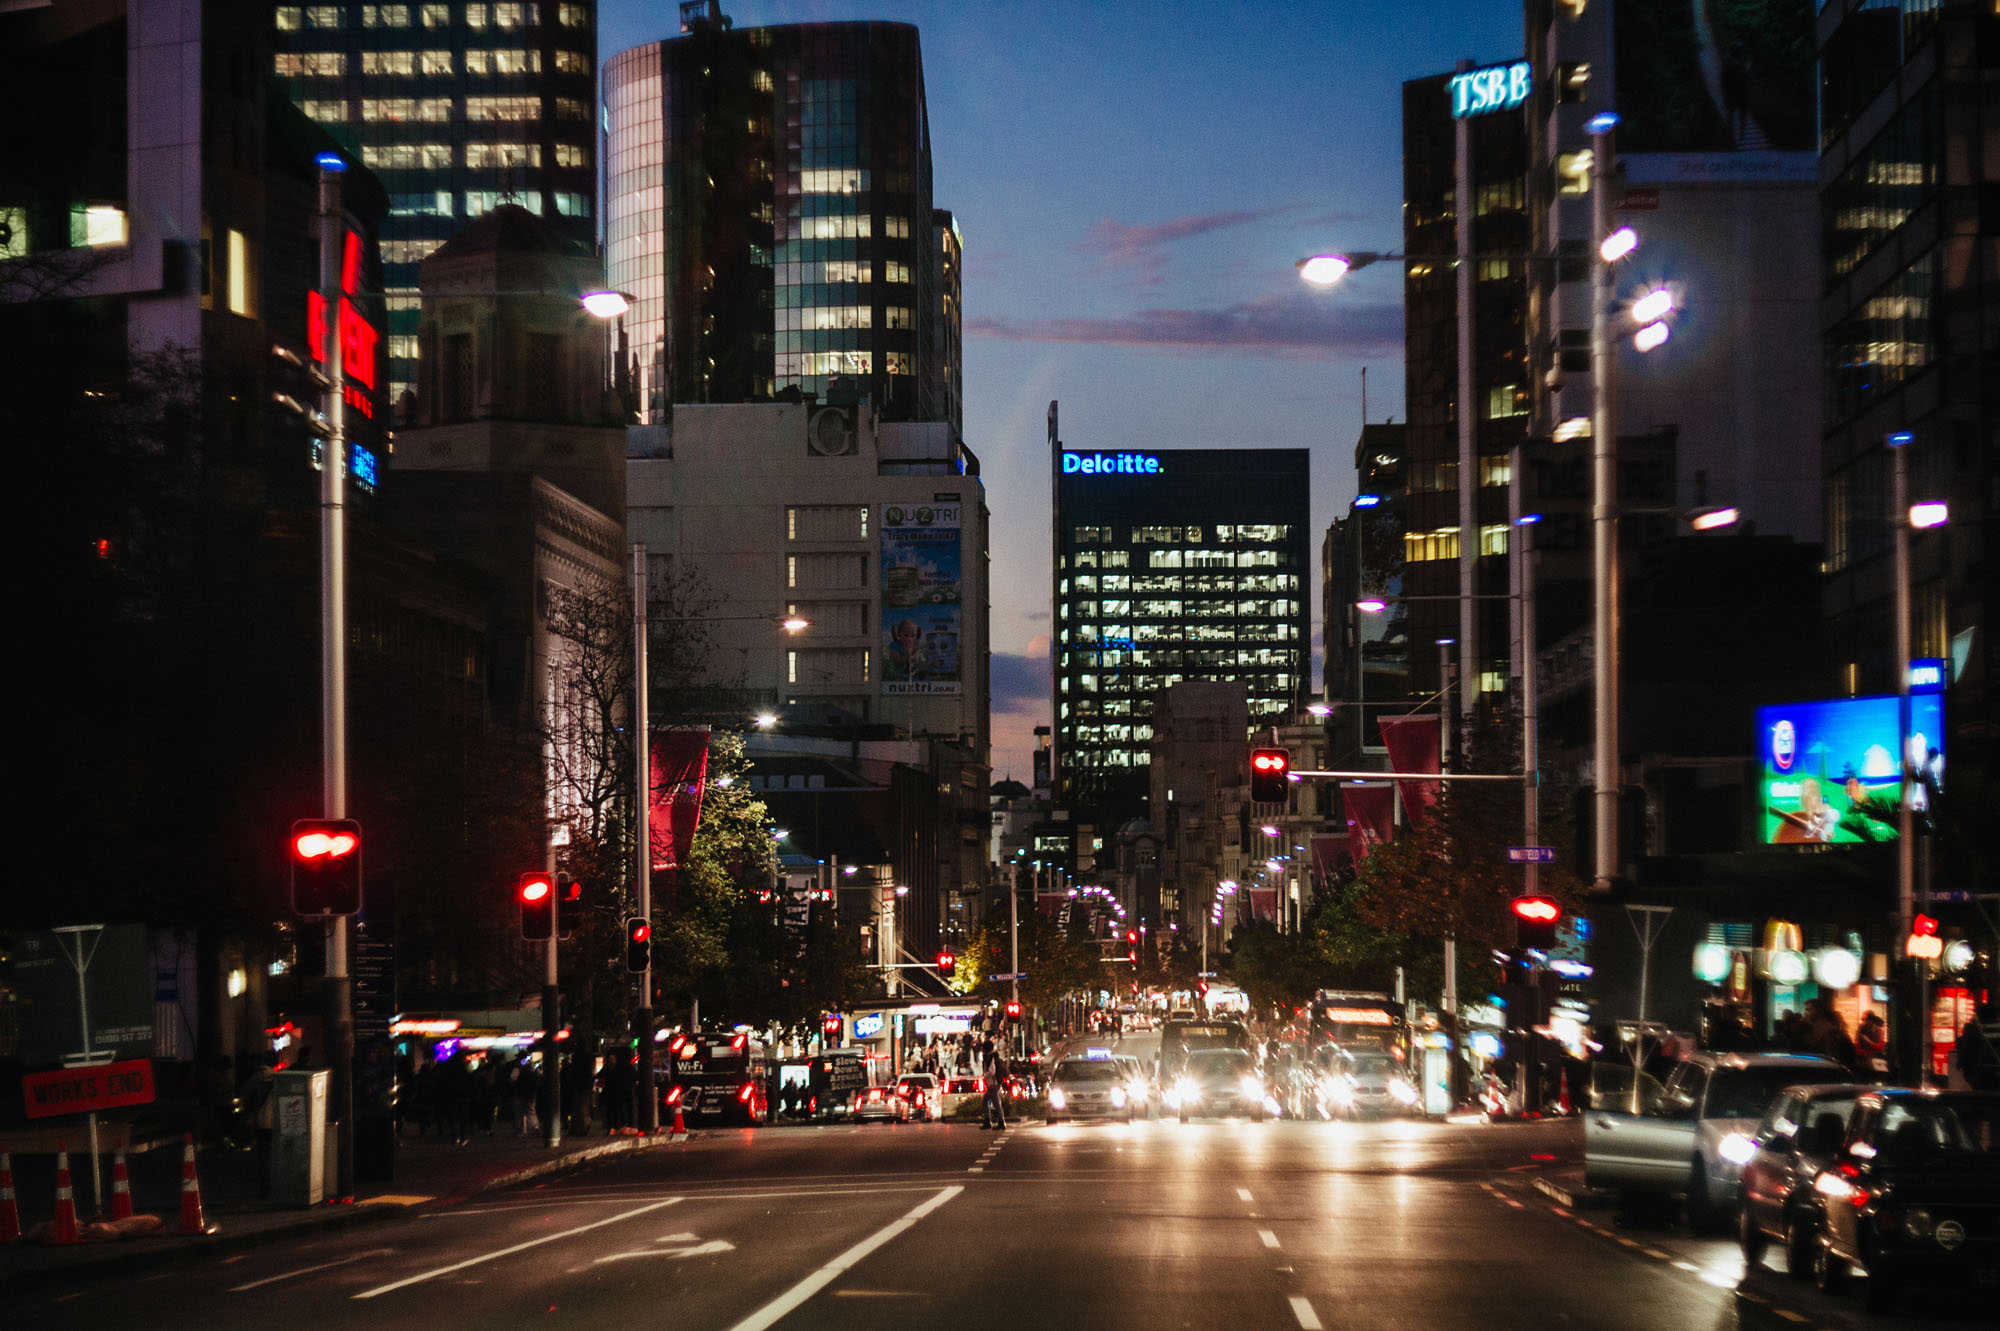
 ISO1800 f/1.5 1/160s
First thing you’ll notice is the sharpness, or lack of sharpness from this lens.
At wide open, the center sharpness is not too bad especially if your camera has a low pixel density sensor like the 16MP D4/Df or 12MP D3/D700. Anything outside the center region is soft and it becomes really soft near the edges. Stop down to f/2.8 would improve the center sharpness quite a bit, but the edges are still very soft until you further reduce the aperture to around f/5.6 or so. But the problem is, this is a lens you should only shoot at maximum aperture. (yes keep reading, and i’ll explain why)
And if your scene has strong light source or is very high contrast, there would be some very noticeable glow that makes the image quite soft. I also found that shooting far away object would quite often result in very soft image.
It’s a dumb lens, there is no electronic contacts, and you can’t tell what aperture you are using from the camera.
Even with the soft images output, chromatic aberration can still be quite noticeable when shooting high contrast scene.
Photos from the Helios has quite low colour saturation. It definitely can’t help you to capture the perfect skin tone as well.
Vignetting on the other hand is actually not too bad when compare to similar fast prime lenses. There is a bit of dark corner but nothing really serious.
The lens is multi-coated to help reduce flare. But I have to say this lens is absolutely horrible when it comes to flare resistance. Any light source in front of the camera would easily create a big big flare in your photo. Actually even light source from an angle that is not visible in the frame would also create a very visible flare and lower the photo’s contrast to a point that makes the photo unusable. I have never used a lens that is so prone to flare. Be careful when you are shooting photos during middle of the day when the sun is high up in the sky as the sun/flare could easily destroy every single photo you took.
Don’t get me wrong, I personally don’t mind, actually love a bit of lens flare especially when taking portraits for artistic reasons, but the flare from the Helios can quite often completely ruin the photo if you are not careful.
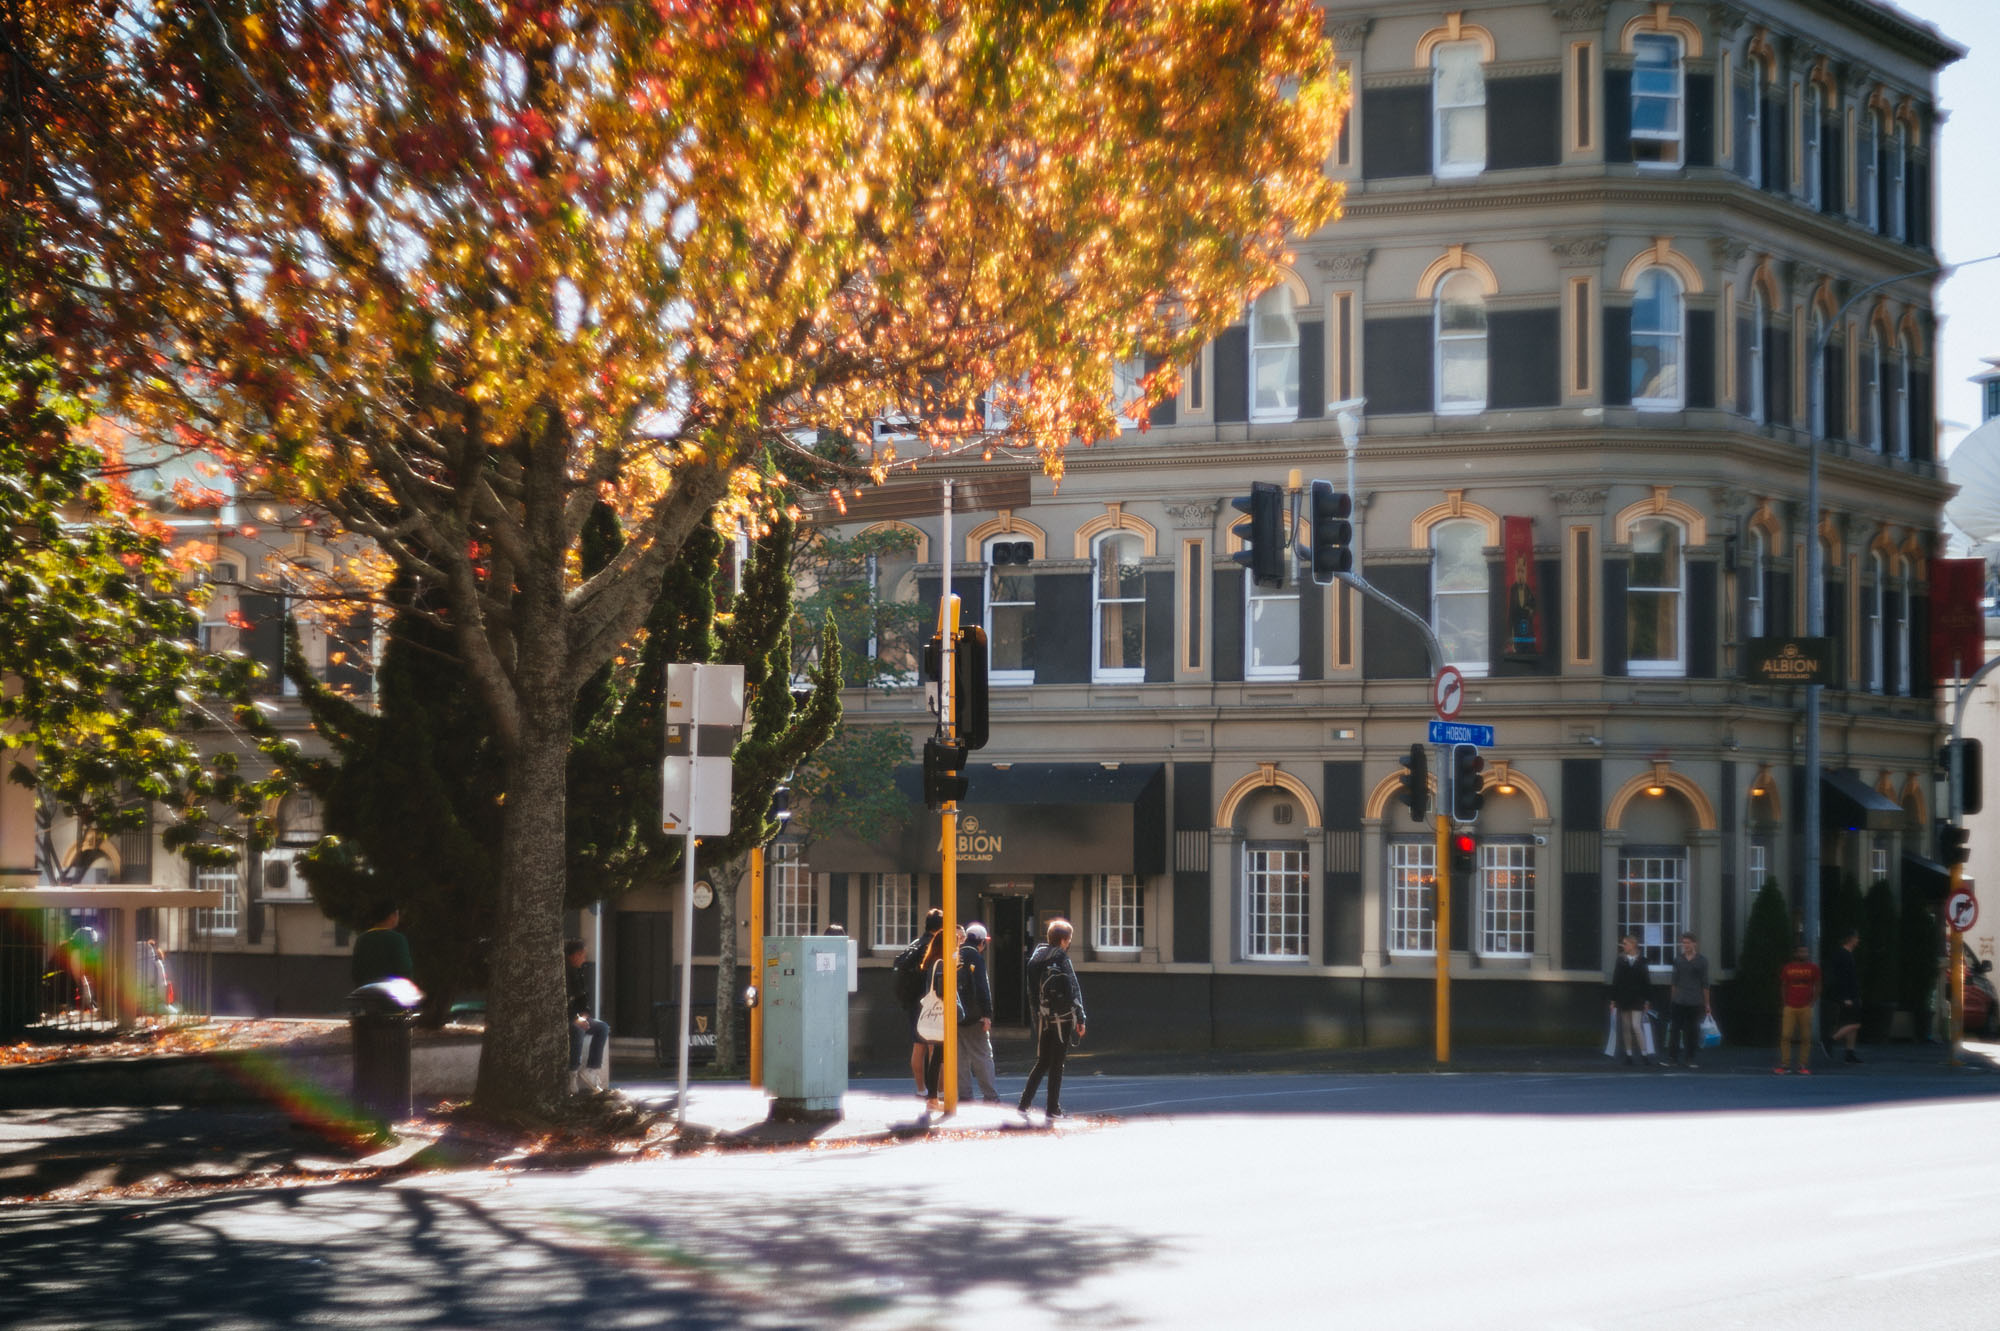
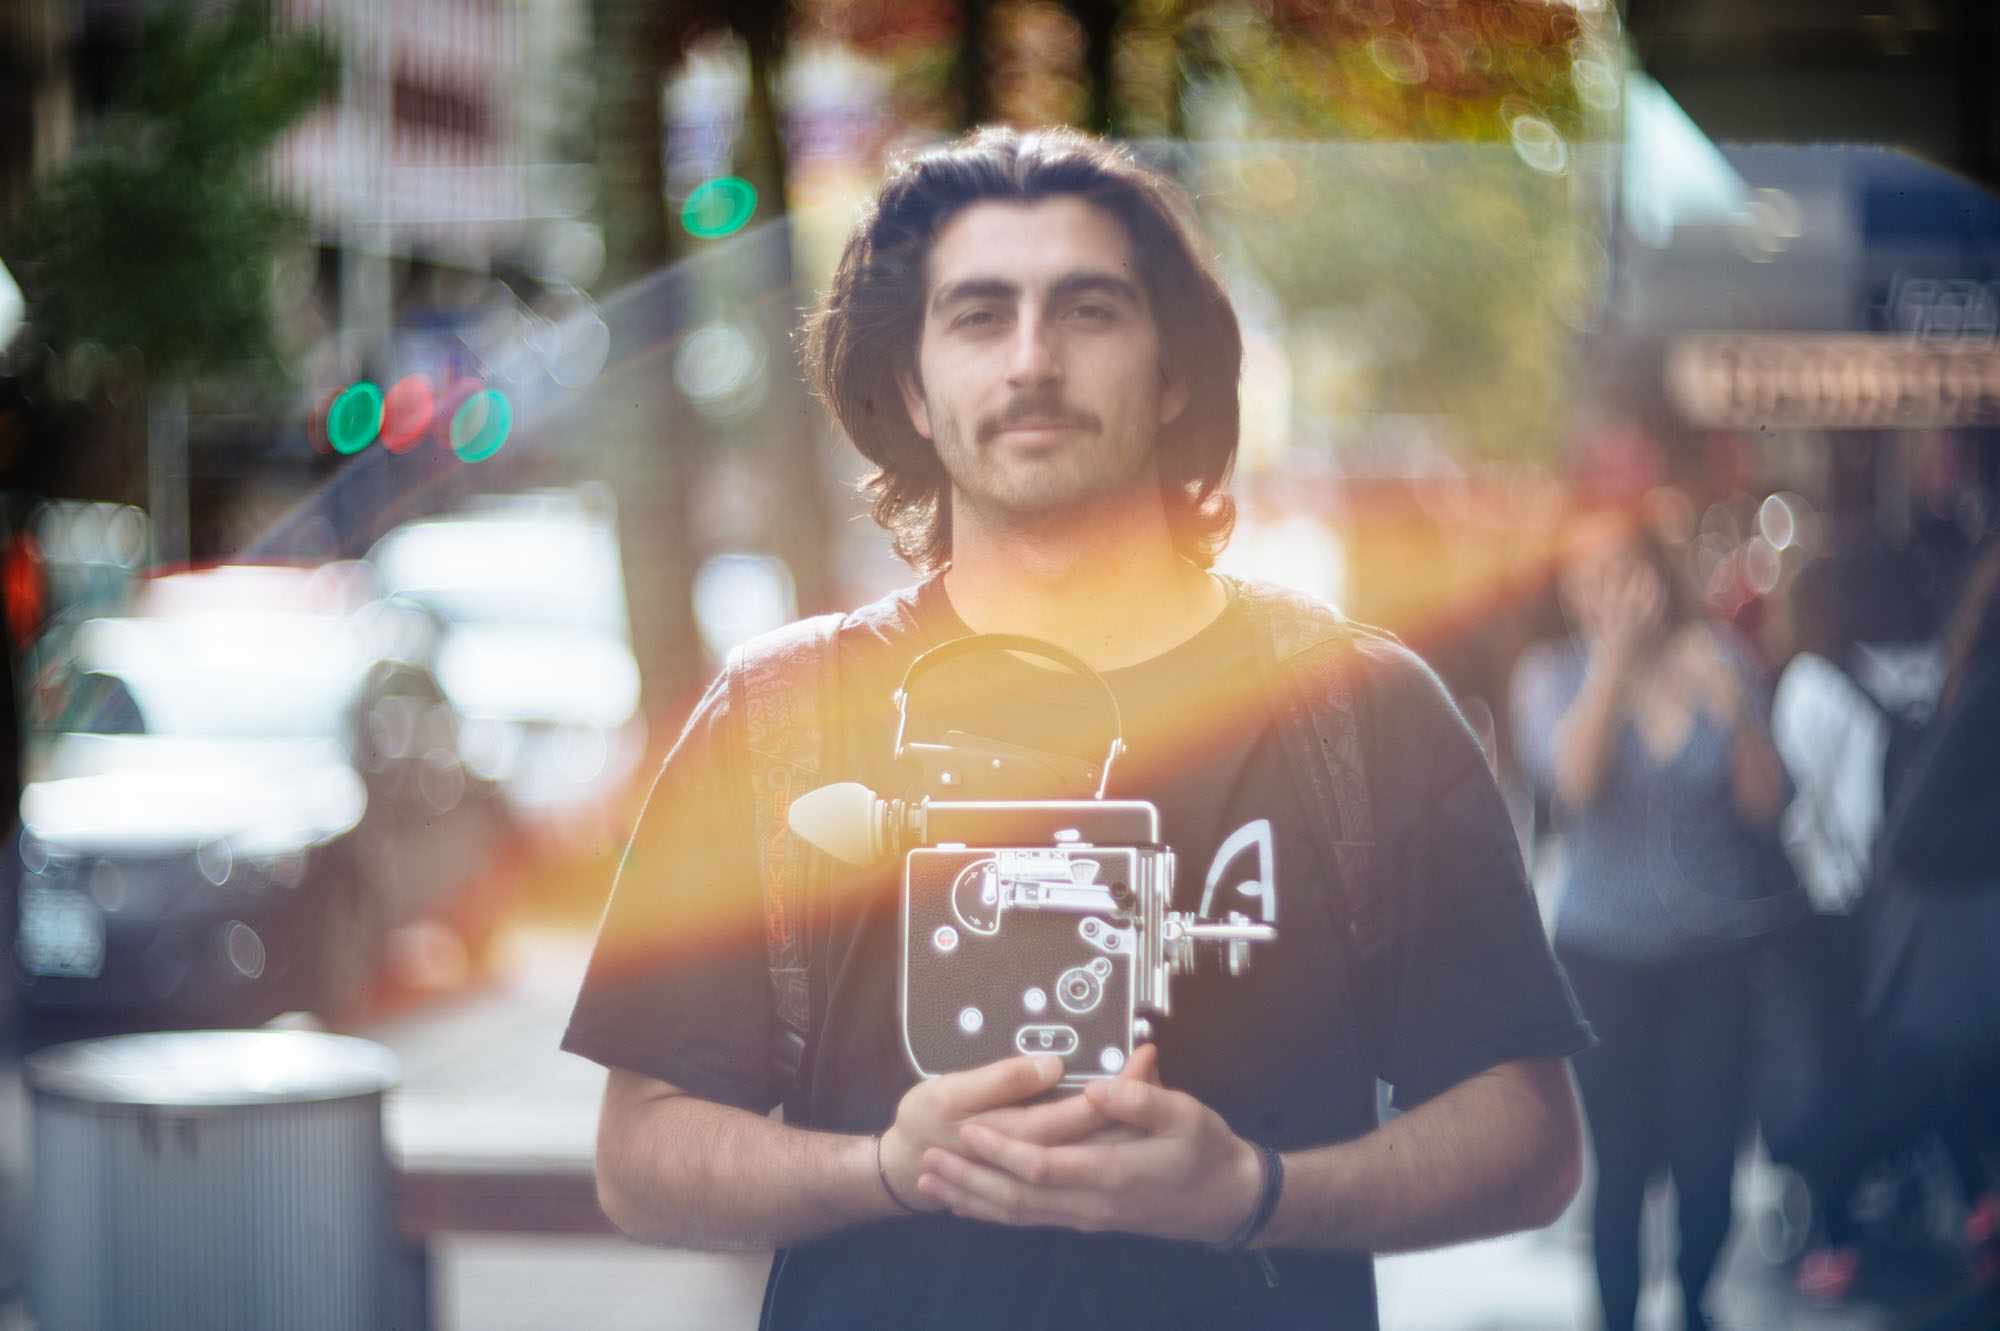 ISO 100 f/1.5 1/1600s
Flare, lots of them, and this photo is only a mild example
For a lens that is so prone to flare, it really should comes with a lens hood. Unfortunately it doesn’t and Zenit doesn’t even make an optional one. So it is absolutely essential to get an aftermarket one in my opinion. Luckily there are lots of aftermarket lens hood that can fit onto the Helios’ 67mm filter thread.
If you are looking at buying an older version of the Helios 40-2, one thing you need to be aware of is that some of the older versions use a rare 66mm thread instead of the 67mm on the new version which makes it hard to install any filter or lens hood to it. If you end up getting an old version with 66mm filter thread, you can consider getting a 66mm -> 67mm or 66mm -> 77mm step up ring then get a 67 or 77mm aftermarket lens hood.
But keep in mind lens hood can only minimise flare caused by stray light. If you have a strong light source that is visible in the photo, you really need to adjust your camera angle or composition to minimise the flare. I also suggest switch to liveview mode when there is a strong frontal light source, this way at least you can easily see how the flare would affect your photo.
I guess it’s very obvious that the image quality from the Helios 40-2 just can’t be compared with any modern lenses. It’s also heavy and manual focus only. So why would someone even wants one while you have something like the Nikon AFS 85mm f/1.8G for just slightly more (brand new), which is a lot lighter and give you almost perfect optical image quality?
The answer is just one word: Bokeh!
Or that dreamy swirly bokeh!!
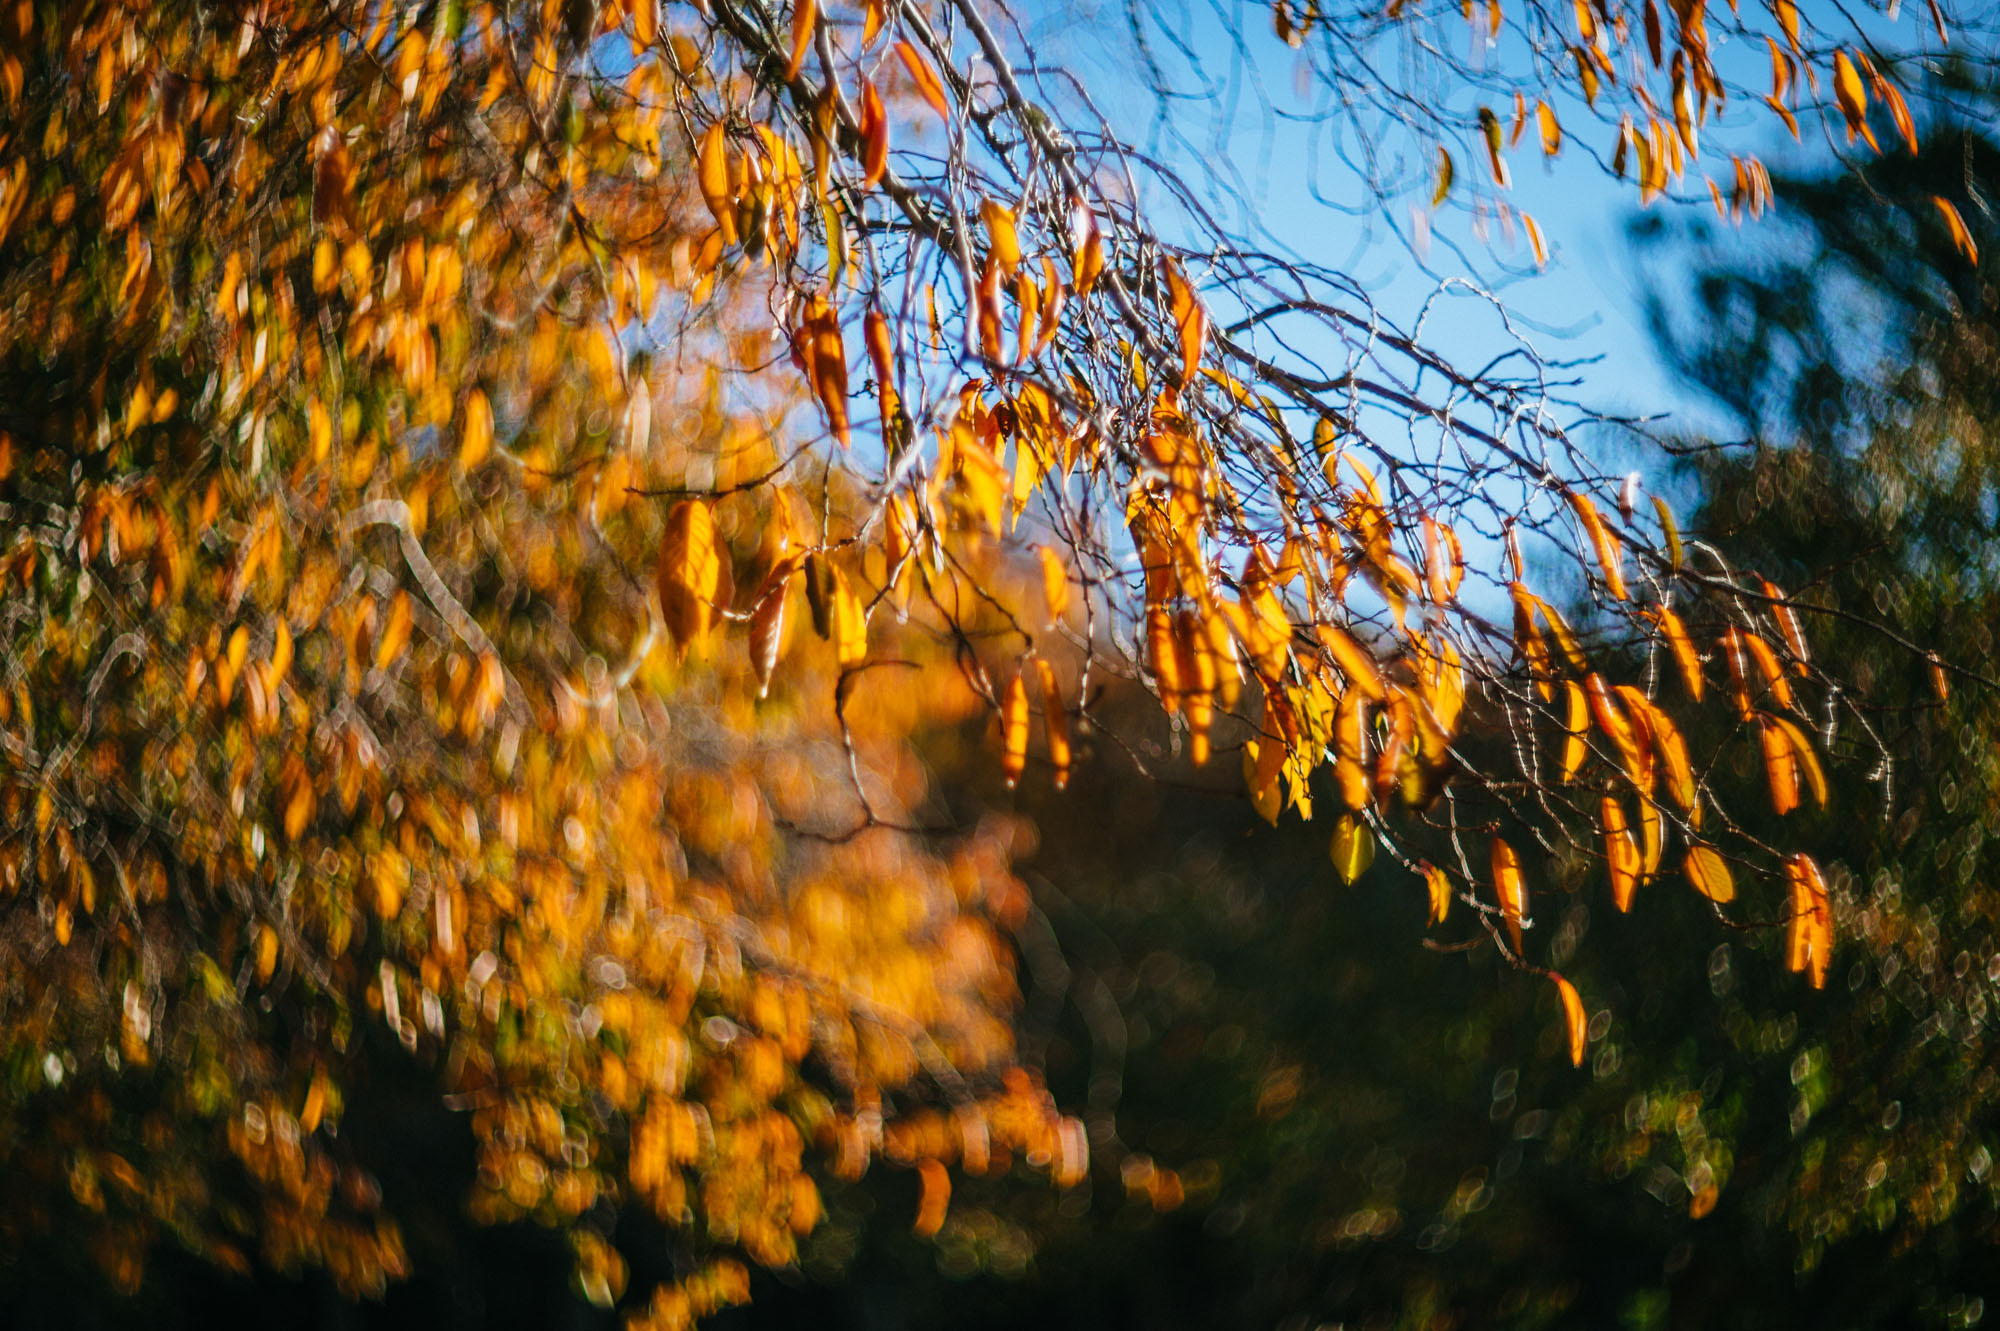
 ISO1100 f/1.5 1/160s
The world is spinning
The cat’s eye like swirly bokeh around the edges of the photo is pretty much the only reason why we would want a Helios 40-2. The swirly bokeh gives you that special, artistic touch that you would really fall in love with, or for some other people, make them feel dizzy and hate it.
If you are the former type, then the swirly bokeh is probably so attractive to you that you can pretty much forgive all the issues you can have when shooting with the Helios 40-2. And that’s really the whole point of this lens.
But the lens wouldn’t magically turn any background into swirly bokeh. You need to pick a background with lots of little but high contrast objects, for example, trees under sunlight. And you need to be careful with your subject/background distance so the background is blurred, but not completely blurred to create the swirly background. It seems like you can get the most swirly bokeh if the foreground subject is at around 3-5m distance and your busy high contrast background is approx 20-50m away. It takes a bit of practice and experience to find out how to create the most swirly bokeh but the result is well worth the effort, assuming you like the swirly bokeh.
The swirly bokeh seems to only appear when you are shooting at maximum aperture. When you stop down to f/2, the bokeh already becomes a bit more round and if you go anything beyond that there is pretty much no cat’s eye bokeh at all. Because of that, you pretty much should only shoot this lens at f/1.5. After all, the swirly bokeh is the only reason why we want to shoot with this heavy, soft, super easy to flare, manual focus lens right?
That’s exactly why I said earlier you should and you would really only shoot this lens at f/1.5.
The lens has a pretty interesting aperture blade design. When the aperture is around f/4, the aperture hole becomes a unusual shape which gives you a special shape bokeh.
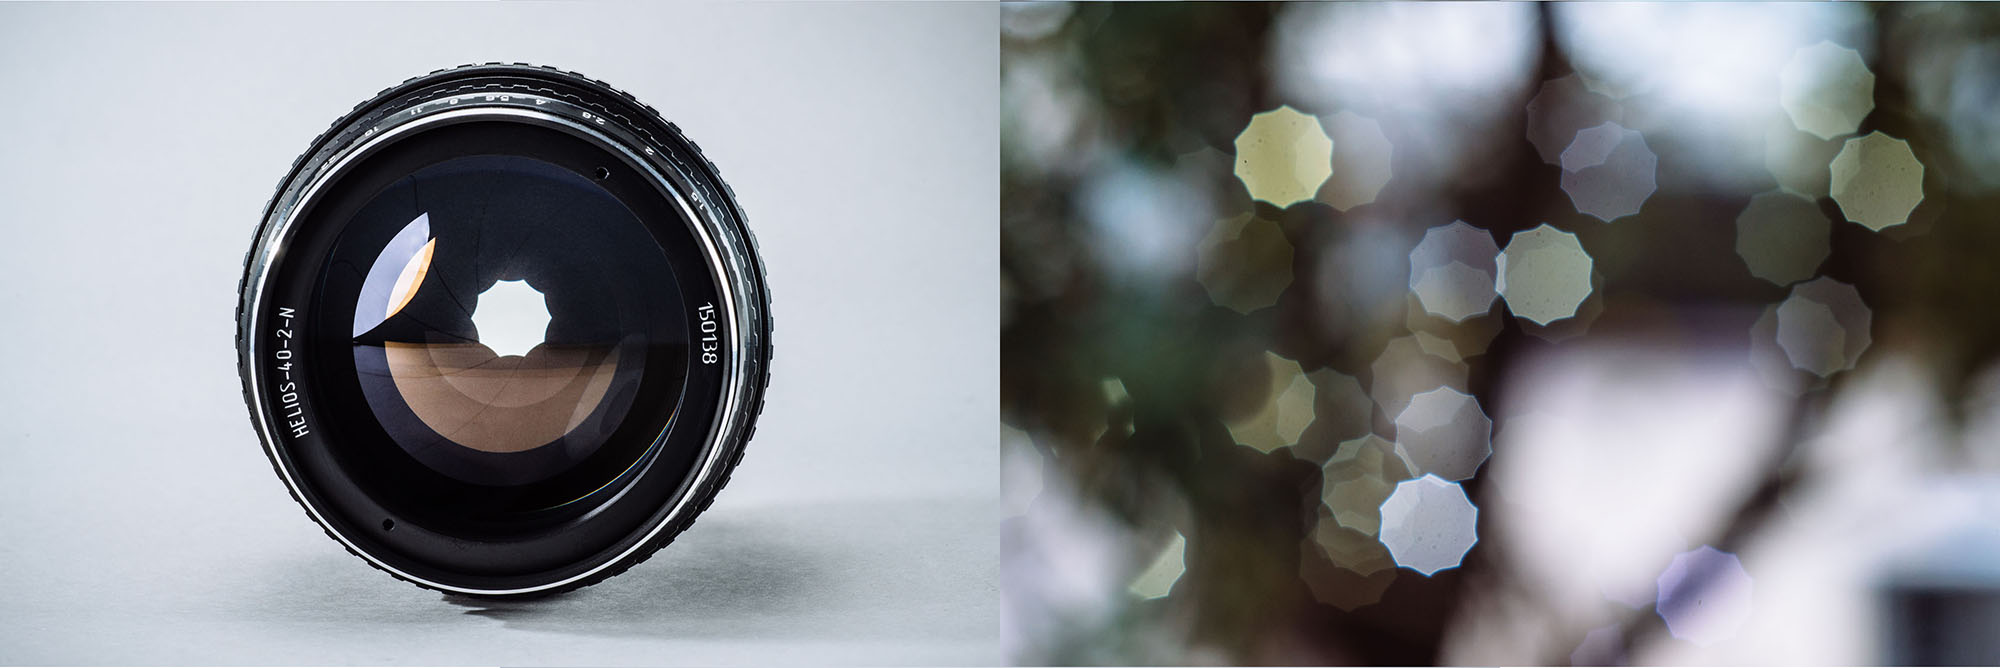
Interesting aperture blade design and this is the bokeh @ f/4
The Helios 40-2 certainly isn’t a lens for everyone. Manual focus a 85mm f/1.5 lens is not easy. The lens is soft and really prone to flare. It is heavy and big. The 85mm focal length also makes it not a very versatile lens. I almost never use it indoor for example.
If you are a beginner, I won’t recommend you getting this lens. Get the Nikon AFS 85mm f/1.8G for similar price and that one is a much easier to use and a lot more forgiving.
If you are crazy about that swirly bokeh? Just go and order a Helios 40-2 now. It’s not the easiest lens to use. But once you managed to conquer it, you’ll love the photos from the Helios 40-2!
Reviewer: Richard Wong
Richard is a multi-award winning wedding/portrait photographer based in Auckland, New Zealand. Richard’s website is www.photobyrichard.com and his facebook page is https://www.facebook.com/PhotoByRichard
Richard is also a contributing writer for a few photography magazines.
Some more sample photos: (All photos shot in RAW and edited to taste in Lightroom)
 ISO720 f/1.5 1/160s
 ISO 100 f/1.5 1/250s
 ISO1800 f/1.5 1/160s
 ISO900 f/1.5 1/160s
 ISO14368 f/1.5 1/160s
 ISO2200 f/1.5 1/160s
 ISO100 f/1.5 1/3200s
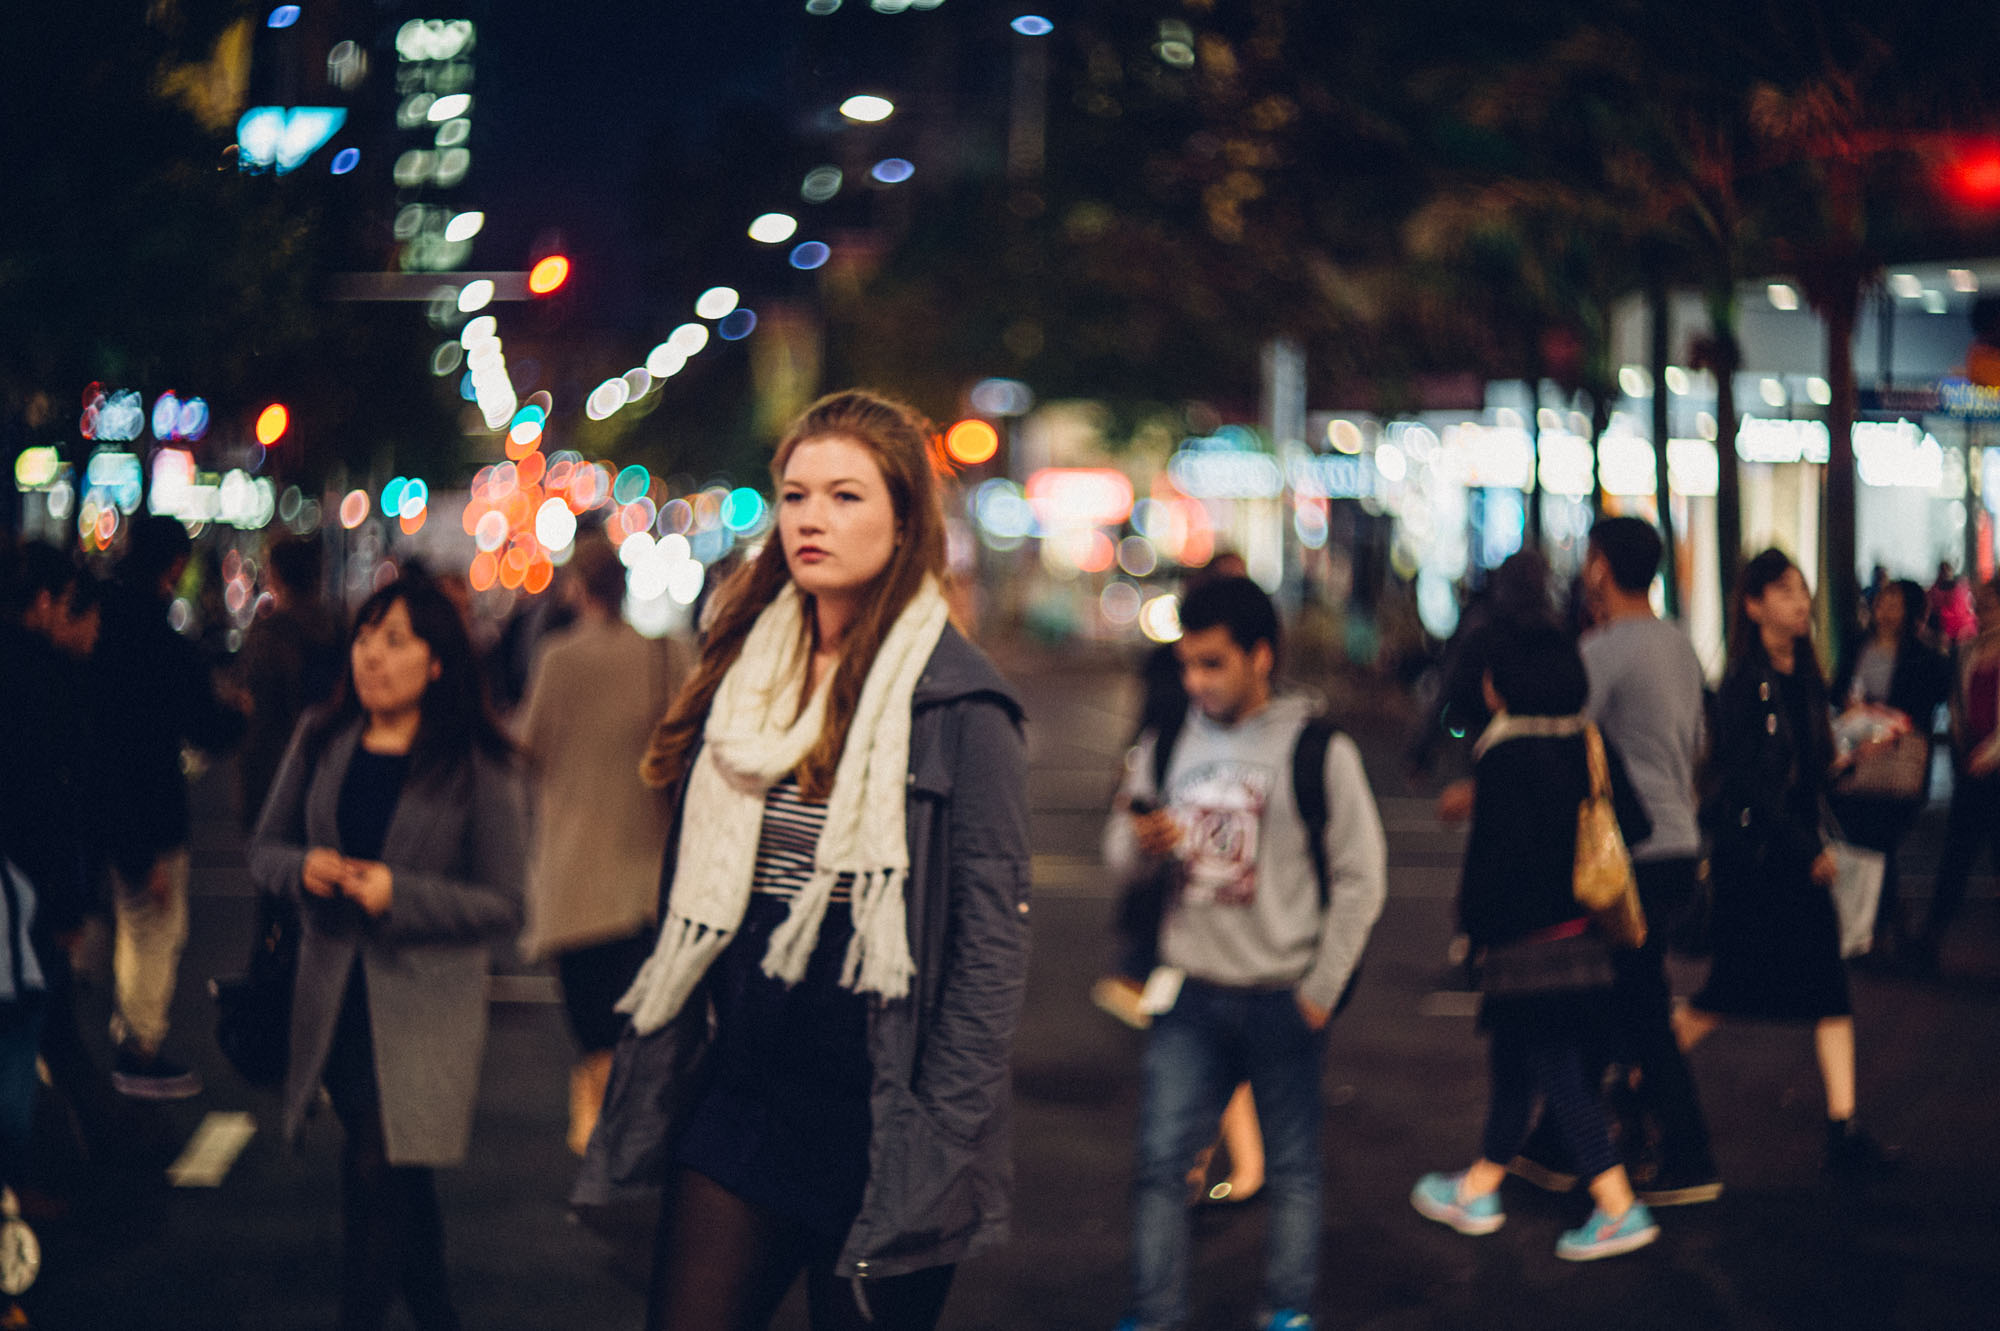 ISO1100 f/1.5 1/160s
 ISO100 f/1.5 1/1600s
We are now on Facebook:
https://www.facebook.com/ReviewByRichard
Like us, follow us and see all our latest reviews!
All photos and text Copyright© 2015 www.photobyrichard.com. All photos and text may not be copied or reproduced in any format without obtaining written permissions