In this review we’re going to look at the three Olympus f/1.2 Pro lenses. The 17mm f/1.2 Pro, 25mm f/1.2 Pro and 45mm f/1.2 Pro.
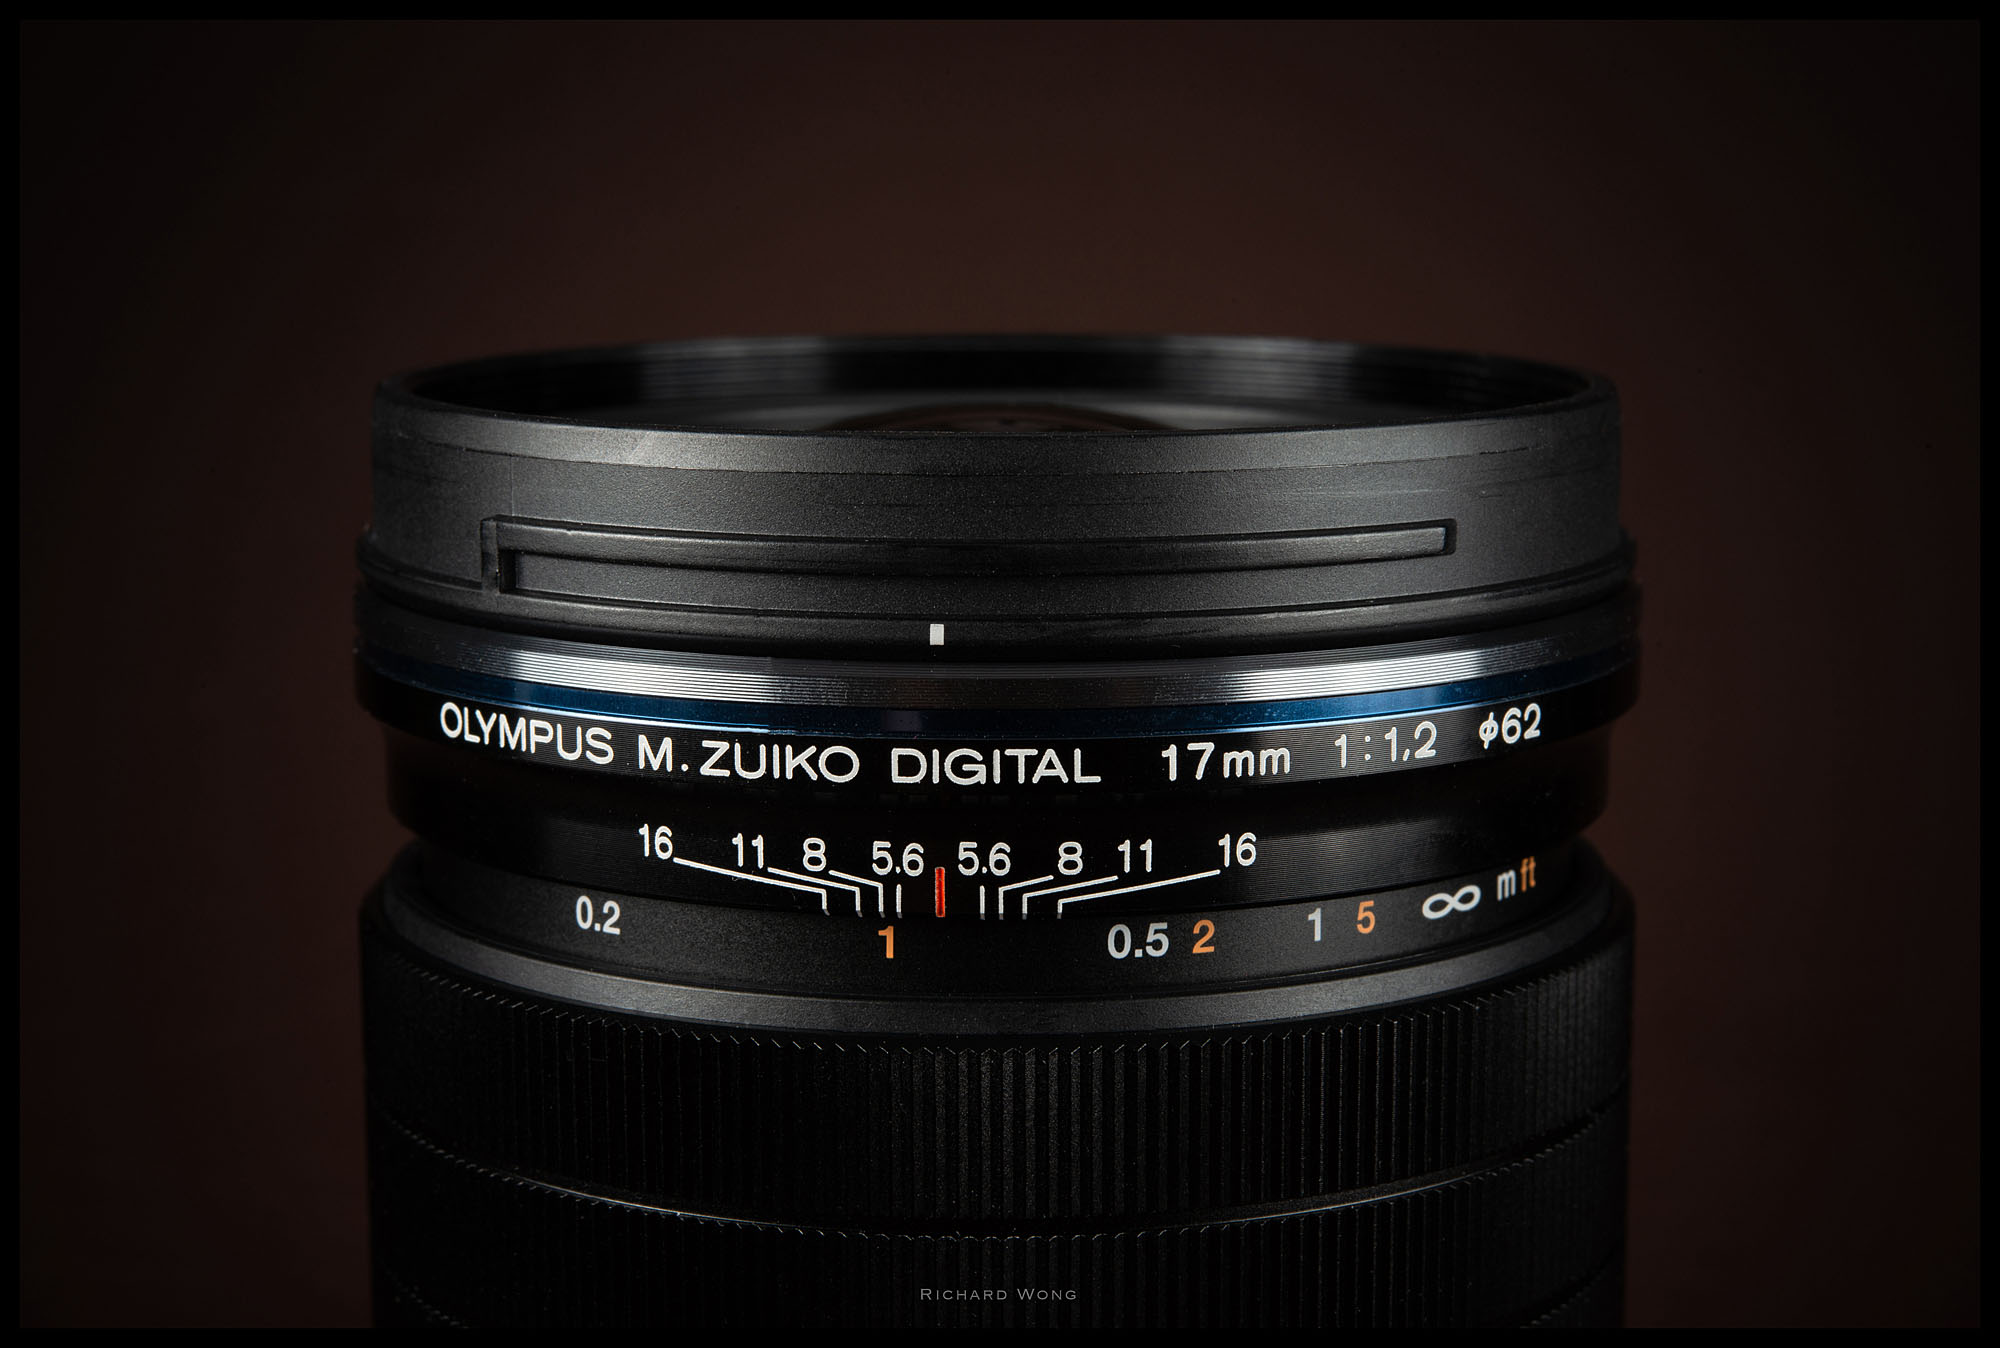
All these lenses are professional lenses from Olympus. You just need to hold one up with your hands, you can immediately feel the professional build quality. They are solid and metal!
Quite often when I grab the lens from my camera bag, I don’t even look at my camera bag and just find the lens by touching the lens and feel the shape and size of the lens. But with these three lenses in my camera bag, there is no way I can tell which is which as they are virtually same size and has same design and shape.
Of course this is not really an issue as I just have to be not lazy and look at the number printed on the lens.

There is one big advantage with the similar body size and design. It’s that all the lenses have the same size 62mm filter thread, which I’m sure it’s not a coincidence as I noticed some other Olympus Pro lenses also takes 62mm filters as well. It allows users to share their filter easily between their lenses.
The focus ring on the lens can be pulled back and turn into manual focus mode. This is very handy for people who shoot regularly in manual focus mode. I’ll talk about the focus ring and manual focus a bit more later in this review. There is also a Fn function on the lens which is programmable when used with Olympus body. All these lenses are also weather proof and allows you to shoot under tough weather condition when paired with a weather proof body such as the Olympus OME EM1 Mark II.
The 25mm and 45mm lenses comes with the same round LH-66B lens hood while the 17mm lens comes with the petal shape LH-66C lens hood. Because all the three lenses have the same filter thread size and uses the same lens hood mounting mechanism, you could mount the supplied lens hood onto another lens if you are not careful. If you mount the LH-66C onto the 25 or 45mm lens, there wouldn’t be any issue apart from the fact that the lens hood may not be as effective in protecting the lens from lens flare. If you mount the round LH-66B lens hood onto the 17mm lens, it may create a bit of extra vignetting or dark corner as the it doesn’t have the cut-out shape near the corner. But I’ve tried mount the LH-66B onto the 17mm lens and took quite a bit photo and I don’t notice any extra vignetting at all. At least when I was shooting photos of objects at medium distance.
Before I move on and talk about the image quality, I want to talk about one thing first. Probably because all these lenses are similar price, have same maximum aperture and design, quite often I heard people ask the question: I want to buy one of these f/1.2 Pro lens. Which lens has the best image quality I want to buy that lens.
You may have heard or read similar questions in real life or on photography forums before and quite frankly I have asked similar question when I first started photography.
The real answer to this question is, you shouldn’t buy a lens because it has better image quality than the other two. You should buy the lens with the focal length that is most useful to you. And this is a question you can only answer yourself. For myself, I would probably pick the 17mm because I love the 35mm equivalent focal length more than anything else. But it’s just me so you may like something else instead. And there is big difference between all these three focal length. To show you the difference, I took the following three photos with the three lenses from the exact same position.
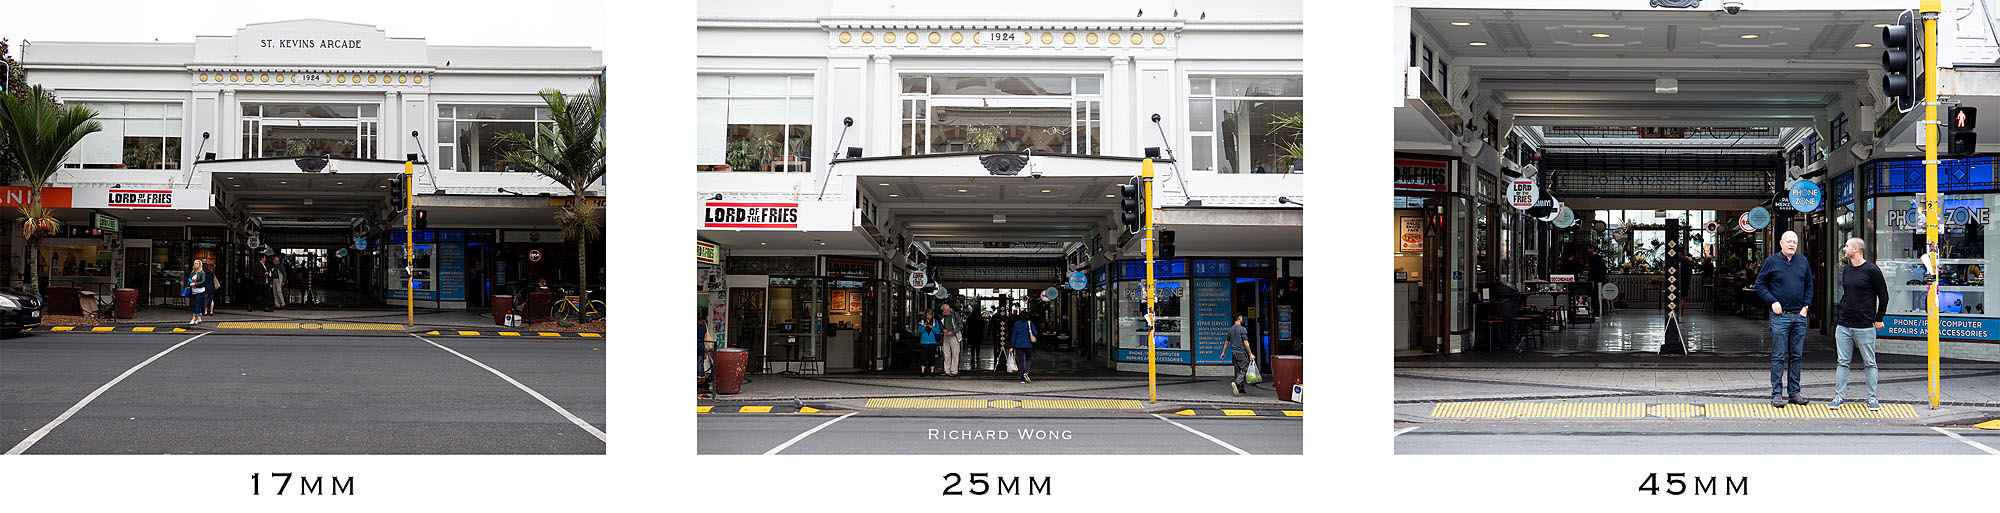
Photos took from same position using the 17mm, 25mm and 45mm lens
As you can see, there is a big difference in terms of view angle. Now you may say, okay the 17mm is a bit wider, I can just move a bit closer and capture the same photo as the 25mm and 45mm lens. “the best zoom lens is your legs” isn’t it?
Not really, that’s not quite the same. While walk closer may give you similar photo as if you took using a longer lens, the composition, the perspective, the foreground and background object would look very different.
To show you that, I took the following three photos. Again with the three lenses, but instead of shooting from the same spot, I move a bit so the Owl remain approximately the same size in the photo.
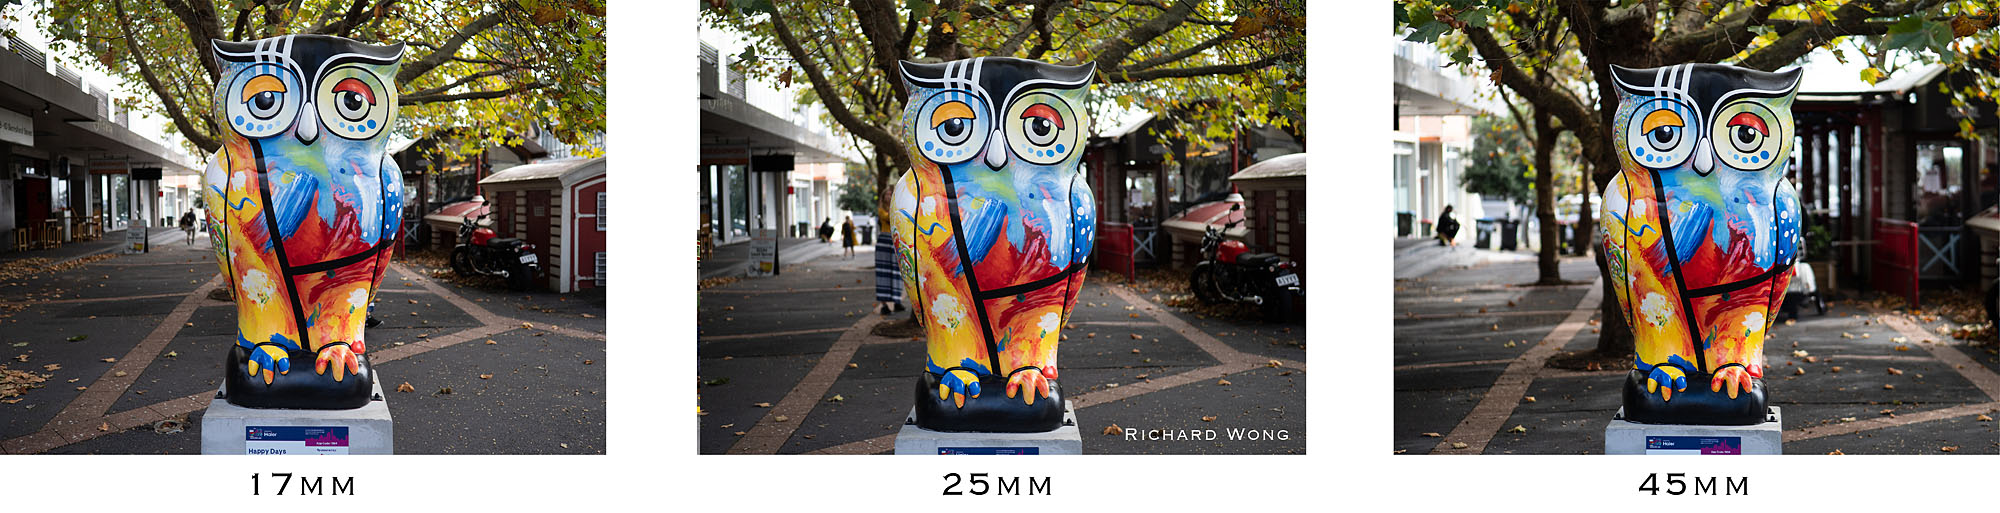
Photos took from different position (so called zoom by leg) to make the main object same size in photo using the 17mm, 25mm and 45mm lens
As you can see, while the Owl is the same size in the three photos, the three photos delivers a very different look. The background in the 17mm photo is much wider, you can see a lot more in the photo and you feel like you are standing right there in front of the Owl and looking at it from close distance. While the photo took using the 45mm lens give you the feeling that you are looking through a telescope. The background has much narrow view angle and there is much less perspective distortion in that photo. If this is a portrait, you’ll also be able to see the face would look dramatically different between the three photos as well.
But anyway, this is just a quick example to show you that you should choose the lens by the focal length first instead of image quality. Now let’s move on and start talk about the image quality.
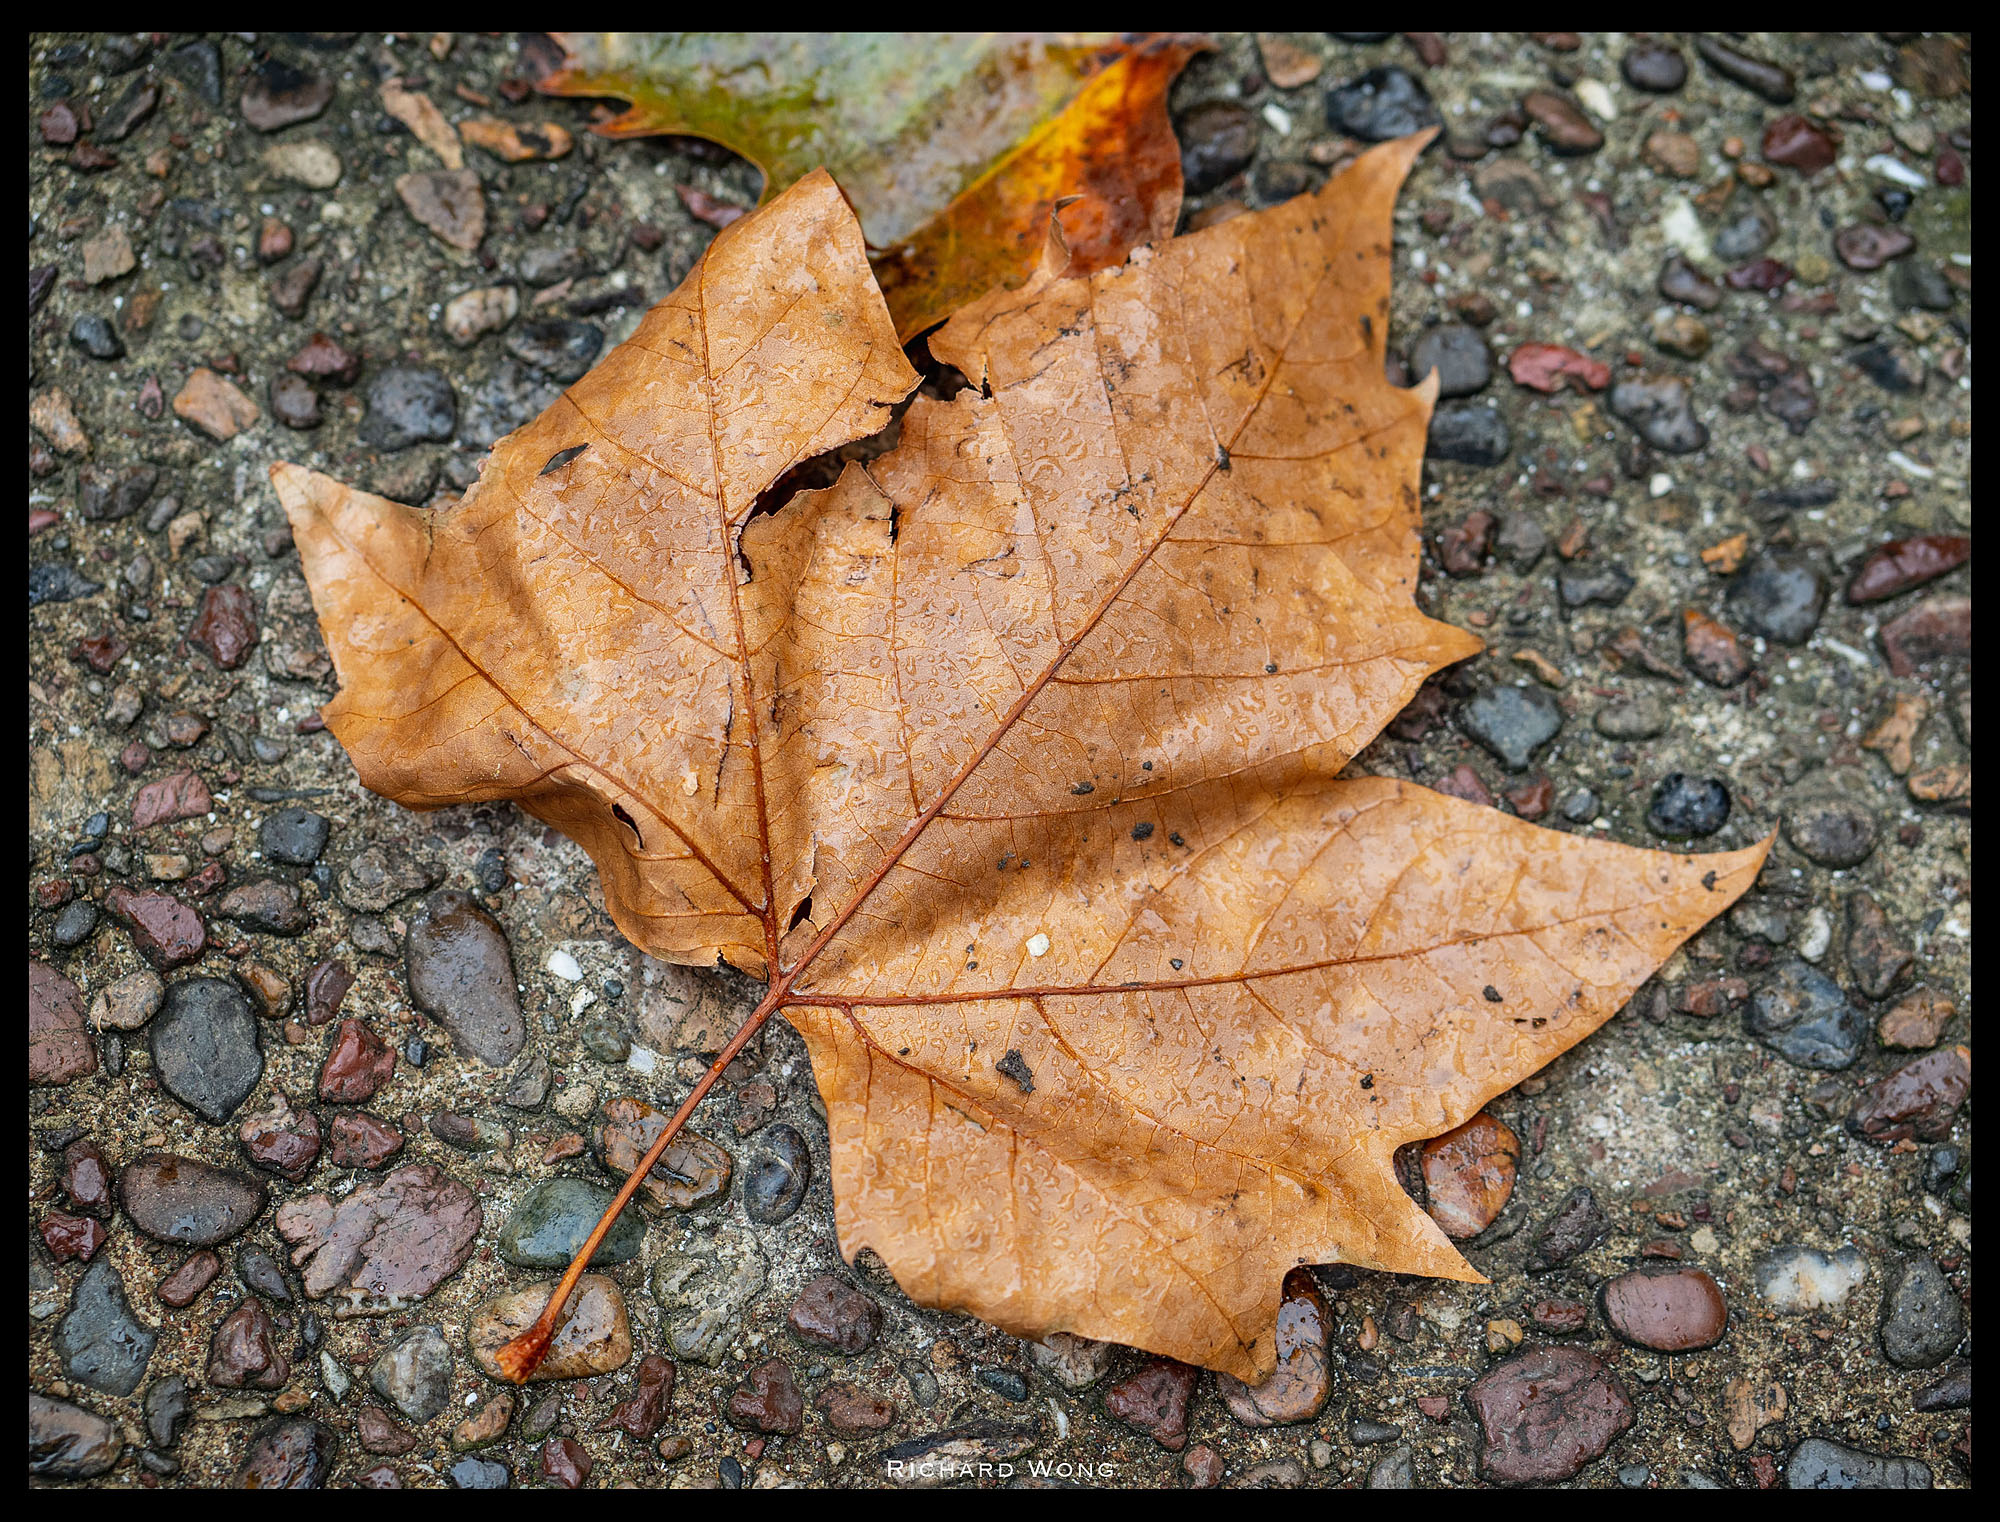
Sharpness
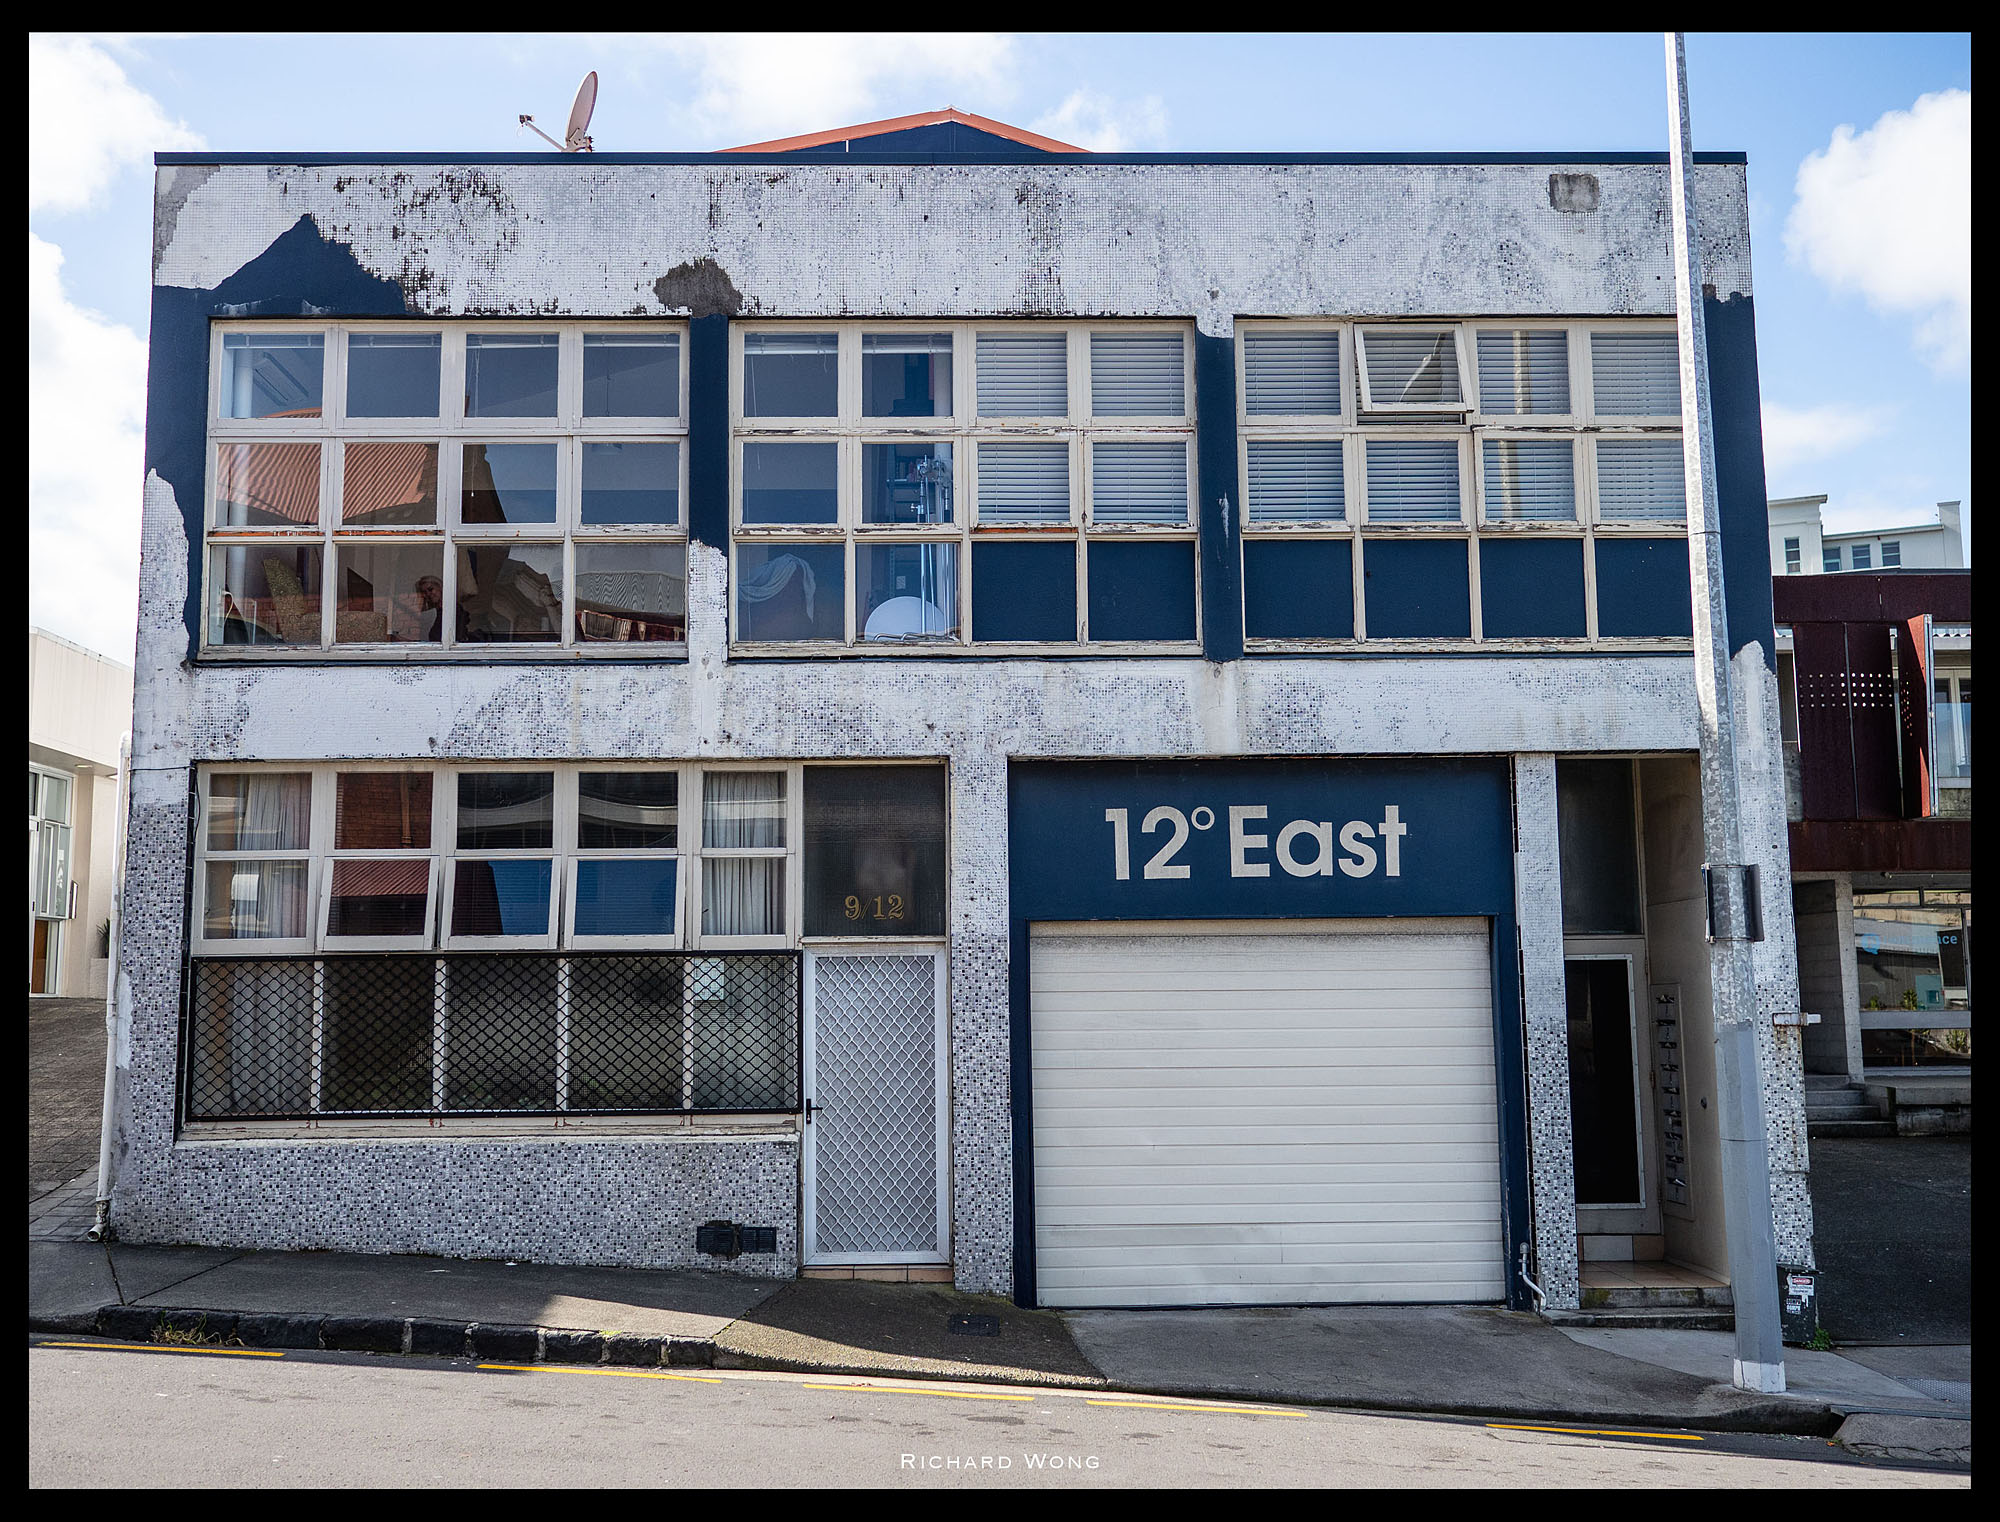
All three lenses delivers excellent sharpness even at maximum aperture. Let me show you one of the photo I took using the 17mm Pro lens at f/1.2.
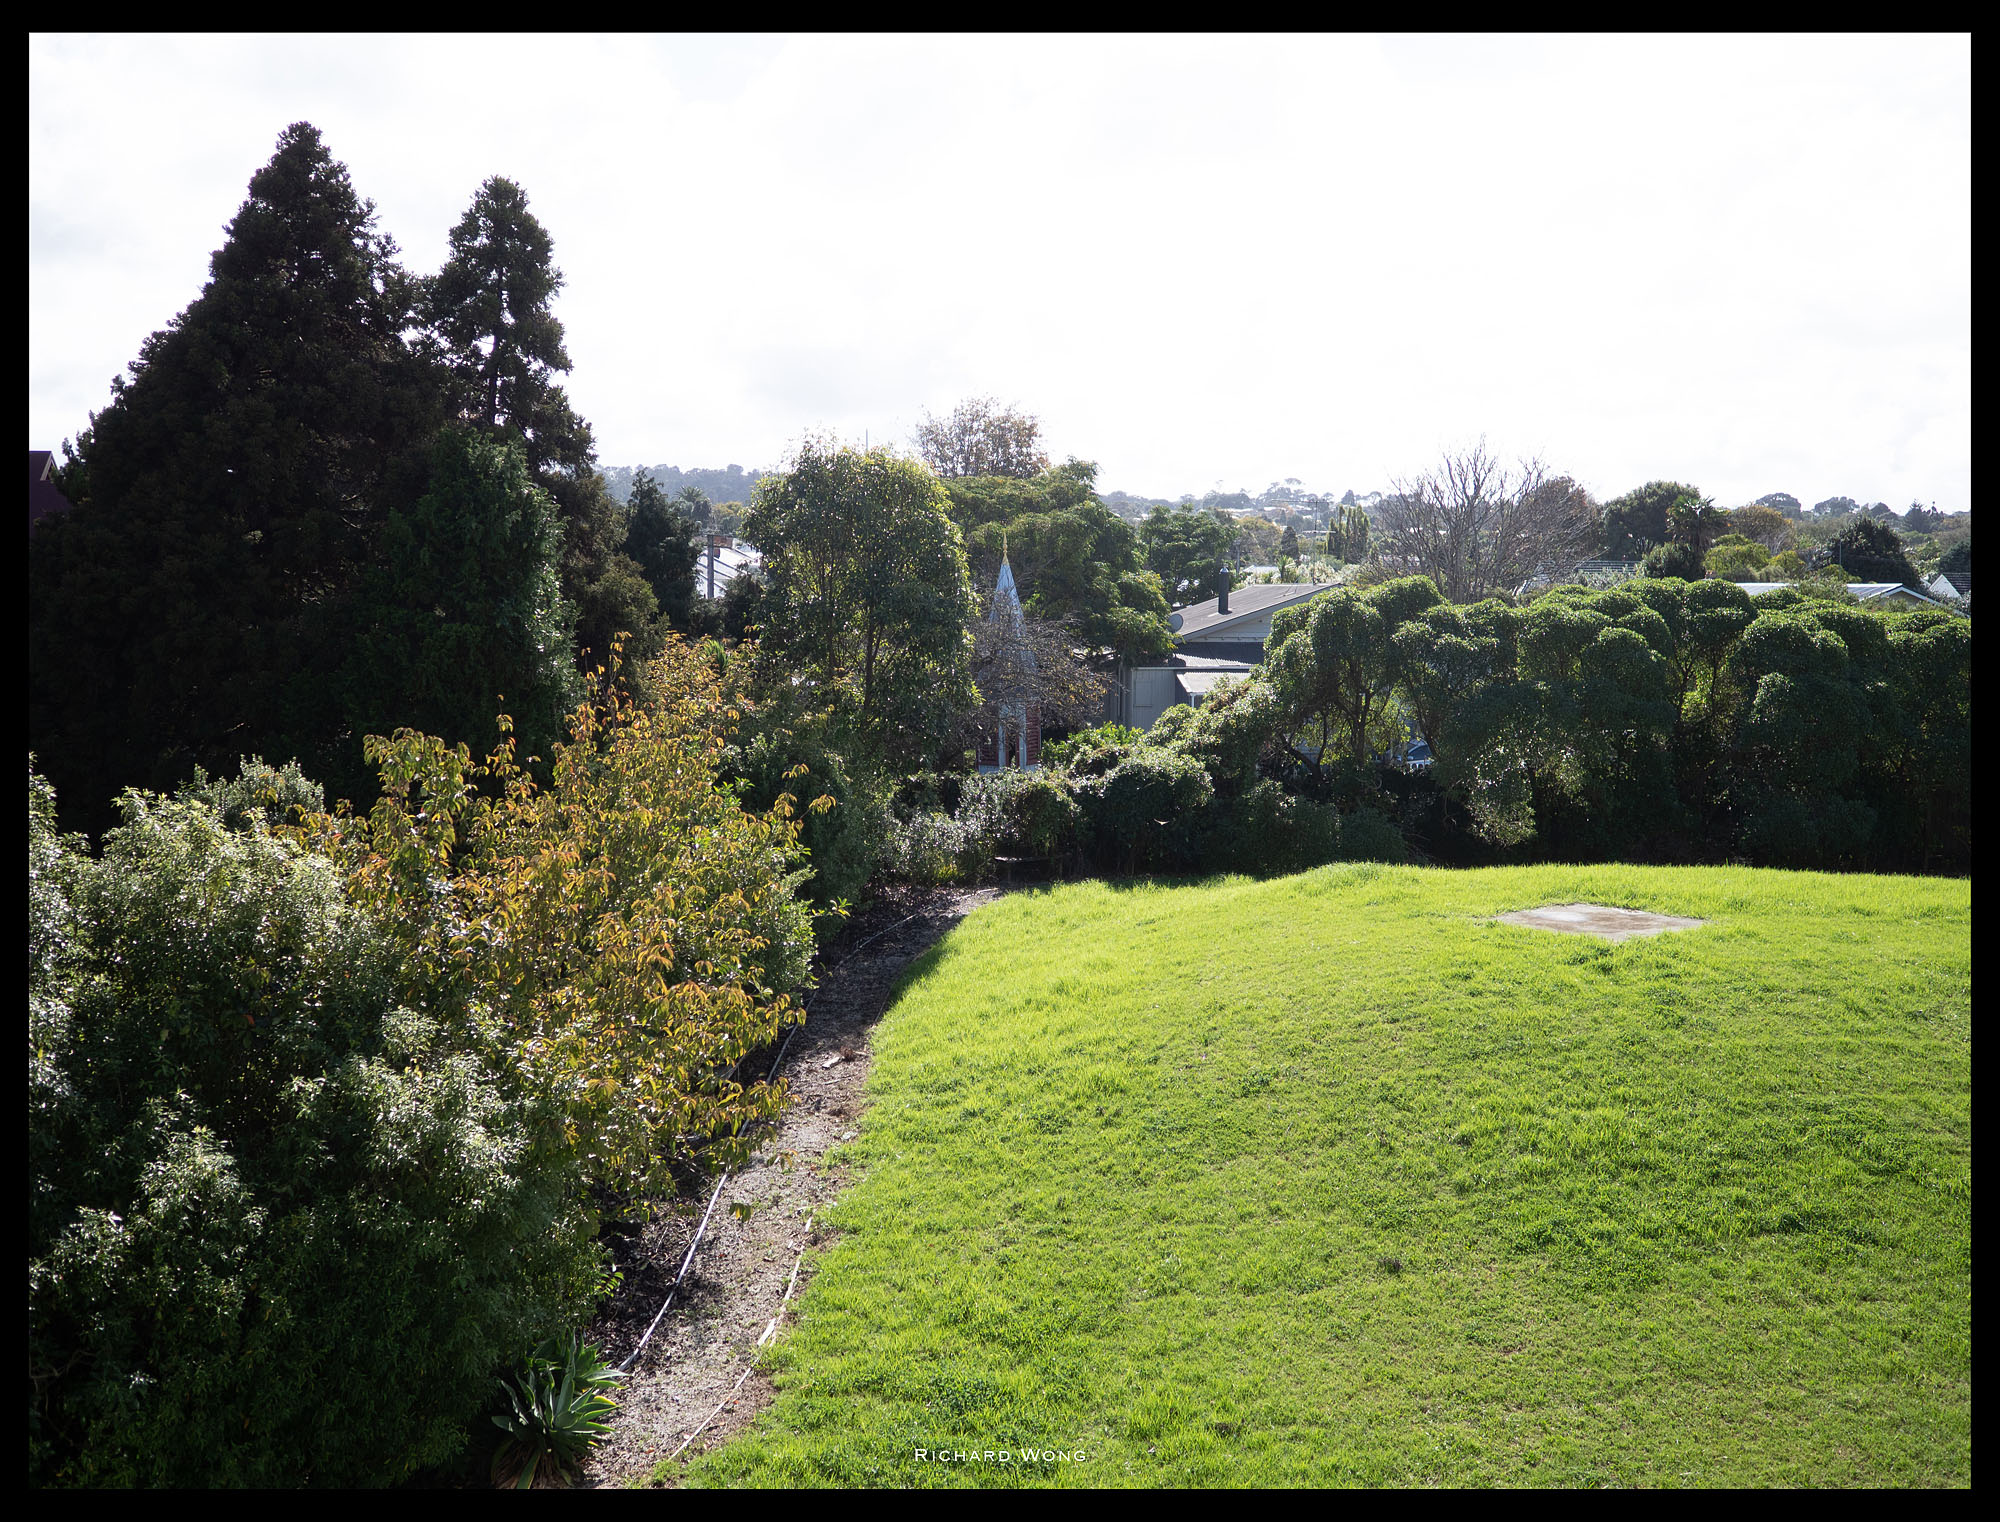
Olympus EM1 Mk2 | Olympus 17mm f/1.2 Pro | ISO 200 f/1.2 1/8000s
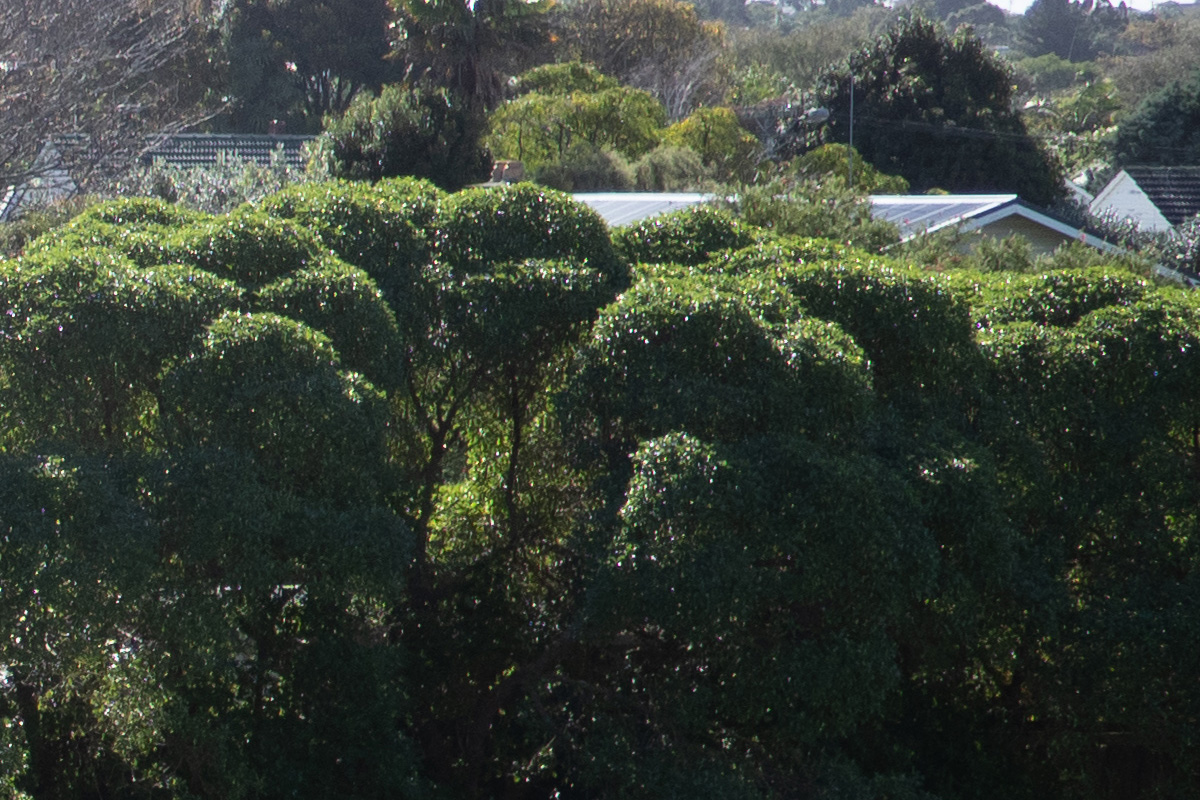
If we look at the centre, you can see the centre sharpness is excellent at maximum aperture. While the micro contrast could be slightly better and it does when I stop down a little bit, there really isn’t much I would complain about at f/1.2.

100% Centre Crop
Move on to the edges, the sharpness is still pretty decent at f/1.2 and I would be happy to shoot at f/1.2 as long as I have enough DOF (which is usually not an issue with micro four thirds) to cover my main subject.
100% Edge Crop
The 25mm and 45mm has very similar image sharpness when shooting at maximum aperture. If you stop down to f/2-f/2.8, then the image would become really really sharp from centre to the corners.
Chromatic Aberration
Chromatic Aberration is quite well controlled. Even when shooting at f/1.2, there is only a small amount of colour fringing, mostly near the edge of the photo. Stop down to f/2.8 then there is virtually no visible colour fringing in the photos.

Olympus EM1 Mk2 | Olympus 25mm f/1.2 Pro | ISO 125 f/3.5 1/8000s
Vignetting
Just like most fast prime lenses, these Olympus Pro lenses have quite a bit of vignetting when you are shooting at maximum aperture. Even when you shop down to f/2 there is still quite a bit of vignetting. You’ll need to stop down to f/2.8 to get rid of most vignetting.
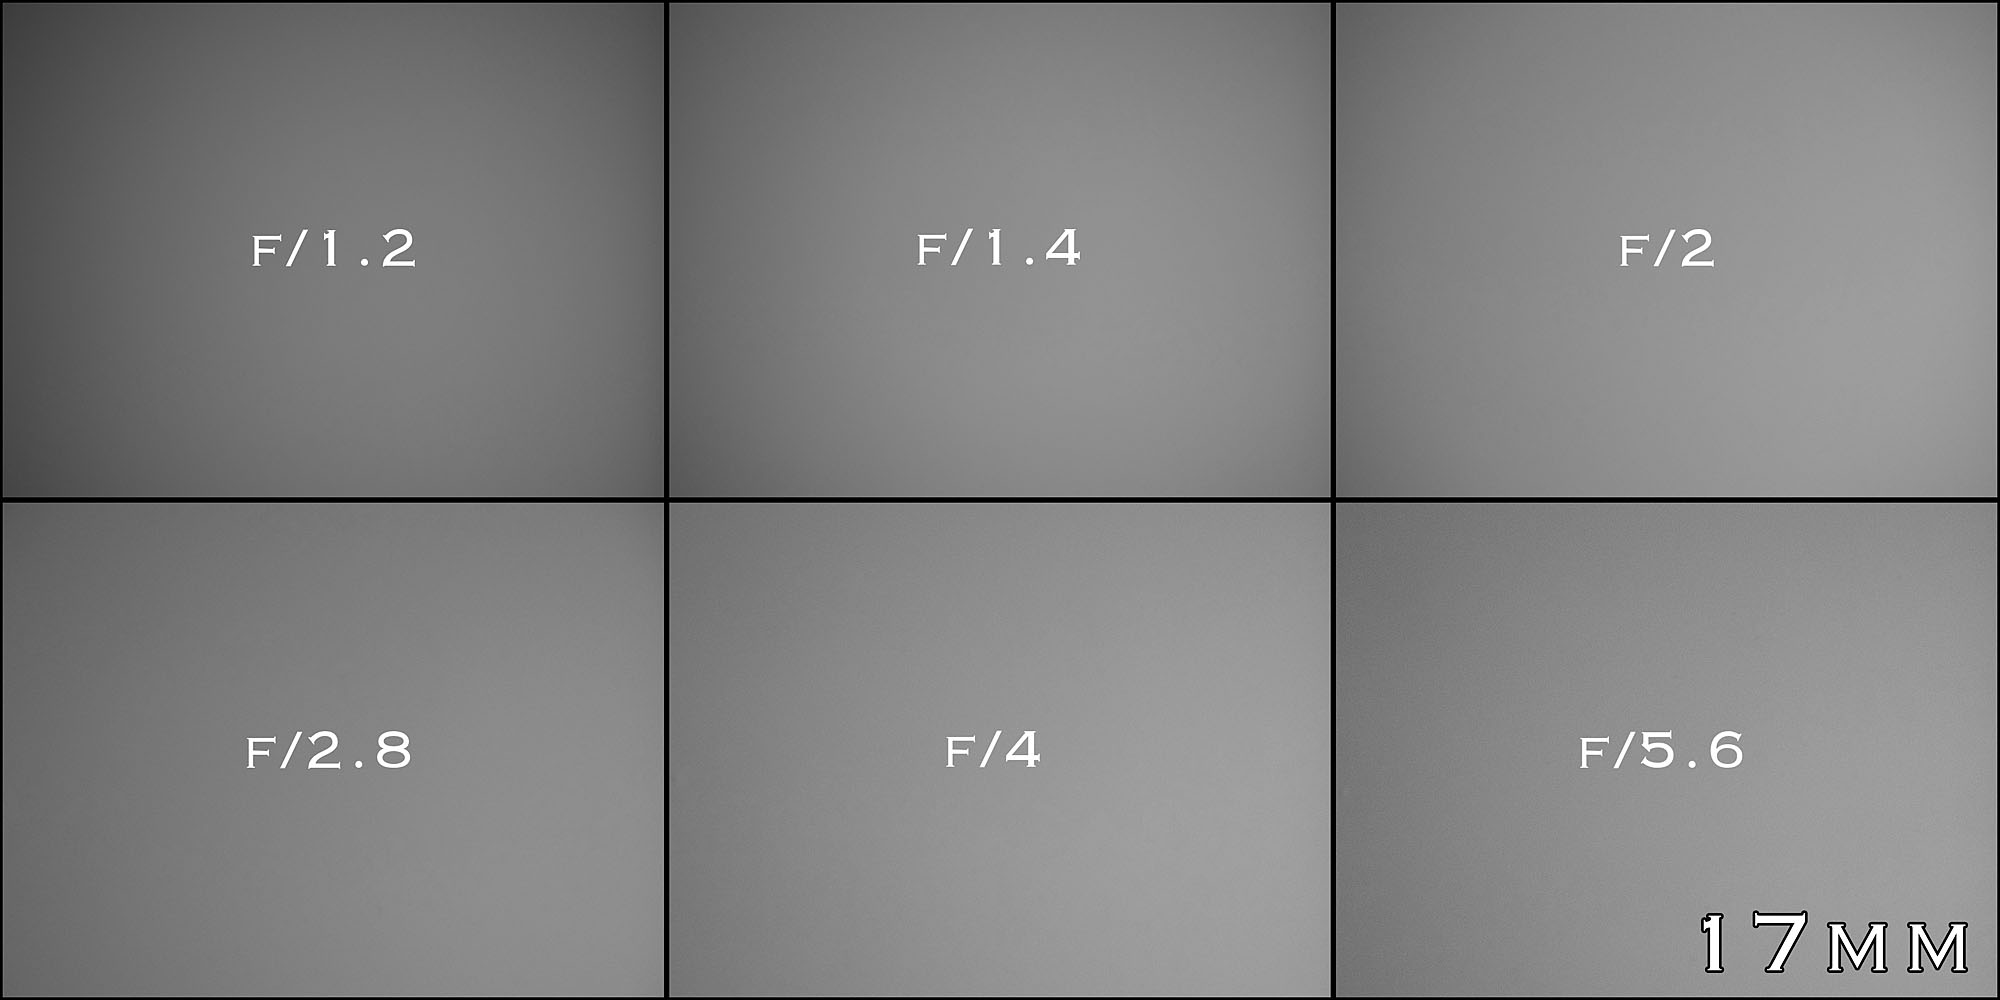
Vignetting – Olympus 17mm f/1.2 Pro
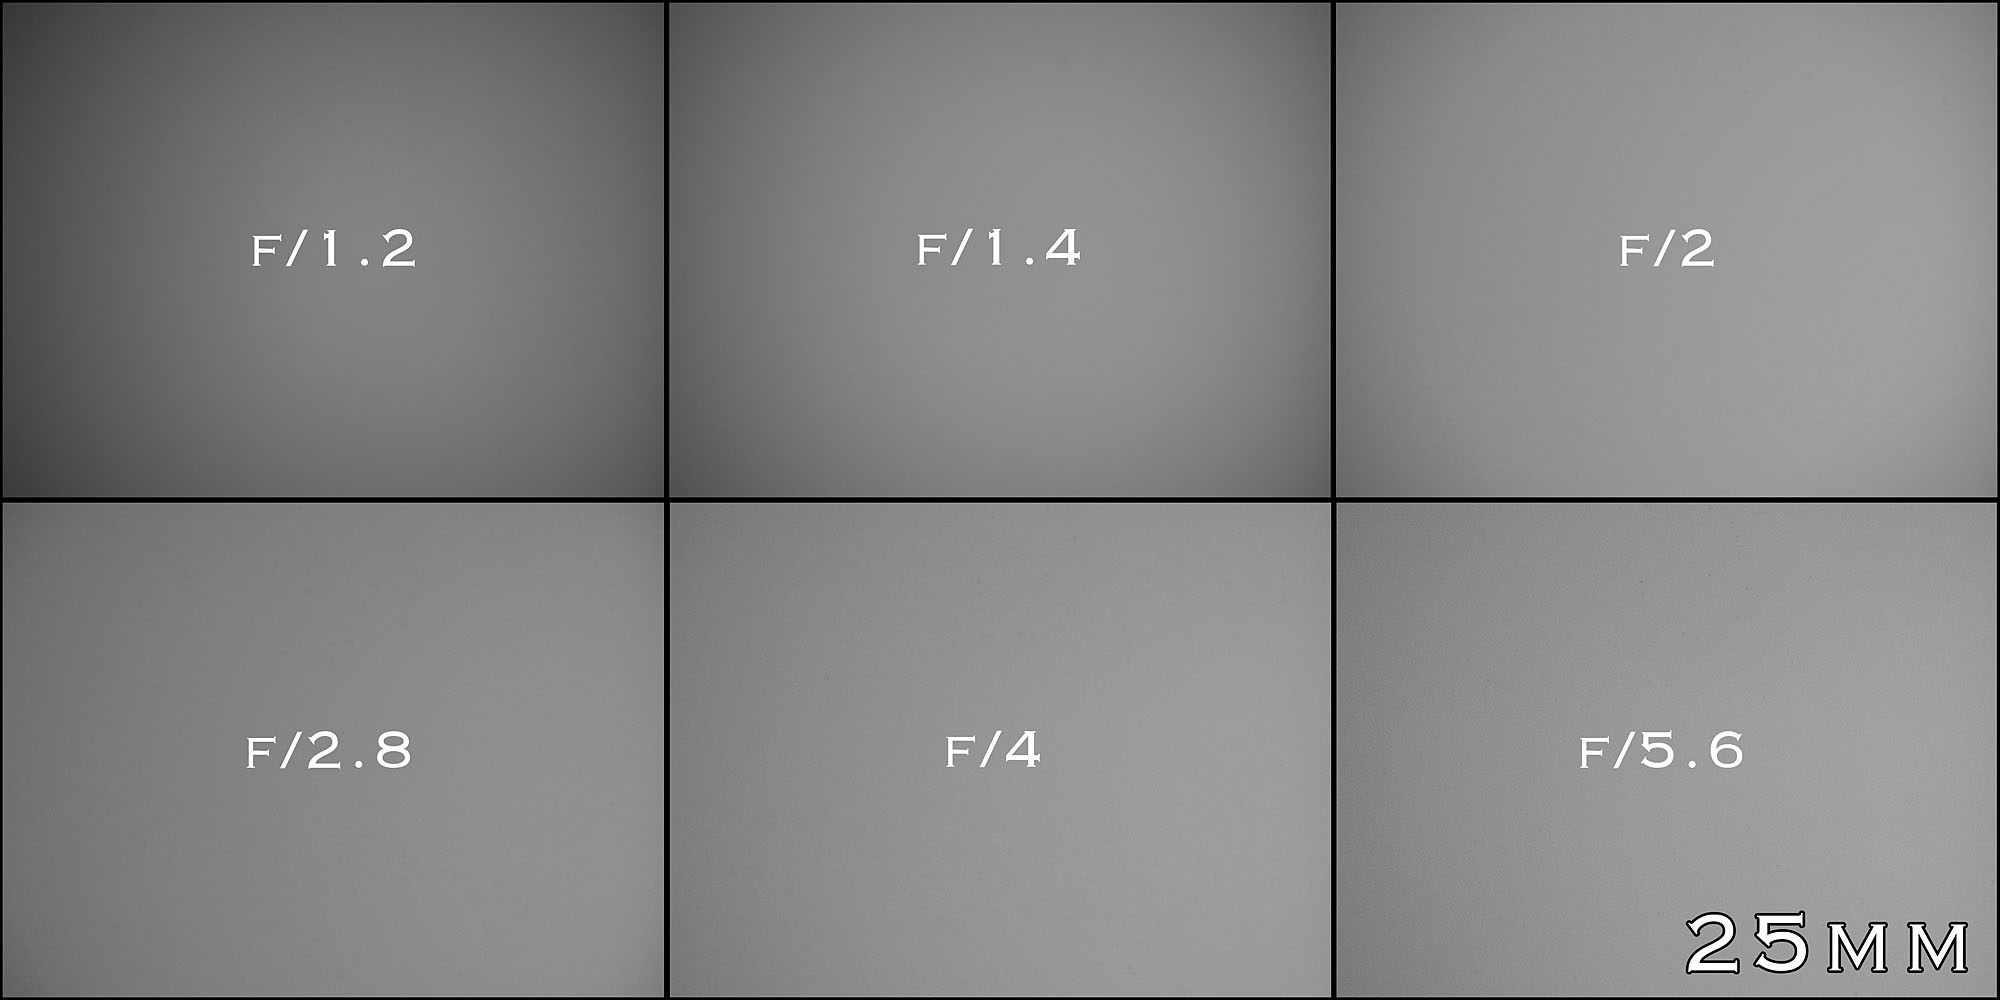
Vignetting – Olympus 25mm f/1.2 Pro
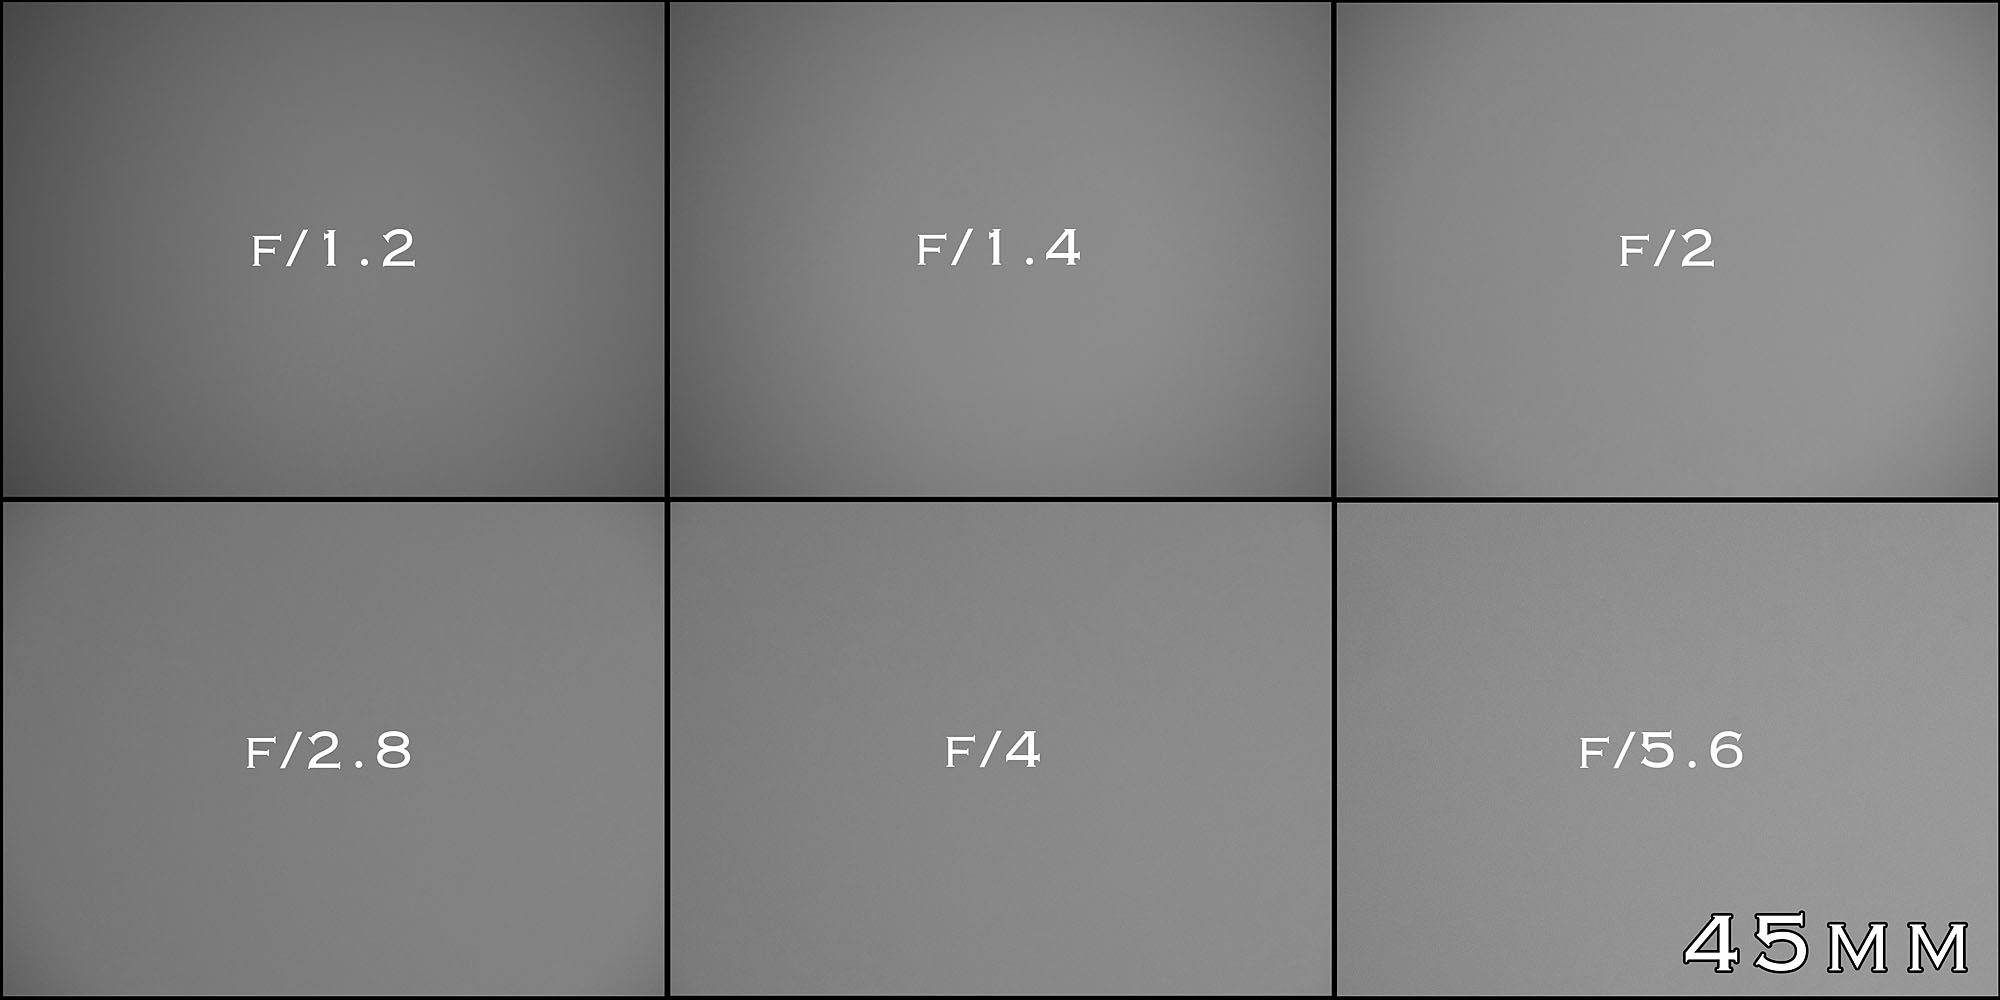
Vignetting – Olympus 45mm f/1.2 Pro
Among the three lenses, the 25mm f/1.2 Pro lens appears to have slightly more vignetting than the other two lenses while the 17mm f/1.2 Pro seems to have the least amount of vignetting.
Distortion
There isn’t too much distortion in the photos captured by all these three lenses. Even the widest 17mm lens has very small amount amount of distortion when shooting regular grid pattern objects so in real life distortion shouldn’t be a problem at all.
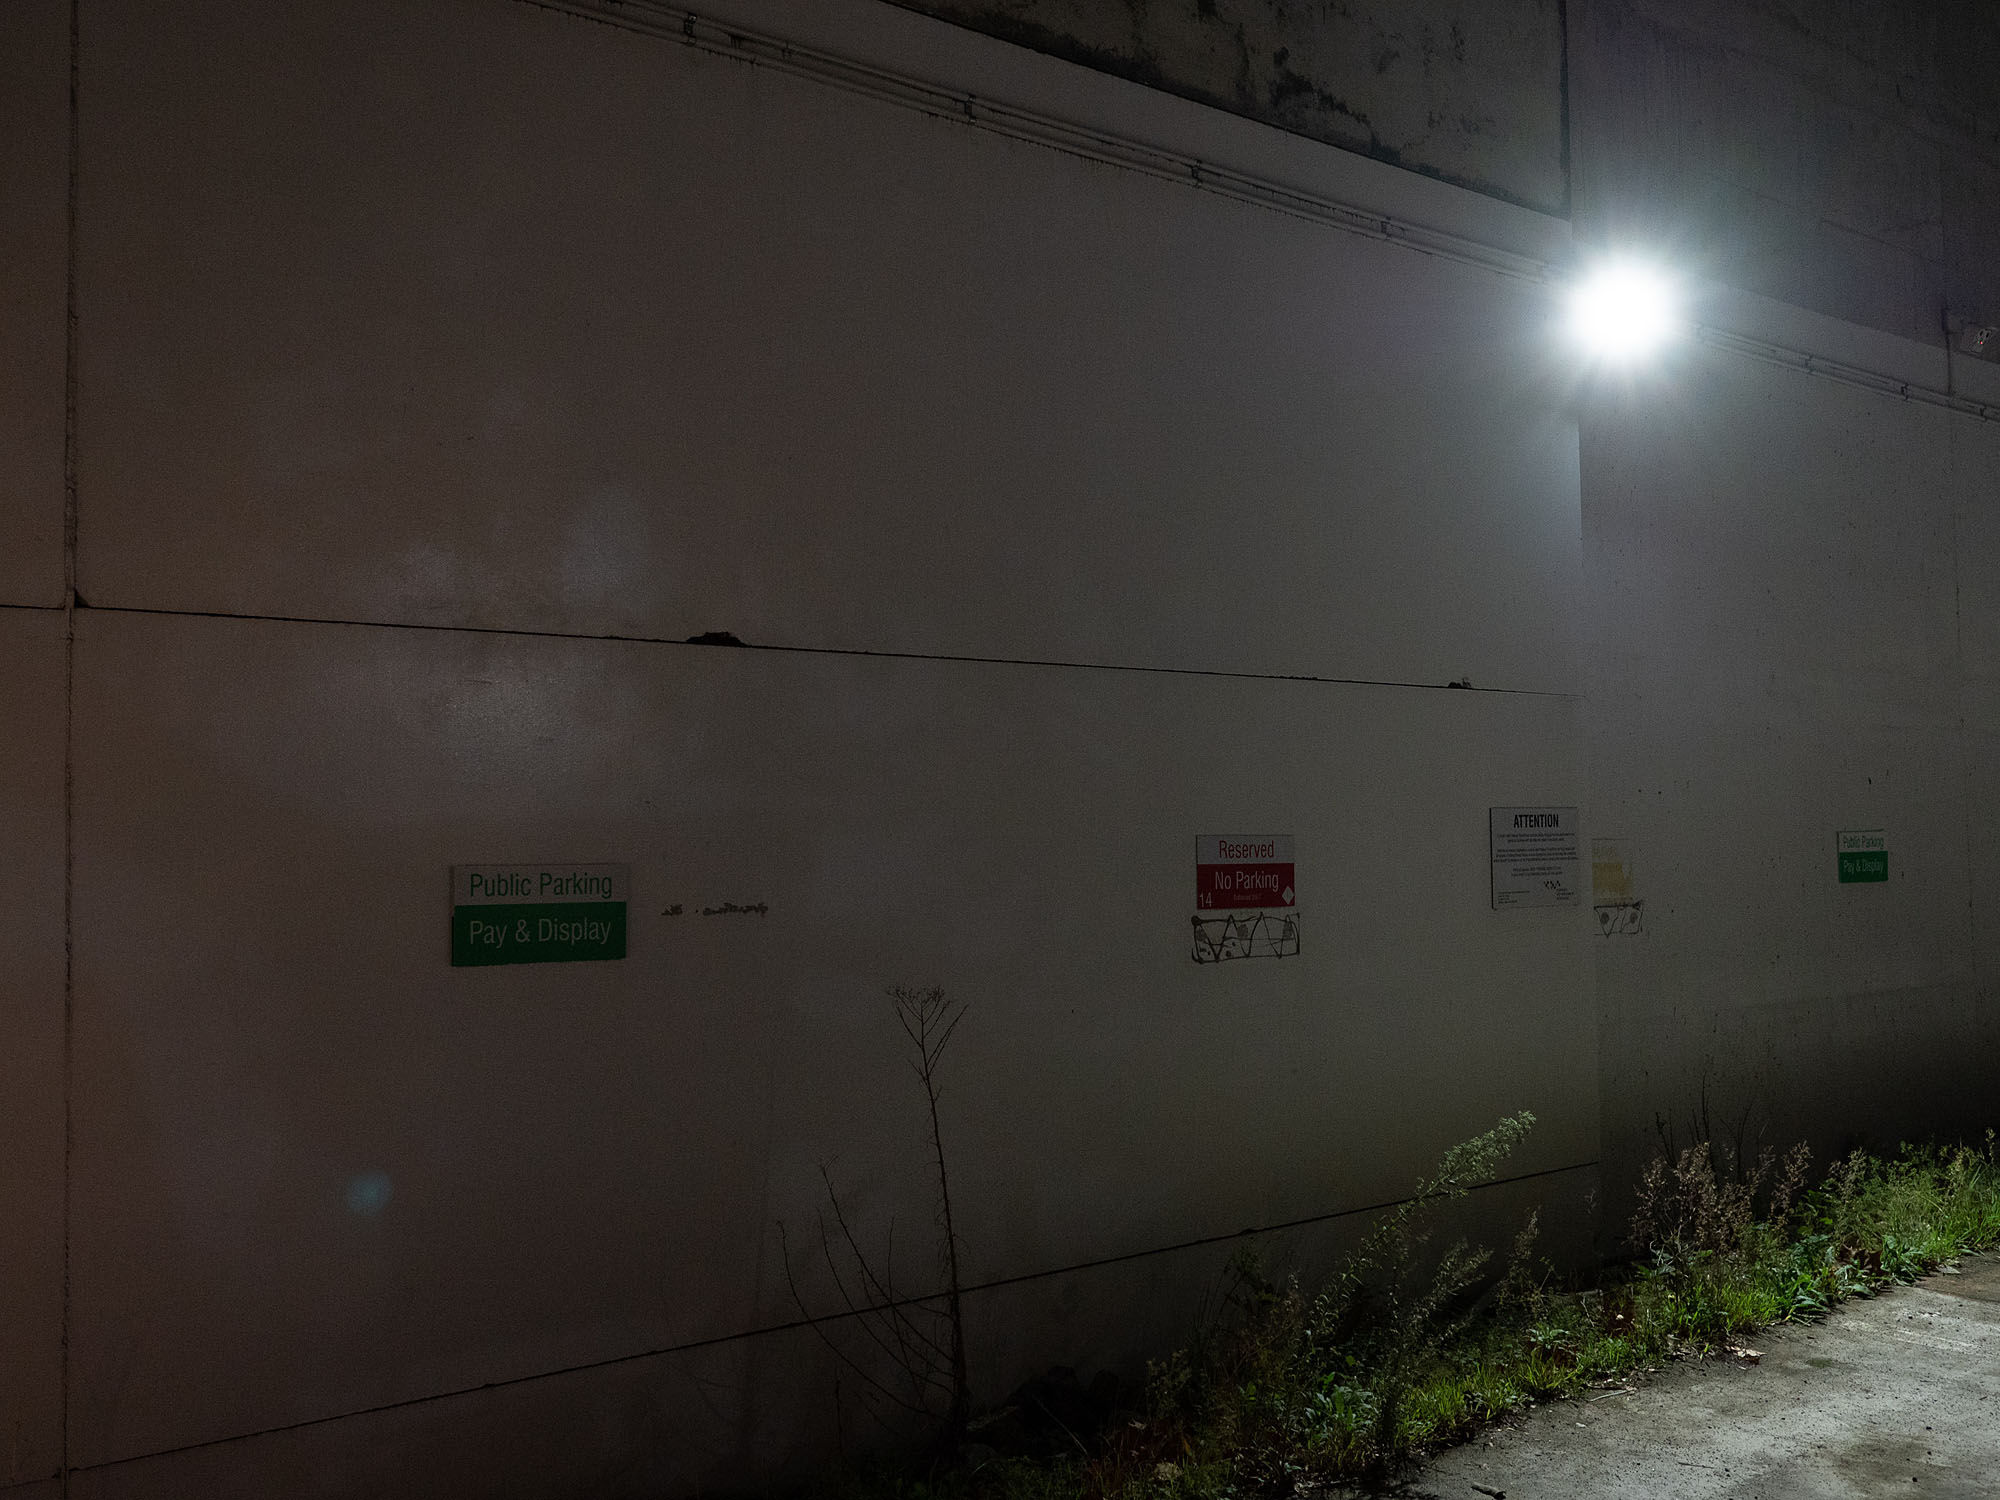
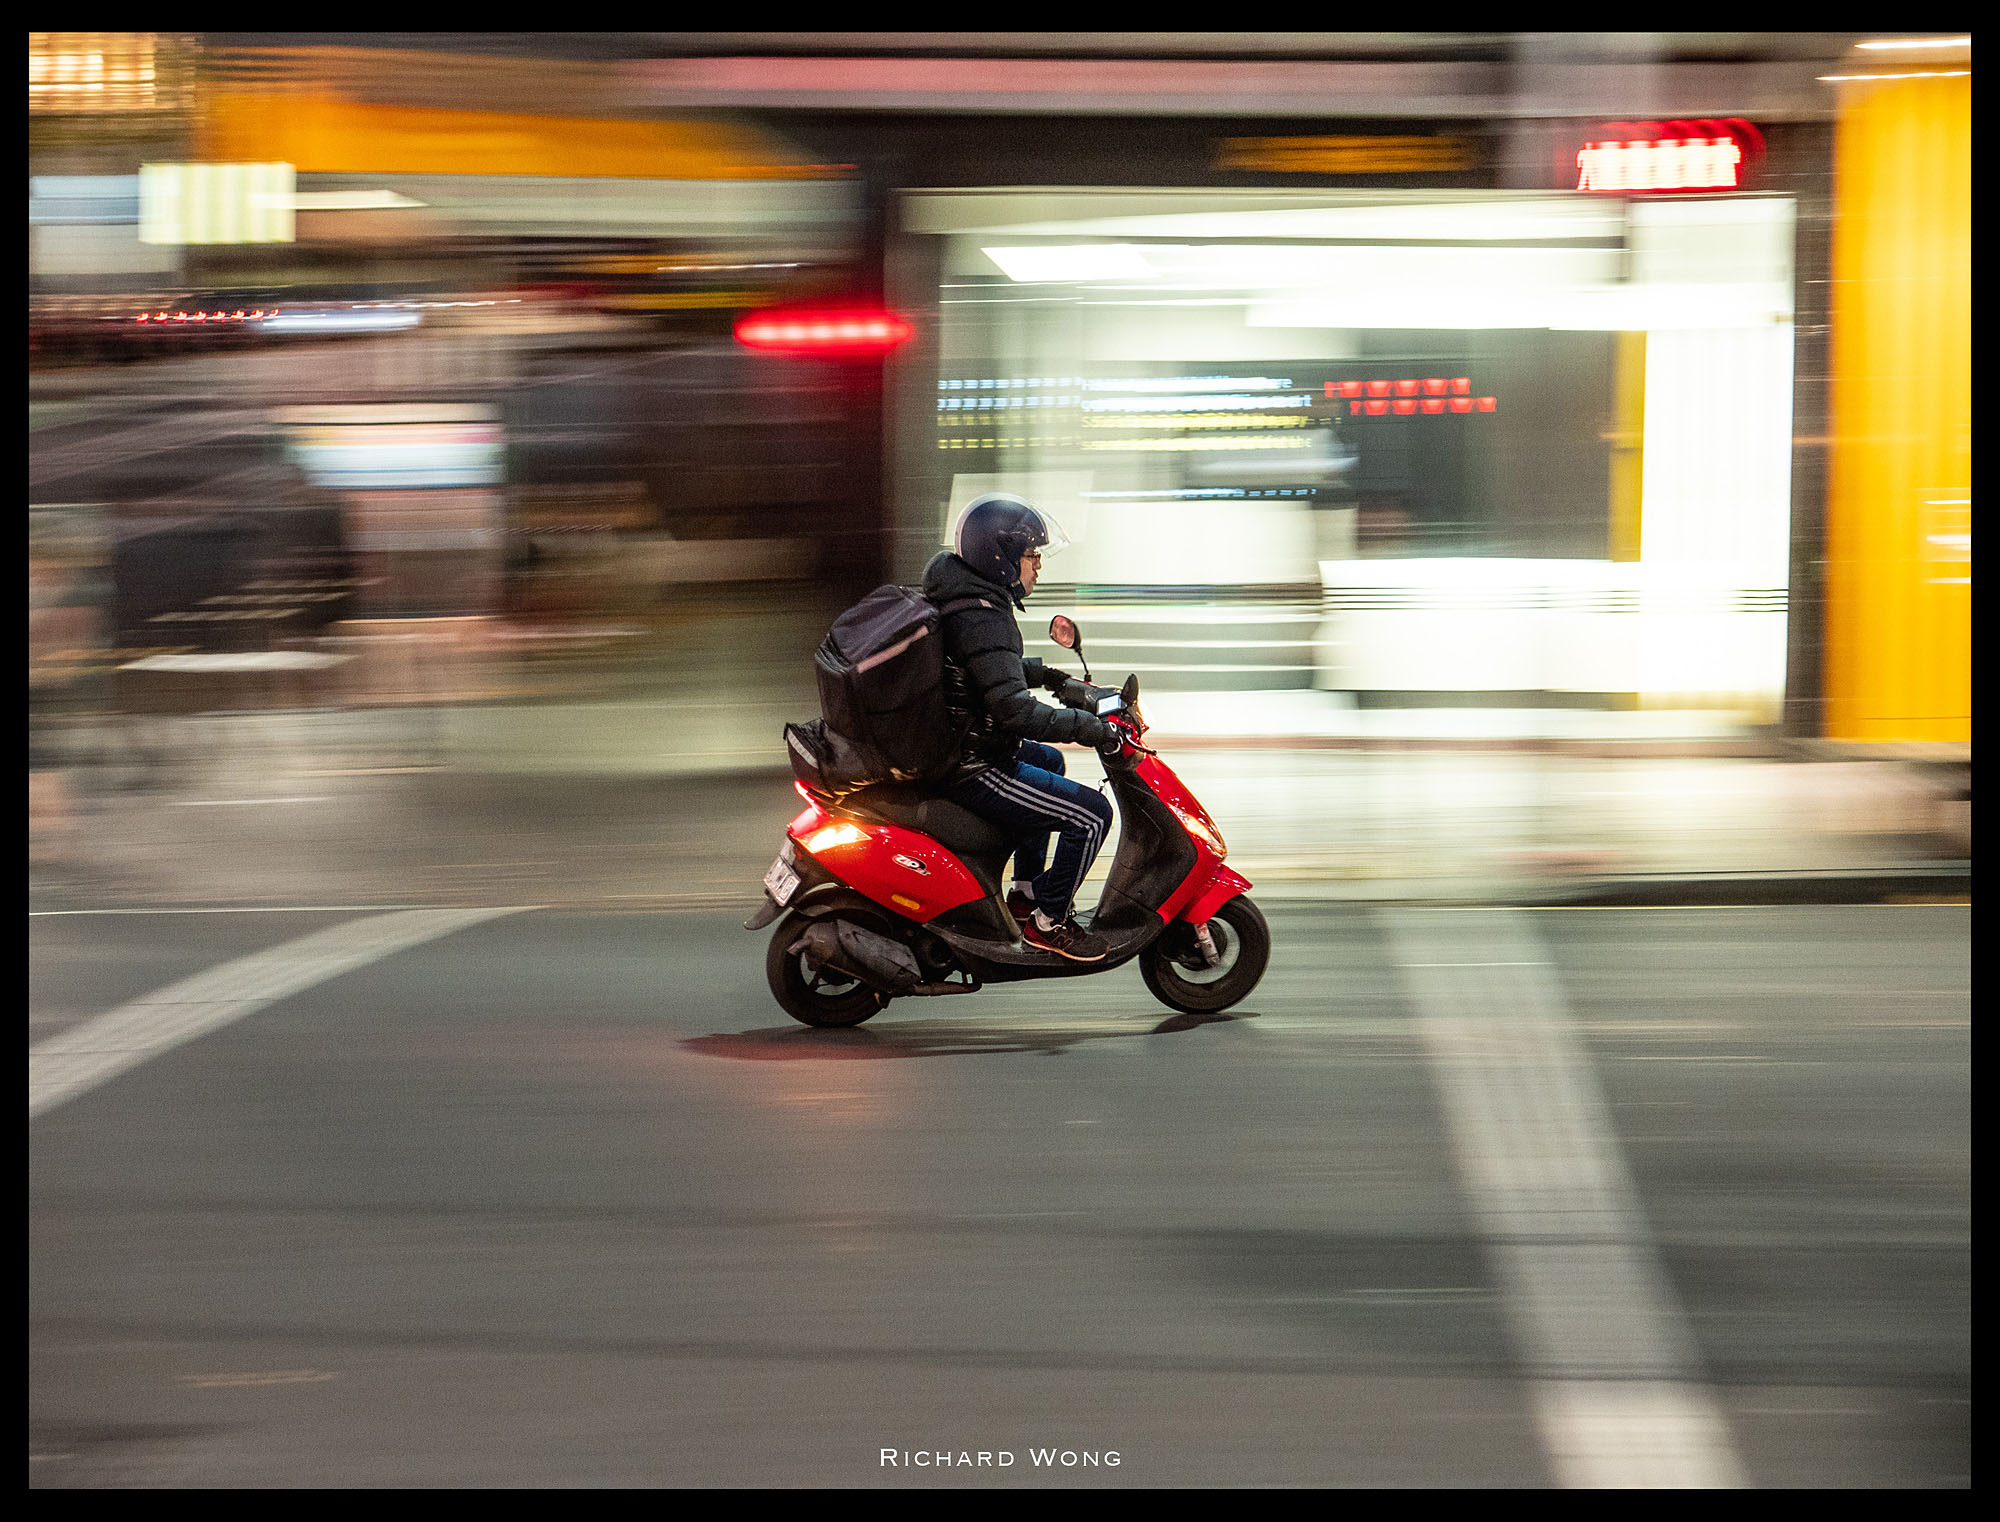
Lens Flare
Lens flare is very well controlled with all these three lenses. I’ve took many photos where the camera was shooting into bright light source to see how the lens flare performance is. And my conclusion is that if you are shooting at maximum or near maximum aperture, then there is very minimal amount of lens flare in the photo. If you shoot at a smaller aperture, then there would be more lens flare but this is pretty much expected.
Lens flare – Olympus 45mm f/1.2 Pro – ISO 1600 f/2 1/60s

Lens flare – Olympus 25mm f/1.2 Pro – ISO 2500 f/2 1/60s
Lens flare – Olympus 45mm f/1.2 Pro – ISO 2500 f/2 1/100s
Among these three lenses, the 45mm f/1.2 Pro seems to create more noticeable lens flare than the 17mm and 24mm lenses but its still within very acceptable level.
Bokeh
Bokeh from these three lenses are all pretty smooth and round when you are shooting at maximum aperture. The 17mm and 25mm’s bokeh remains round even when you stop down to f/5.6. But with the 45mm lens, the bokeh starts turn into polygon shape when you are shooting at f/2.8 or smaller aperture.
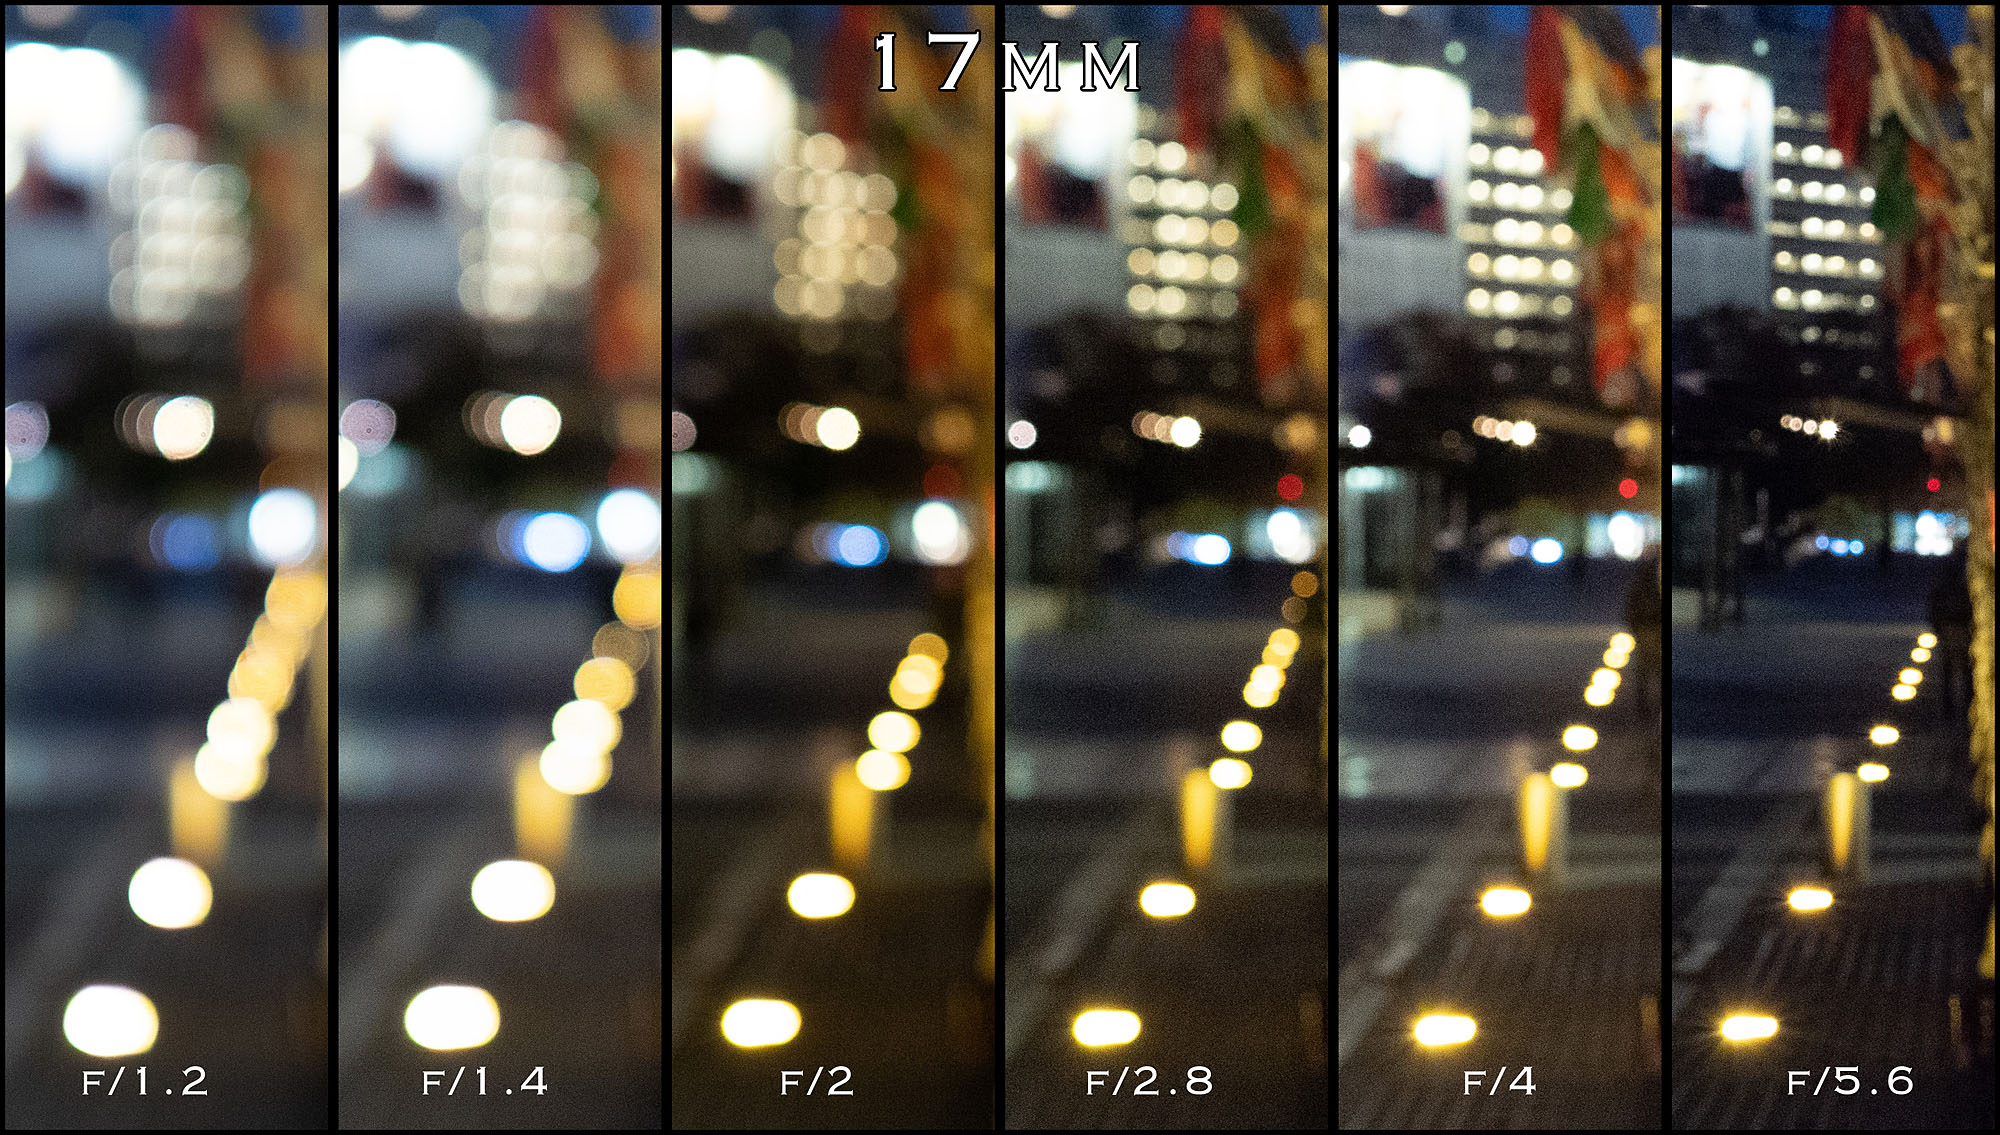
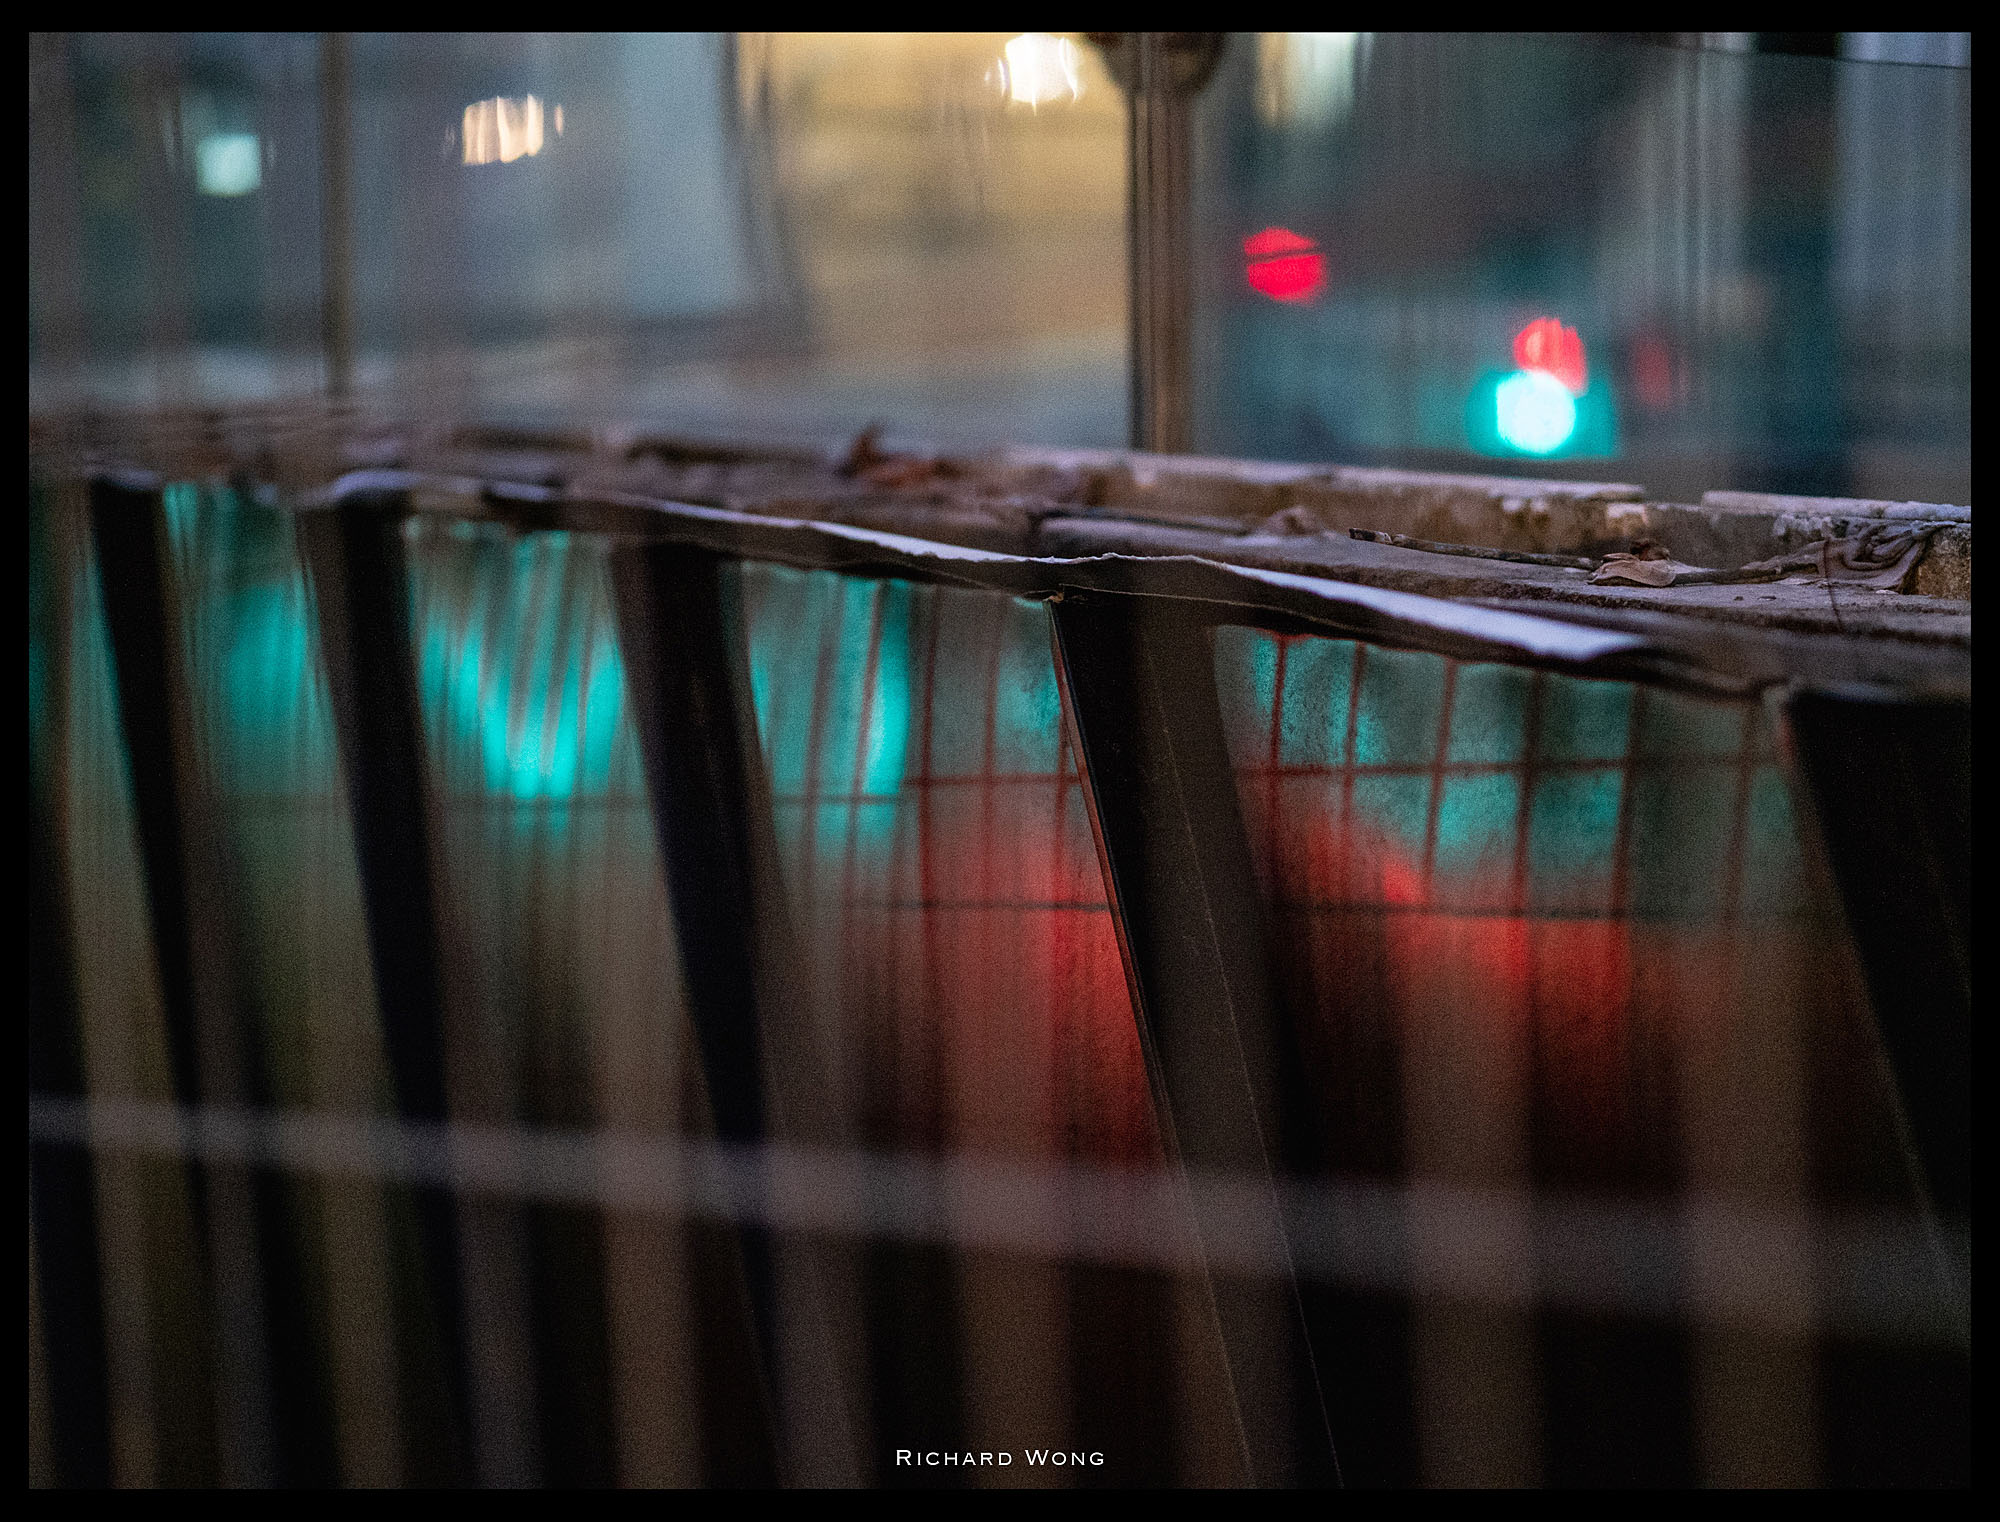
Bokeh – Olympus 17mm f/1.2 Pro
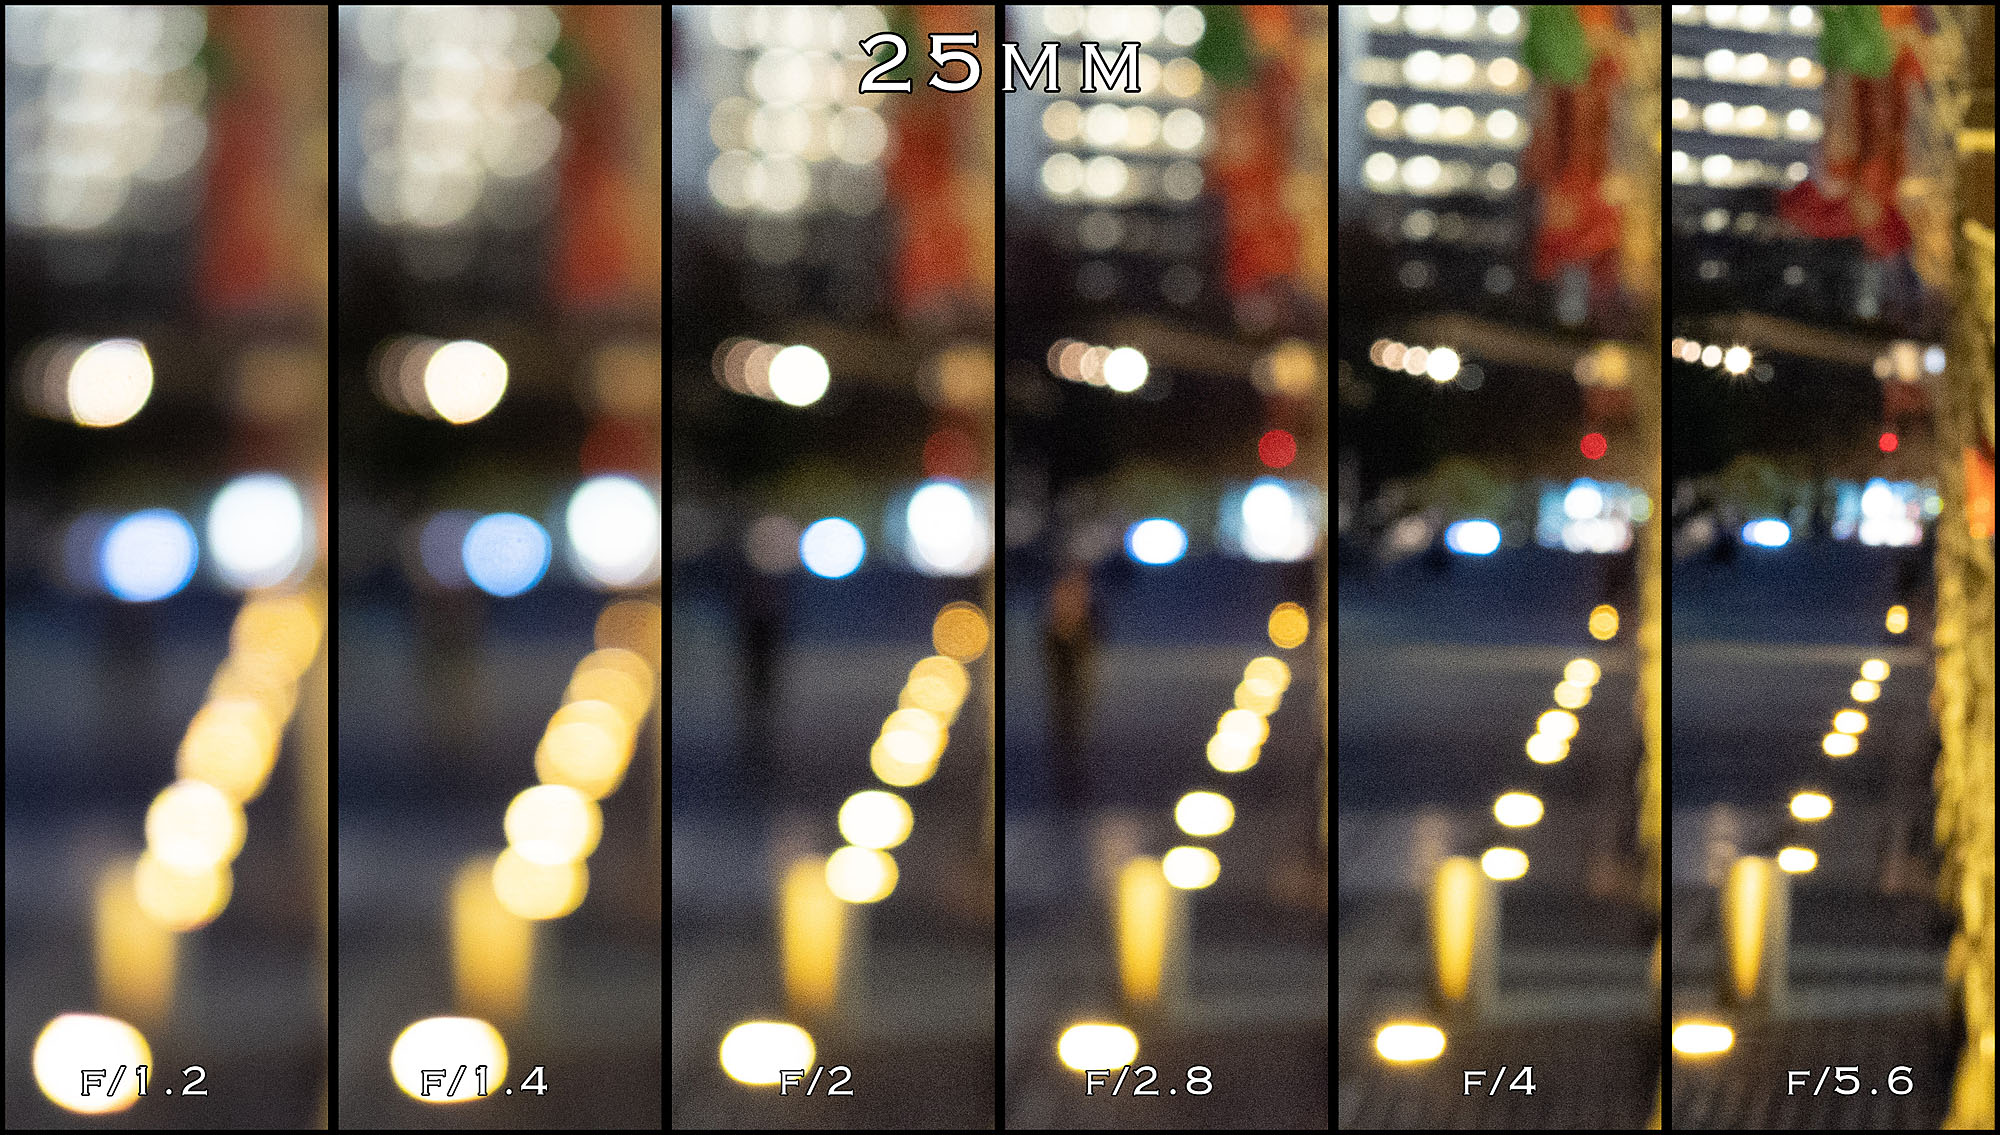
Bokeh – Olympus 25mm f/1.2 Pro
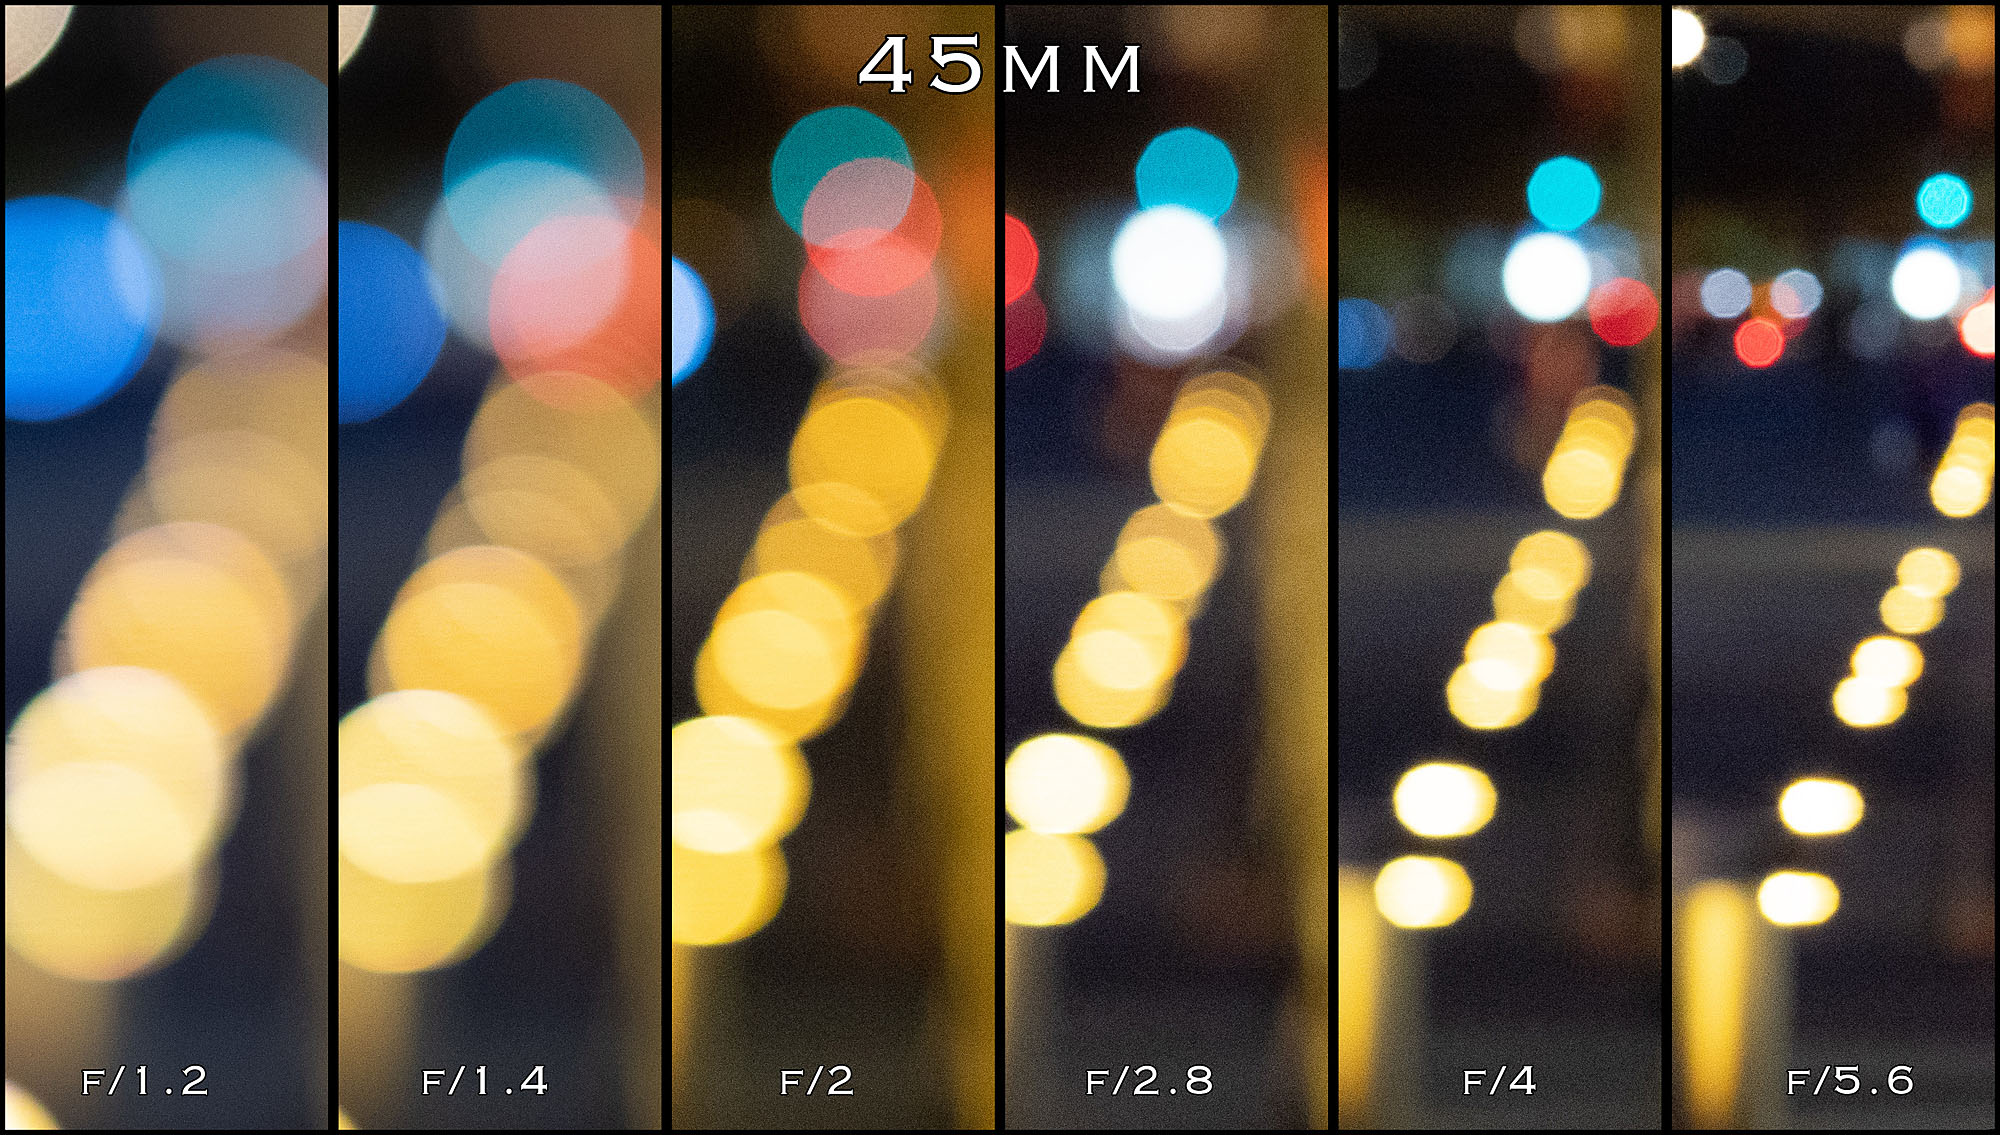
Bokeh – Olympus 45mm f/1.2 Pro
However, with the 45mm lens, when you are shooting at f/1.2, the bokeh is just beautiful! The transition from the edge of the bokeh to the background is very smooth and pleasant with virtually no highlight/halo at the edges. With all the different lenses I’ve used recently, I think the 45mm f/1.2 Pro produce the smoothest and beautiful bokeh when shooting at maximum aperture.

Olympus EM1 Mk2 | Olympus 45mm f/1.2 Pro | ISO 2000 f/1.2 1/100s
Autofocus
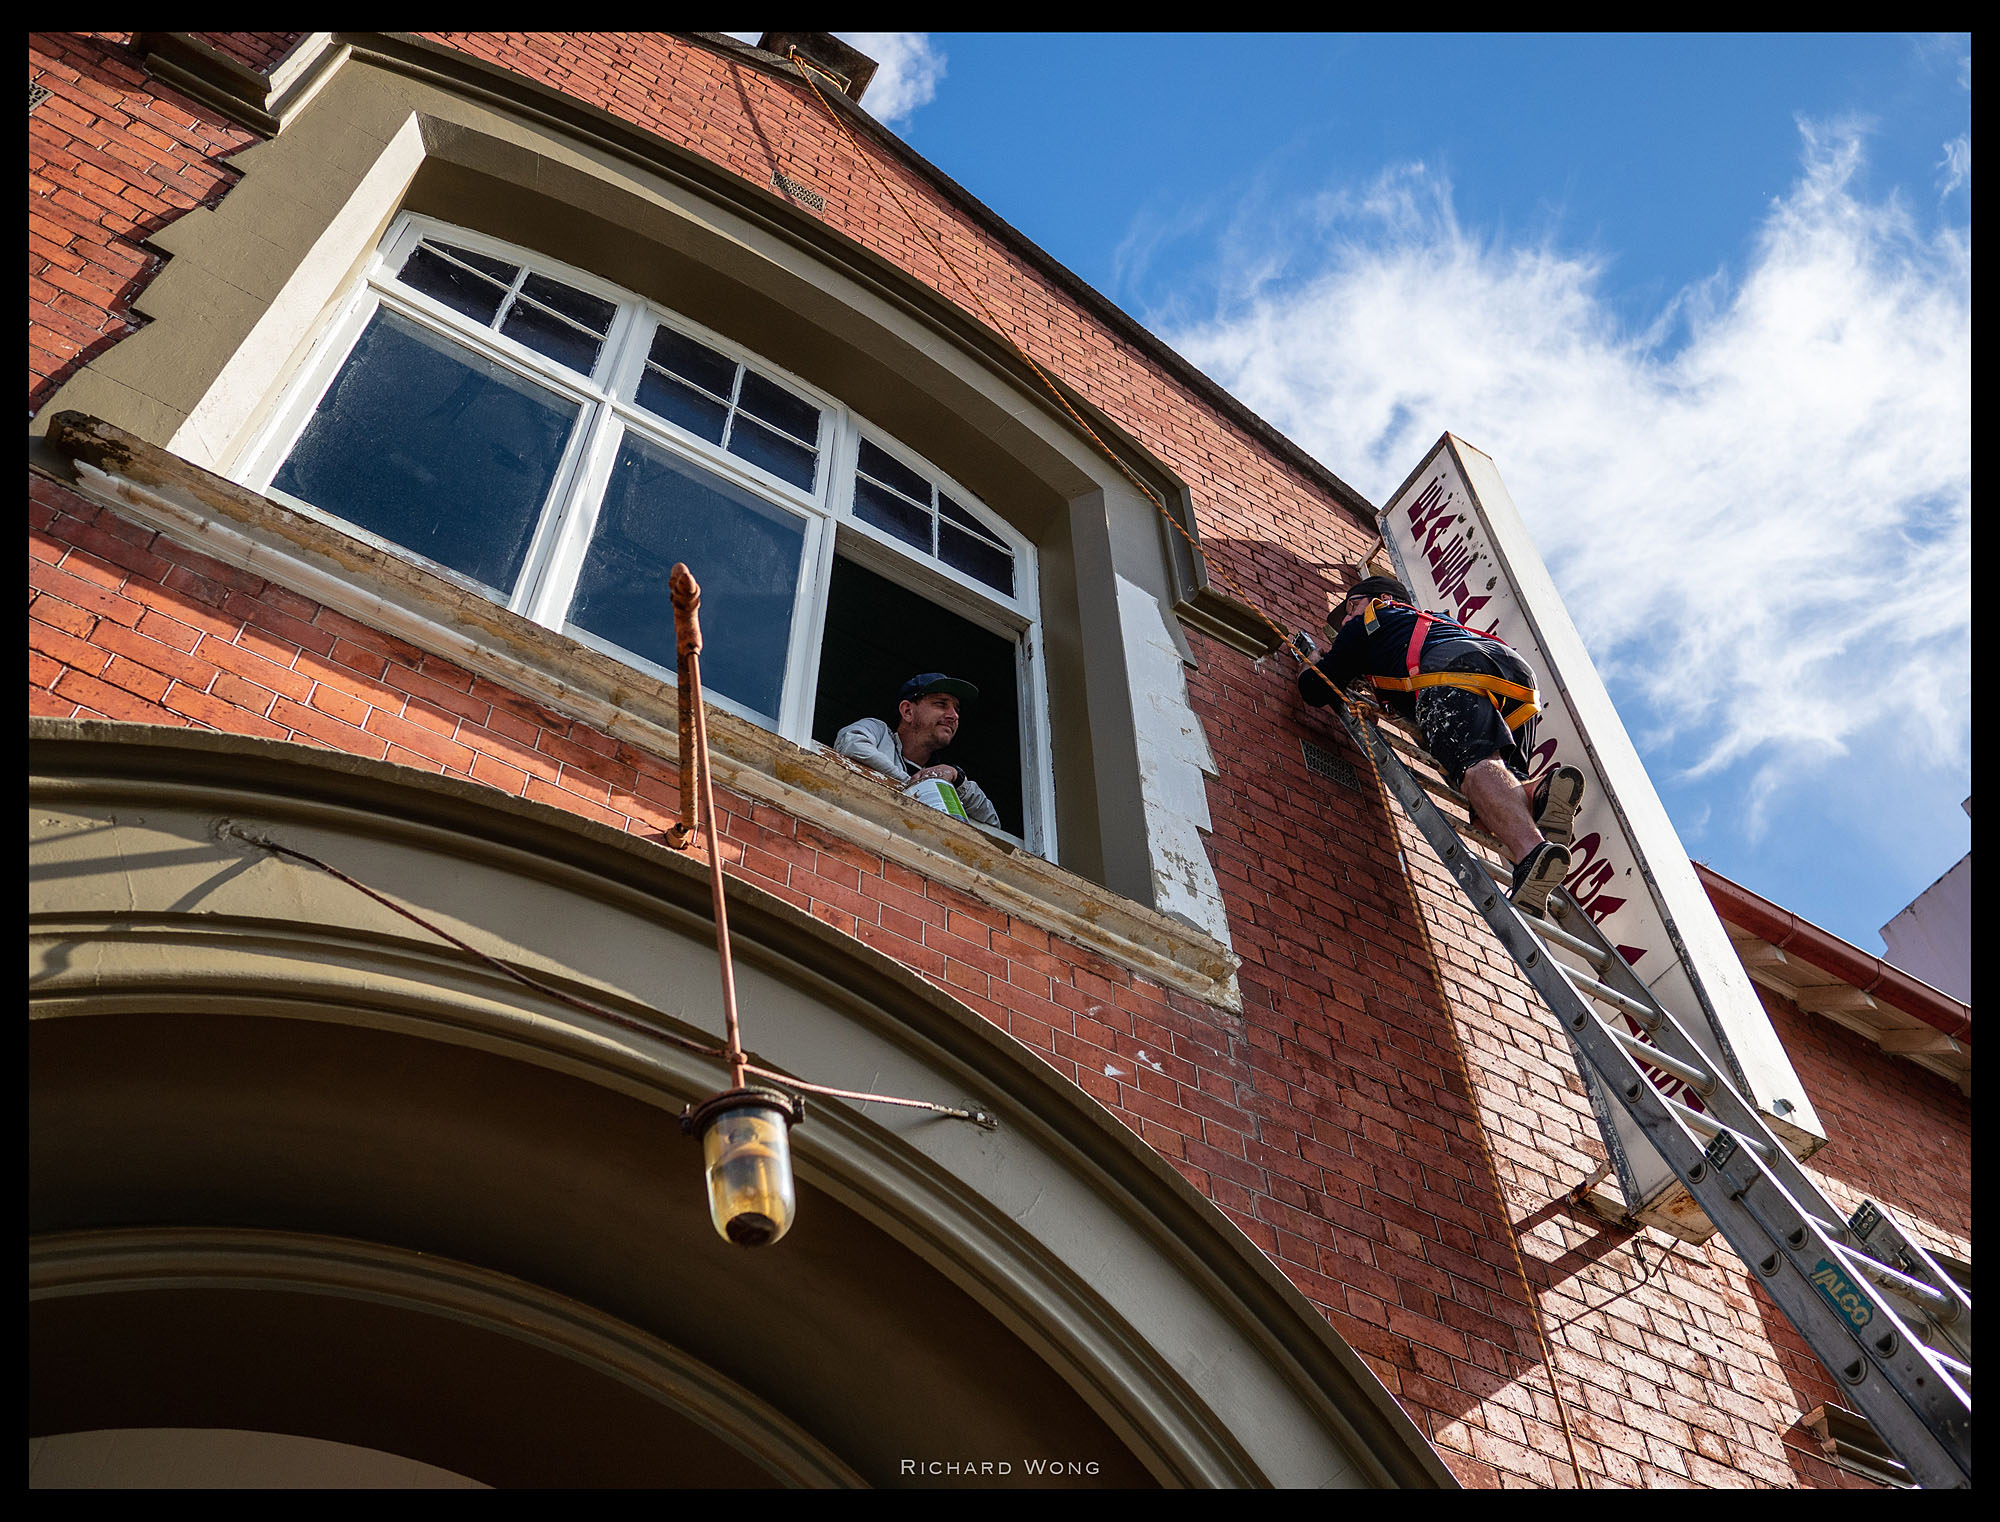
In terms of autofocus performance, the 17mm, 25mm and 45mm are all very fast when used with a EM1 Mk2. There isn’t much difference in the autofocus speed between these three lenses. The autofocus operation is also virtually silent. I can only hear a tiny bit of autofocus noise when I put my ear right next to the lens in a quiet indoor room. When you are shooting outdoor, you won’t be able to hear any autofocus noise at all. This makes them great for videographers as well.

Olympus EM1 Mk2 | Olympus 17mm f/1.2 Pro | ISO 160 f/1.2 1/8000s
As mentioned at the beginning of this review, you can pull the focusing ring backgrounds to turn the lens into manual focus mode, and push it back to change it back to autofocus mode. When you turn the lens into manual focus mode, it reveals the hidden focus distance scale that is normally hidden behind the focus ring. It’s a little but clever design. I like it.
At first, I thought manual focus is purely mechanical as there is a hard stop and the manual focus operation feels really like a classic manual focus lens. But later on I noticed the lens elements don’t actually move when the lens is detached from the camera and realised it is actually focus by wire. It doesn’t really matter as the manual focus operation feels nice and is precise.
However, I have one minor complaint. Quite often when I grab the camera from the camera bag, the focus ring would be in the manual focus position unintentionally. And this happens quite regularly. I think it’s probably because the focus ring is quite large (about half the height of the lens) so I might have grabbed the focus ring instead of the body when I try to pull the camera out of the bag and hence shifted the focus ring from AF to MF position? It is definitely a little bit annoying as I have to check the focus ring position every time I pick up the camera. However, after talking to the Olympus representative, I was told I could setup the camera to ignore the focus ring position if I want. Of course this setting is only available on the Olympus camera bodies.

Conclusions
I’m really quite impressed by the image quality from all these three Olympus f/1.2 Pro lenses. They are sharp, with nice bokeh and not much imperfection. The price of these lenses is definitely not cheap, unfortunately this is kind of expected for an ultra fast prime lens.
If you compare these lenses with the APS-C or full frame lenses, they are not big at all. You could even call them small. But if you compare them with the typical micro four thirds lenses, then they are quite big and heavy. For example, I had an Olympus 17mm f/1.8 lens before. I had that lens on my EM1 all the time because I love how small and light it is and I’m happy to leave it in my everyday bag all the time.
If you compare it with the 17mm f/1.2 Pro (or any of the f/1.2 Pro as they are all virtually same size), the f/1.2 is more than double the height and triple the weight. So when you mount it onto the camera, it makes the camera quite a lot heavier and bigger. This is even more true for photographers who are lucky enough that carries all three of them in their camera bag.
But of course, if you want the best image quality, faster aperture / better low light performance, weather proof and metal solid build quality, then you can probably justify the extra size and price that comes with these lenses.
And if you are a pro photographer shooting with Olympus bodies? You really should get at least one of these Olympus Pro lenses. Or even better, Gotta Catch Em All!

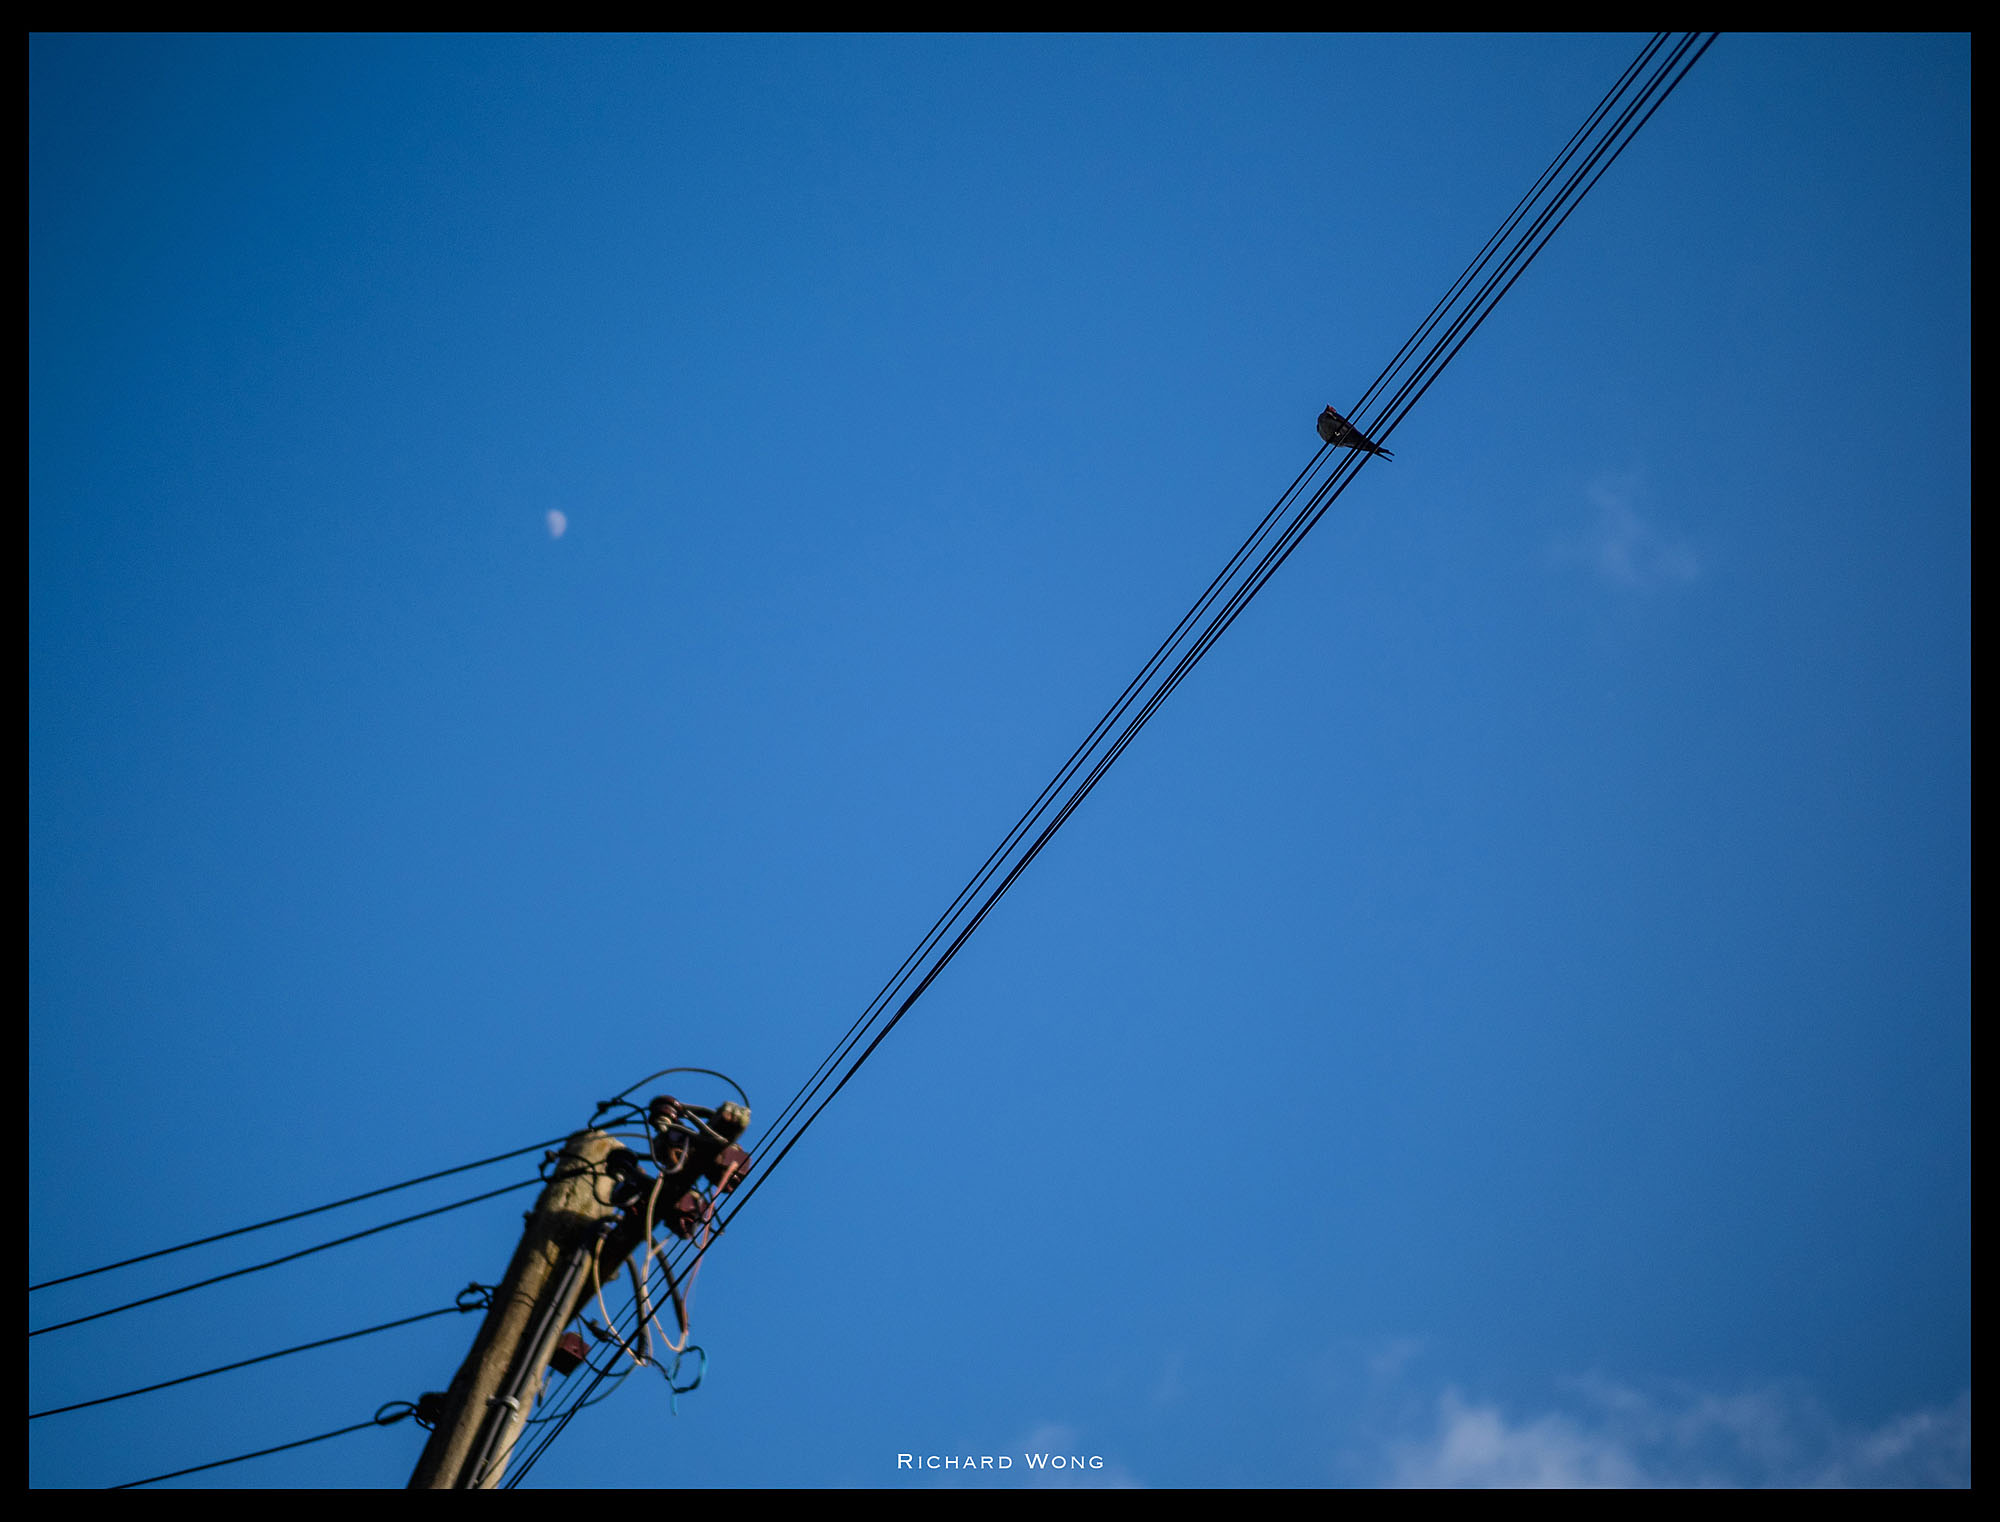
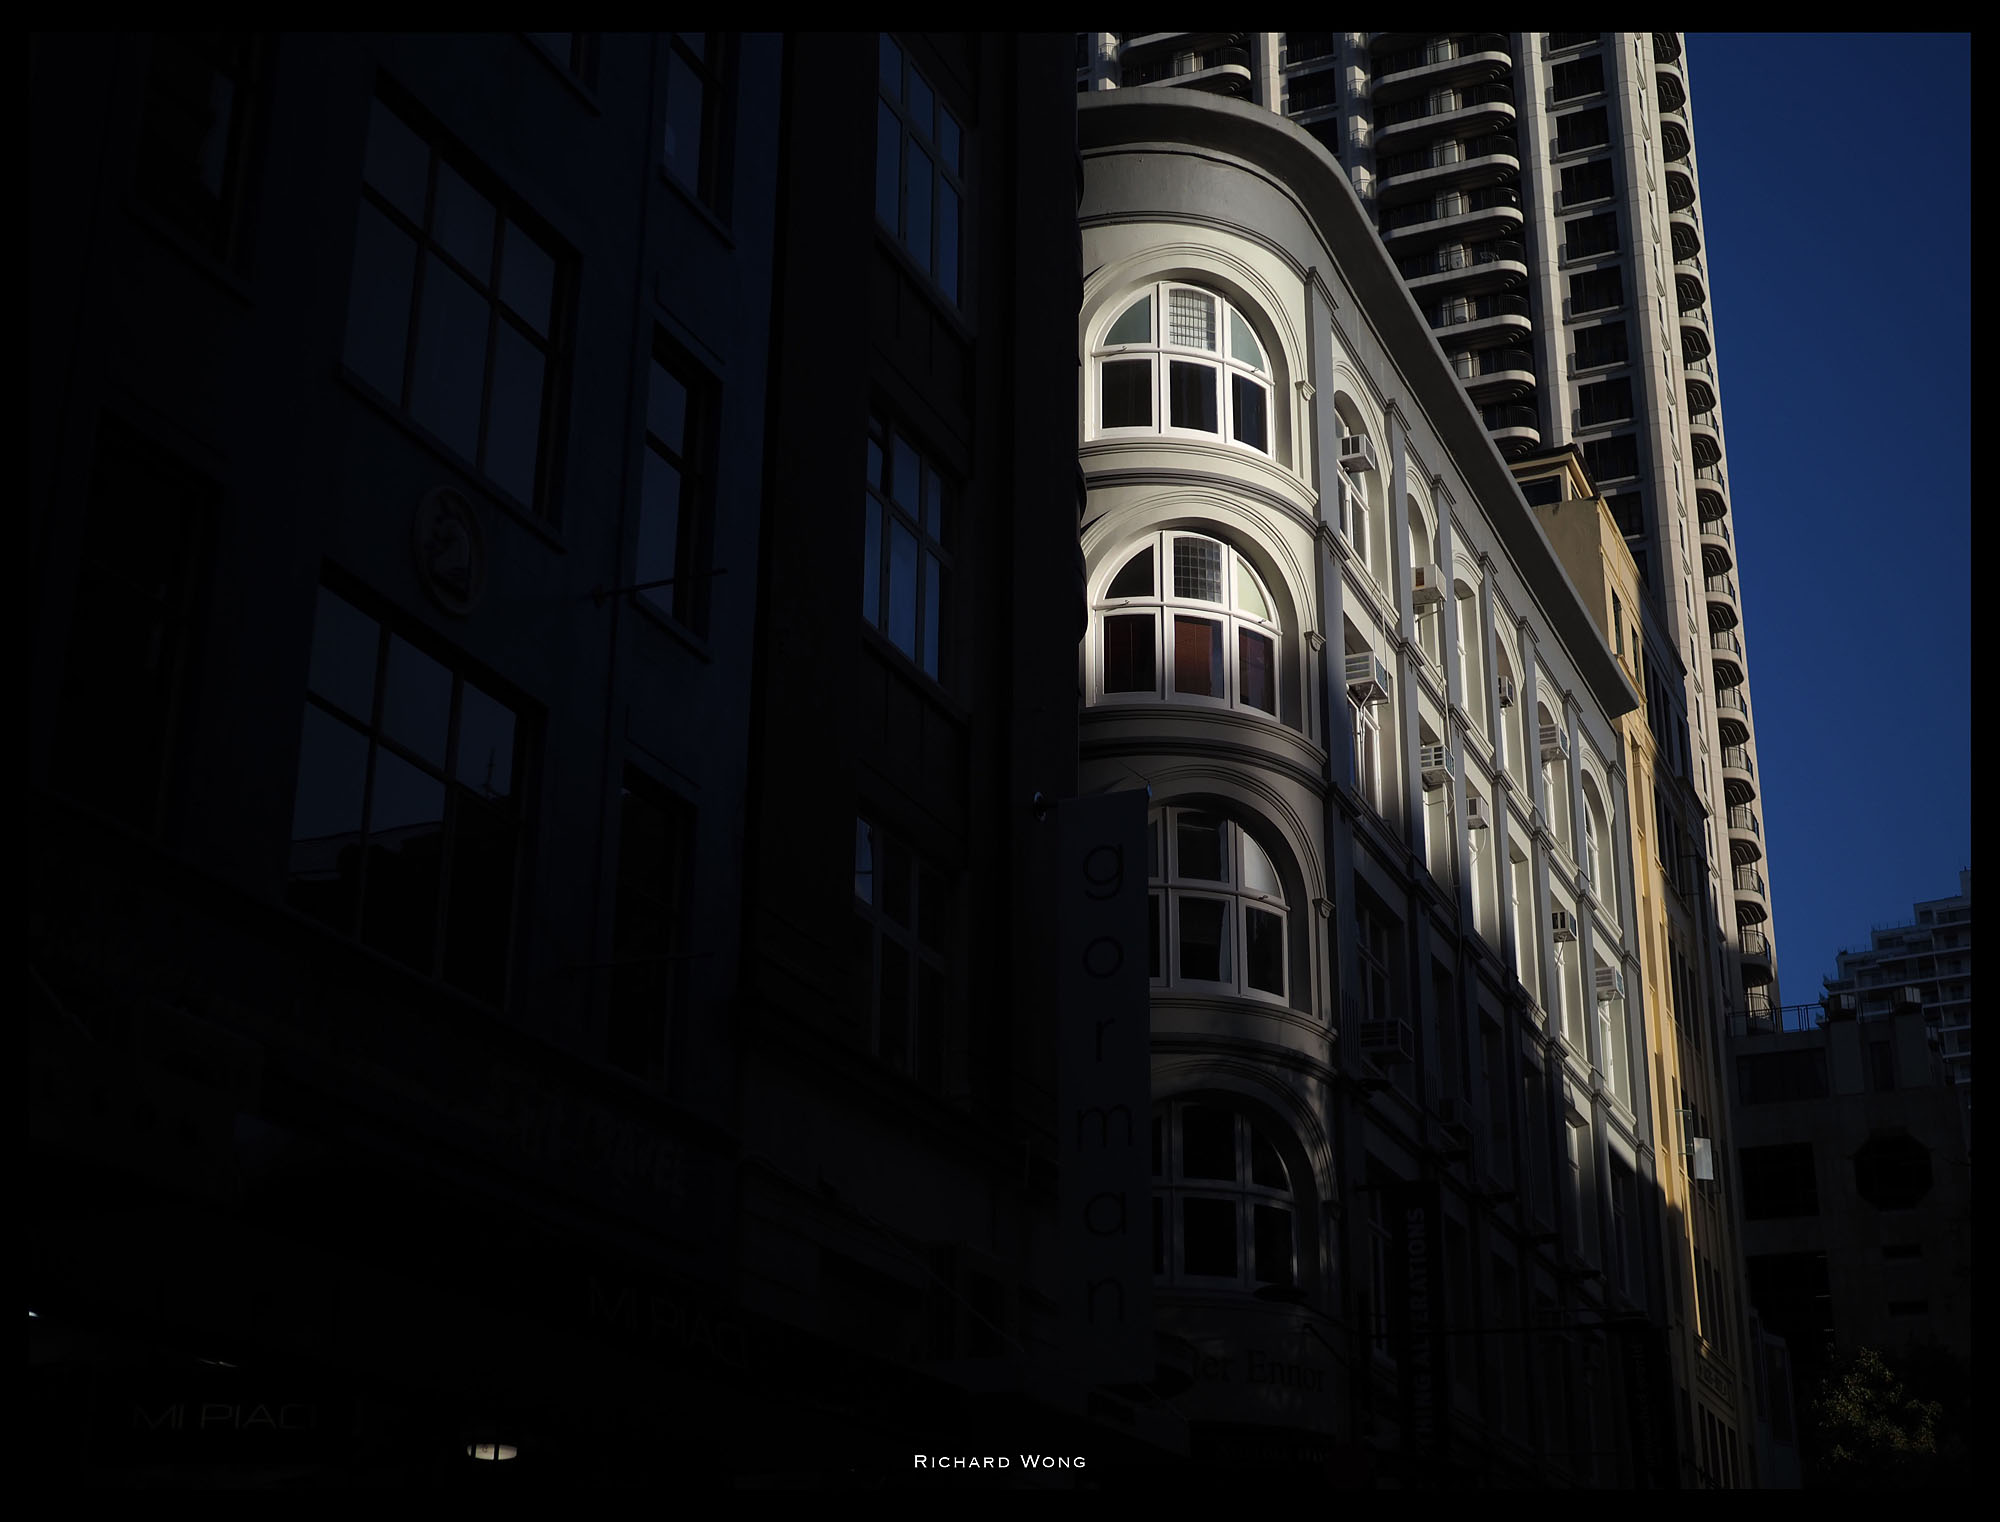
Olympus EM1 Mk2 | Olympus 17mm f/1.2 Pro | ISO 160 f/1.2 1/32000s
Olympus EM1 Mk2 | Olympus 17mm f/1.2 Pro | ISO 200 f/1.8 1/2500s
Olympus EM1 Mk2 | Olympus 17mm f/1.2 Pro | ISO 200 f/1.8 1/4000s
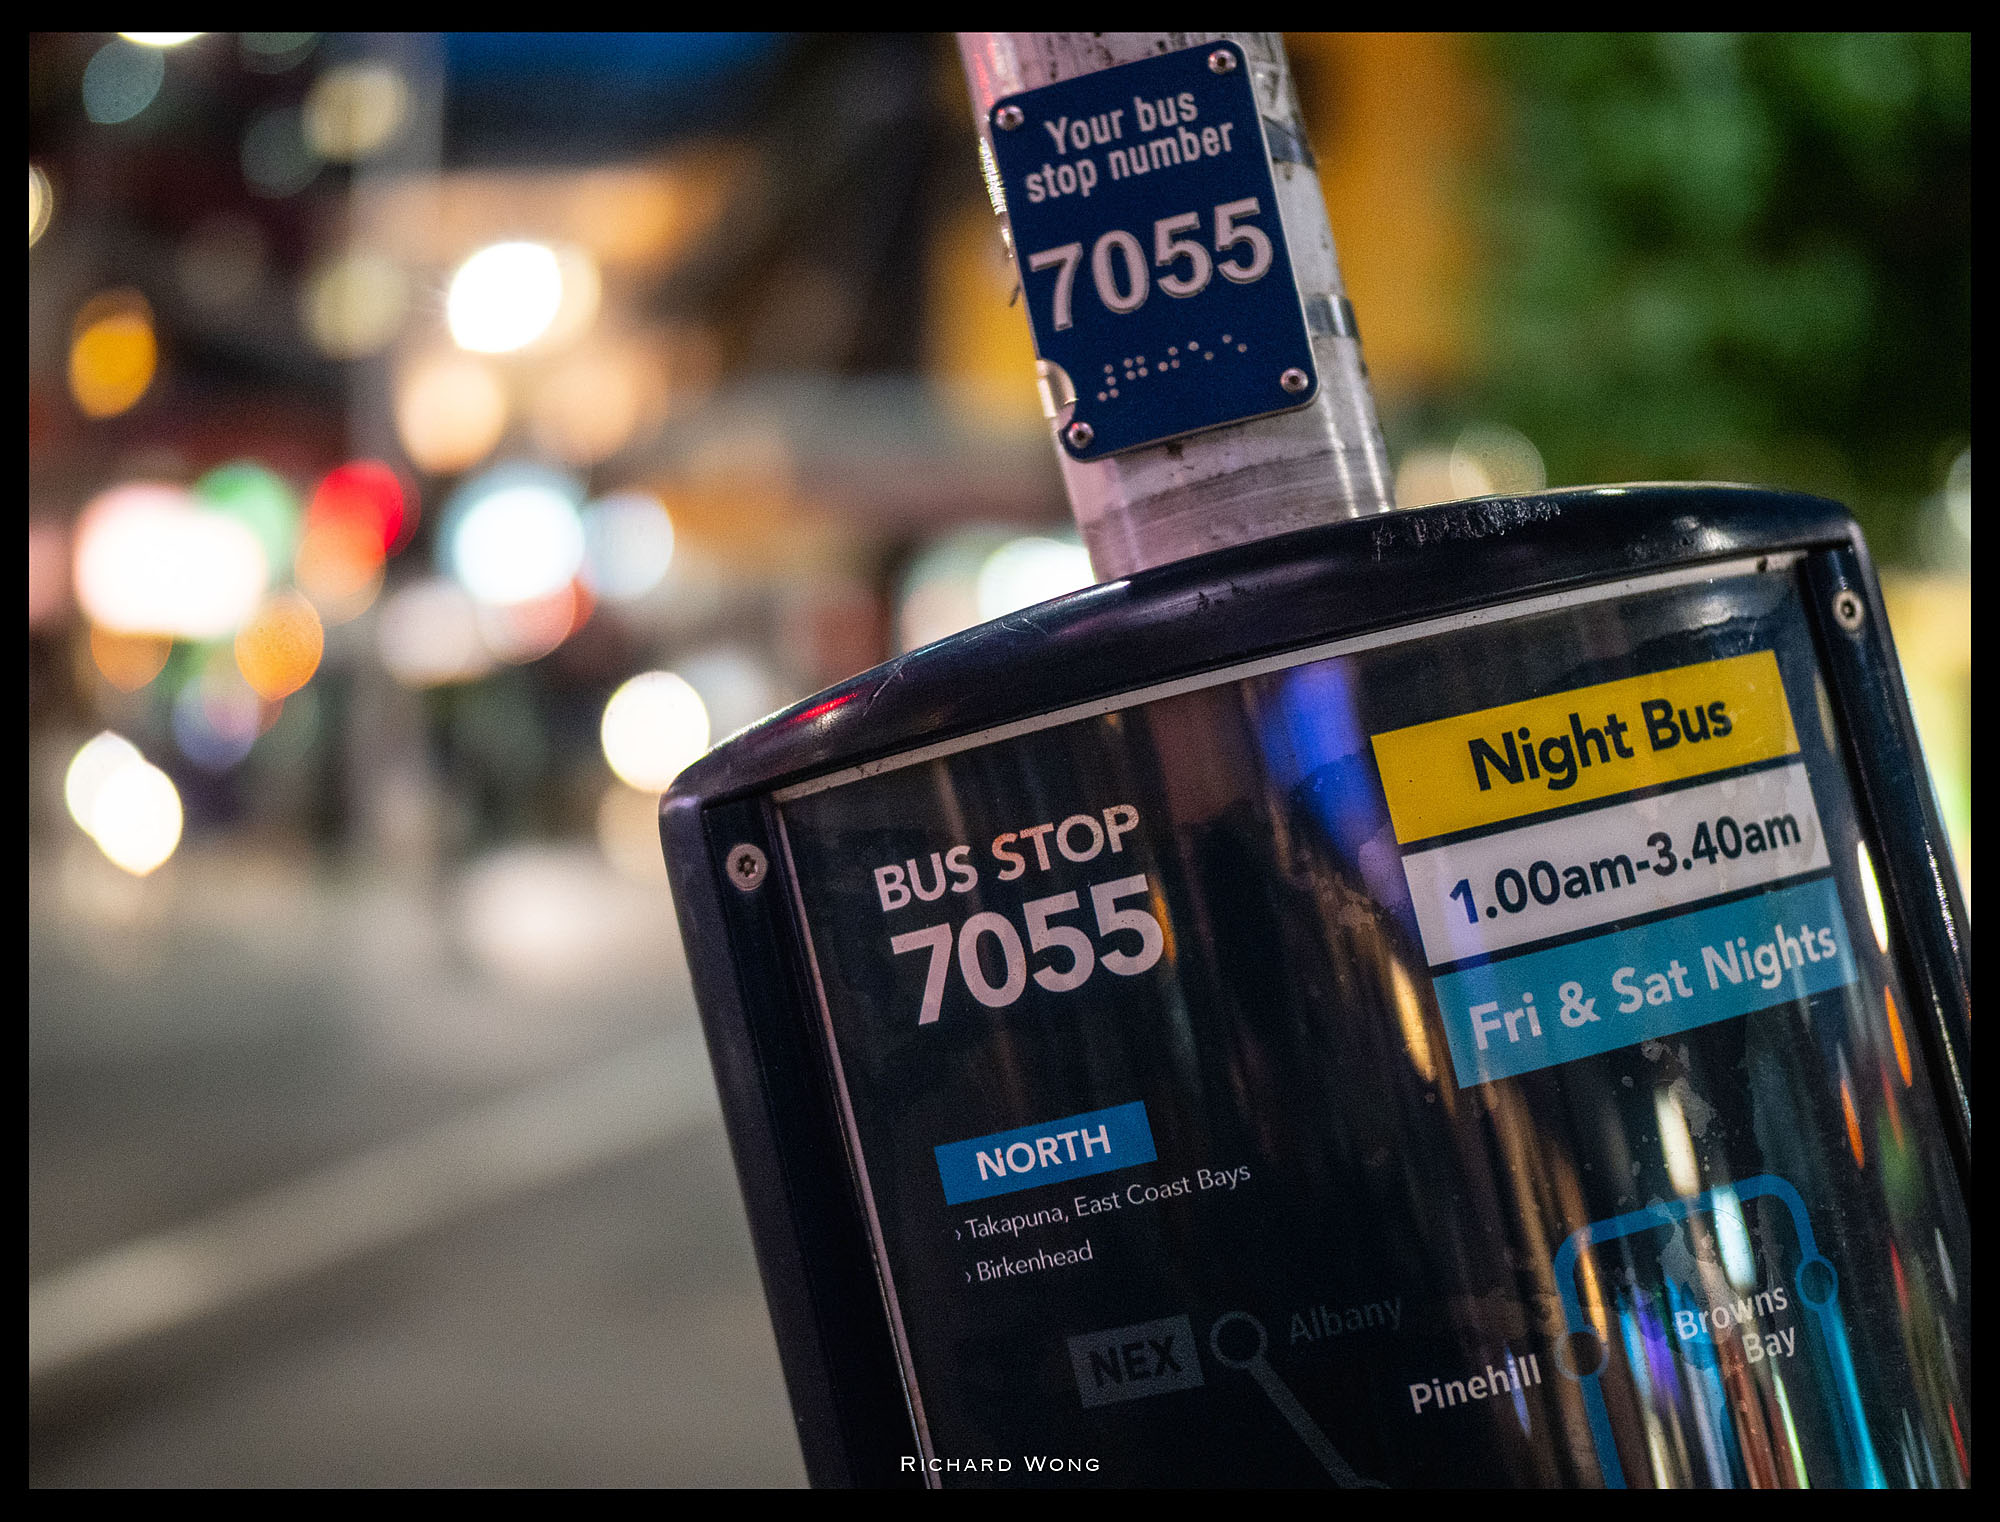
Olympus EM1 Mk2 | Olympus 25mm f/1.2 Pro | ISO 200 f/1.2 1/6400s

Olympus EM1 Mk2 | Olympus 25mm f/1.2 Pro | ISO 200 f/1.2 1/2000s
Olympus EM1 Mk2 | Olympus 25mm f/1.2 Pro | ISO 200 f/1.2 1/5000s

Olympus EM1 Mk2 | Olympus 25mm f/1.2 Pro | ISO 1600 f/1.2 1/60s
Olympus EM1 Mk2 | Olympus 25mm f/1.2 Pro | ISO 800 f/1.2 1/60s
Olympus EM1 Mk2 | Olympus 25mm f/1.2 Pro | ISO 64 f/1.2 1/8000s
Olympus EM1 Mk2 | Olympus 25mm f/1.2 Pro | ISO 1600 f/1.2 1/60s
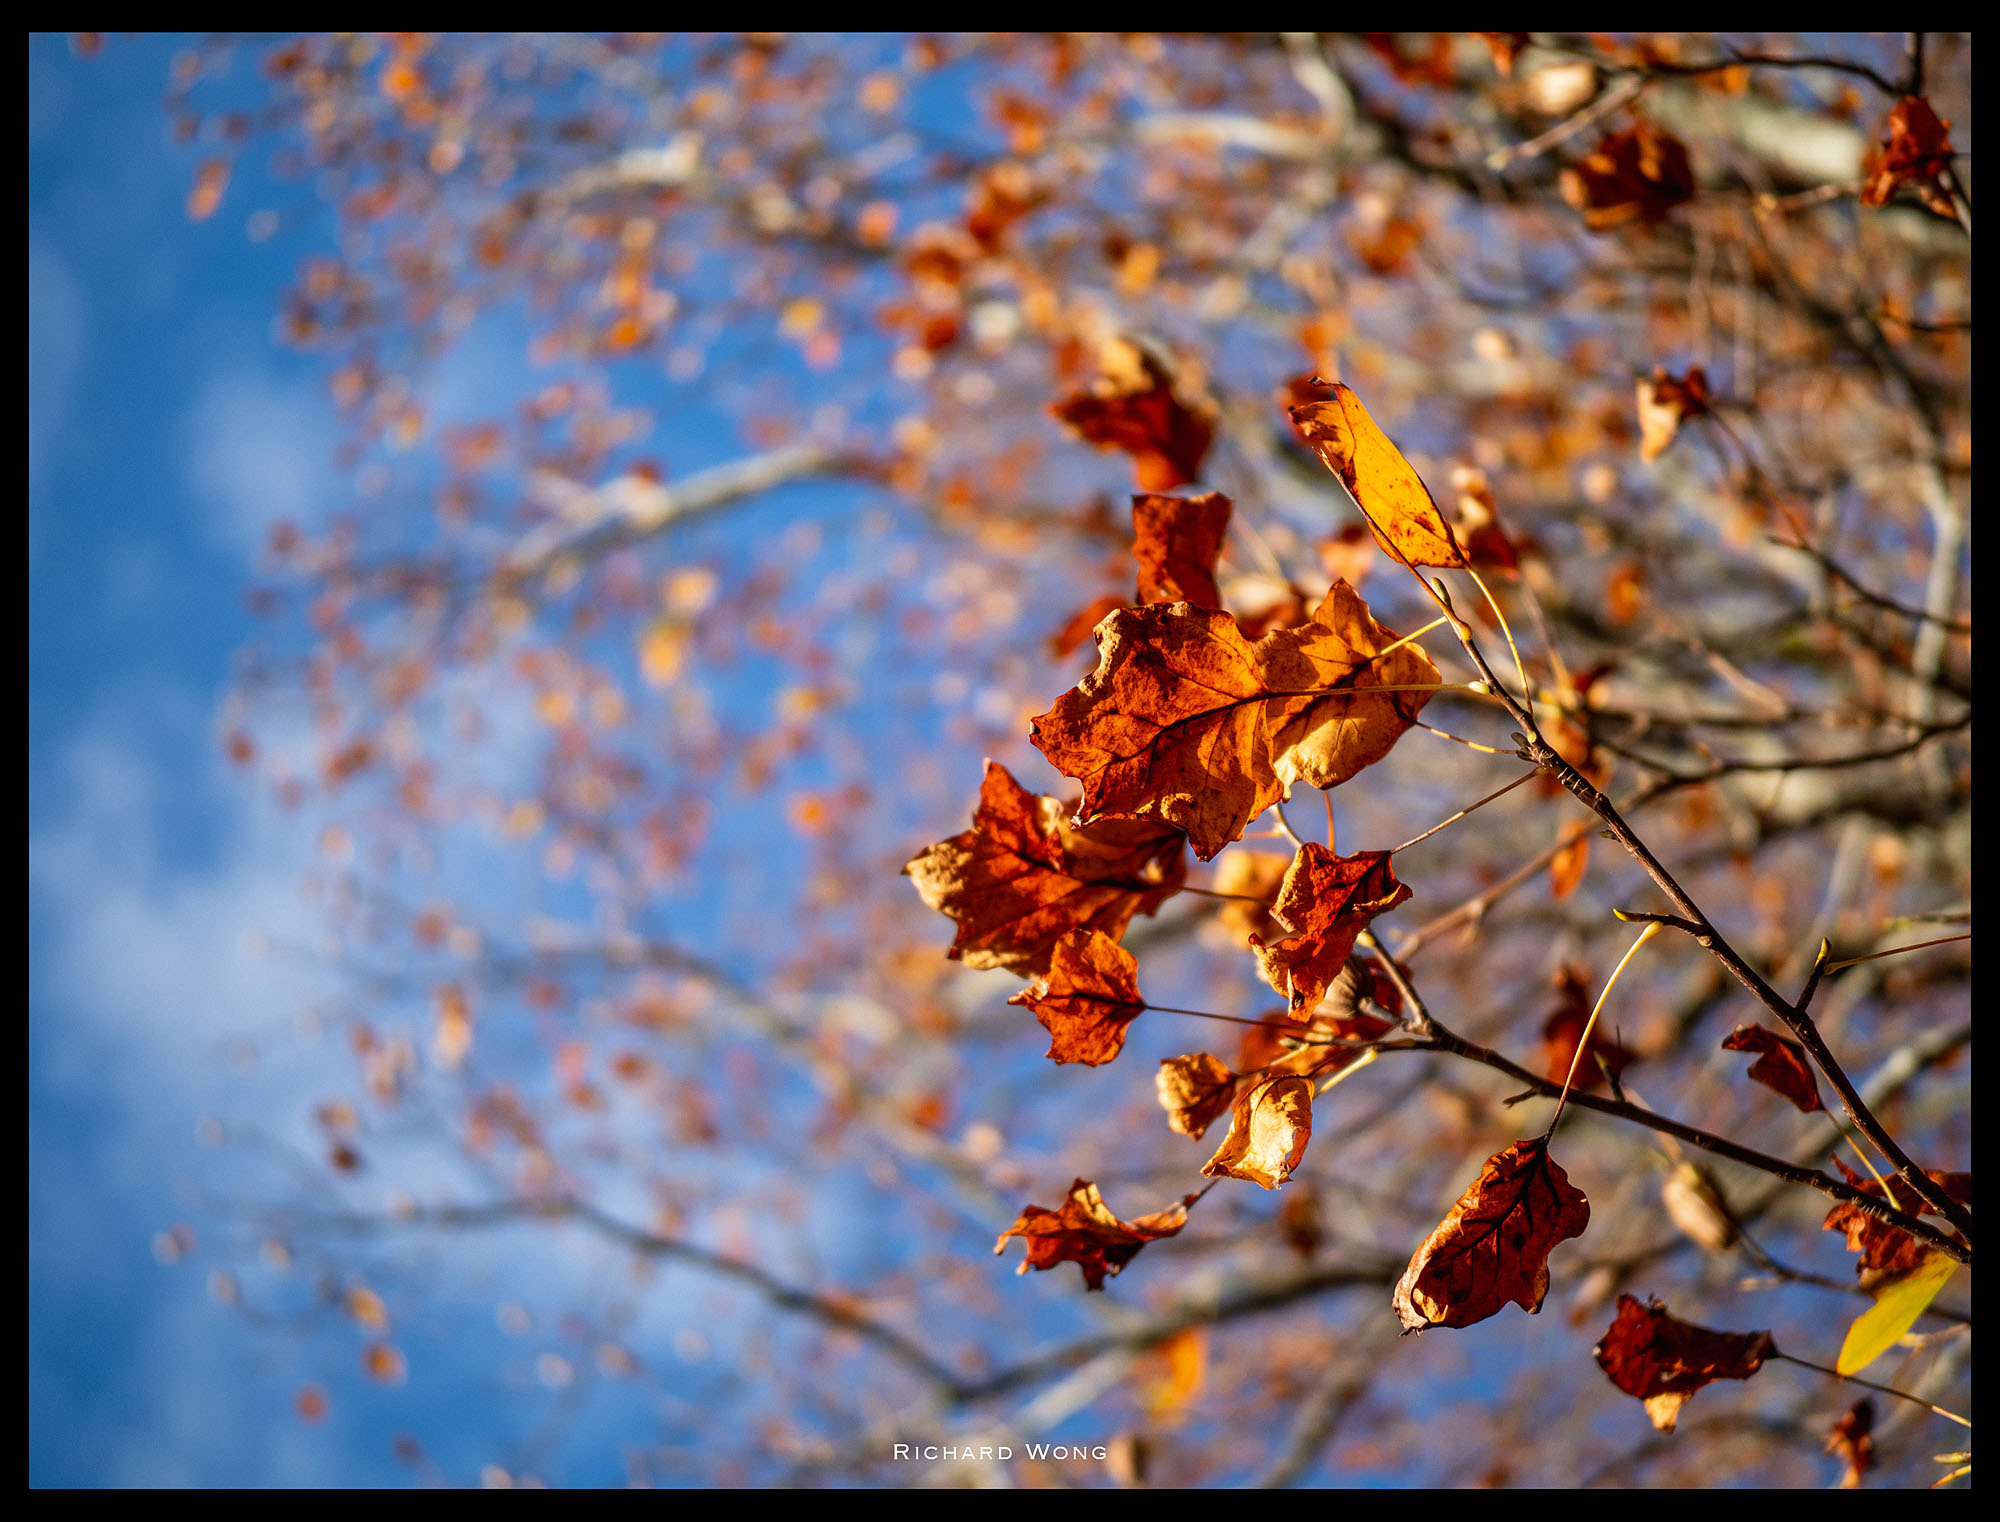
Olympus EM1 Mk2 | Olympus 45mm f/1.2 Pro | ISO 200 f/1.2 1/5000s

Olympus EM1 Mk2 | Olympus 45mm f/1.2 Pro | ISO 200 f/1.2 1/1600s

Olympus EM1 Mk2 | Olympus 45mm f/1.2 Pro | ISO 200 f/1.2 1/4000s
Olympus EM1 Mk2 | Olympus 45mm f/1.2 Pro | ISO 200 f/1.2 1/12800s
Olympus EM1 Mk2 | Olympus 45mm f/1.2 Pro | ISO 200 f/3.2 1/2500s
Olympus EM1 Mk2 | Olympus 45mm f/1.2 Pro | ISO 200 f/1.4 1/3200s

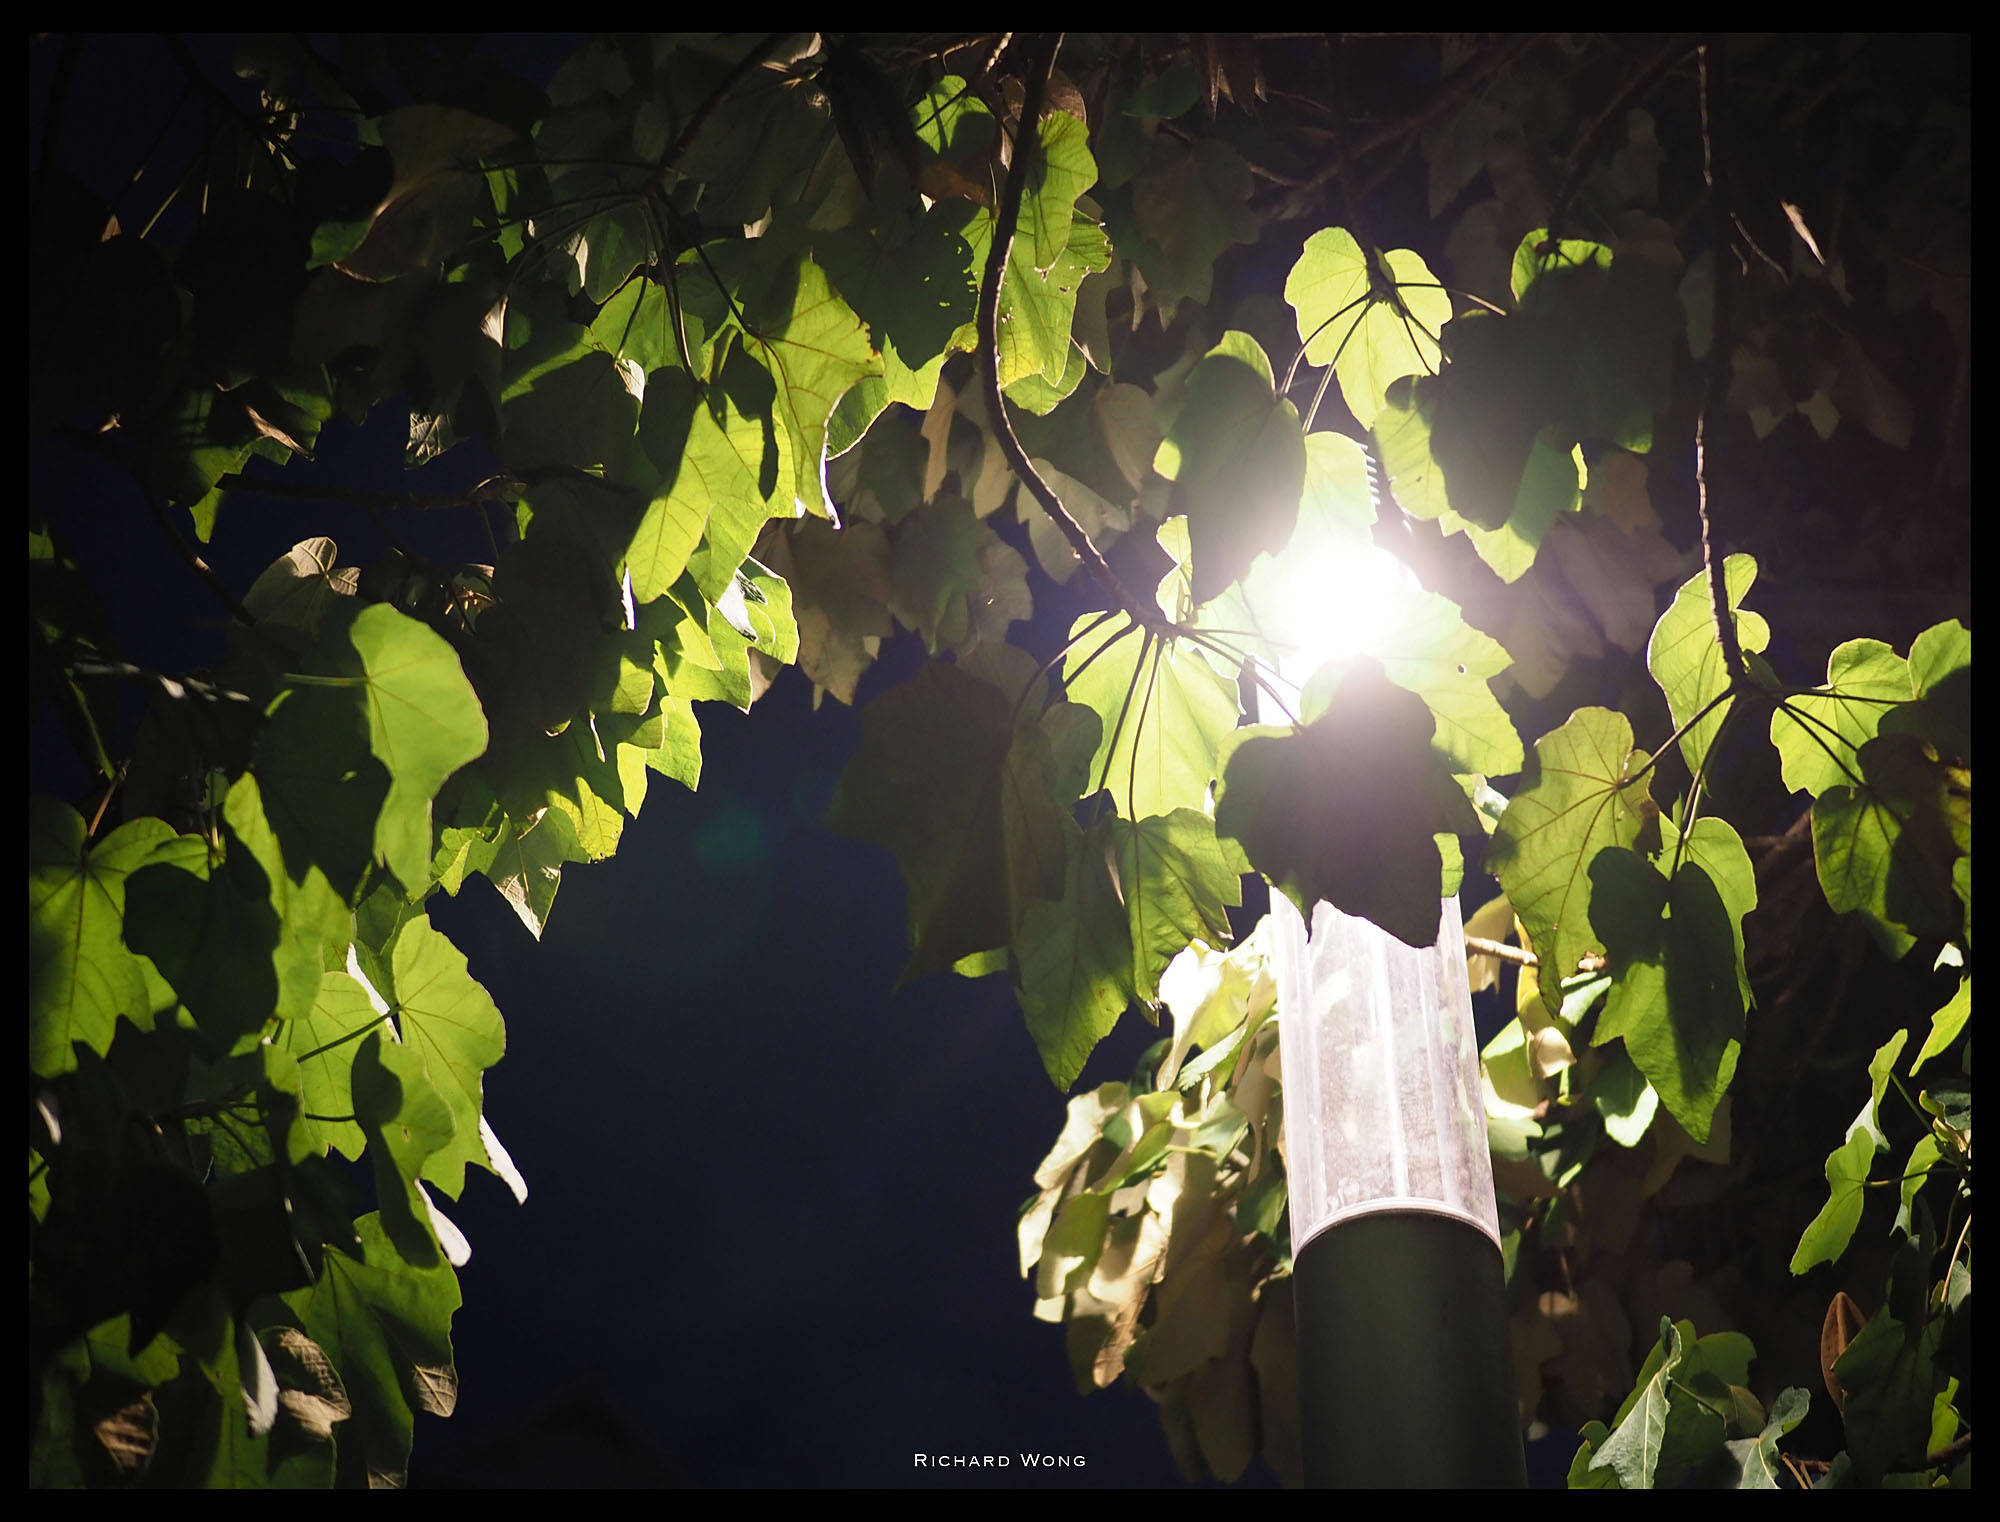
Olympus EM1 Mk2 | Olympus 45mm f/1.2 Pro | ISO 2000 f/1.2 1/100s
Olympus EM1 Mk2 | Olympus 45mm f/1.2 Pro | ISO 5000 f/1.2 1/80s
Olympus EM1 Mk2 | Olympus 45mm f/1.2 Pro | ISO 1000 f/2.8 1/20s
Olympus EM1 Mk2 | Olympus 45mm f/1.2 Pro | ISO 200 f/2.5 1/320s
Comments are closed.